Connector for dg hyparchive in processes
User switch action
Because interactive user logins to an external system are not possible in processes, a login to hyparchive within the process needs to first take place before hyparchive actions are triggered. There are two possible ways to select an additional user defined in the hyparchive configuration for authentication. For timer-controlled processes, the user can be defined directly in the timer properties. Another option is the user switch action. This makes it possible to switch to the dg hyparchive user from within a process.
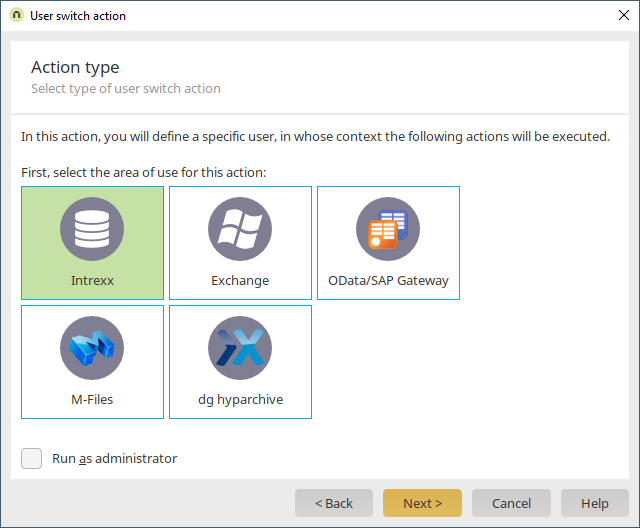
To do that, create a new user switch action and select "dg hyparchive" as the action type. The user that the subsequent actions should be performed with can be selected in the next step.
User selection
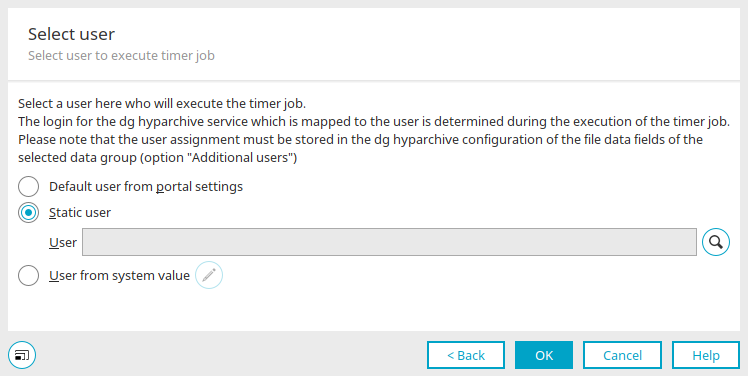
Default user from portal settings
If no specific user is selected, this option automatically uses the user who is defined in the portal properties.
Static users
Displays the path and name of the user whose context will be used to perform the queries.
![]() Select user
Select user
Opens a dialog in which a user can be selected from the "Users" module.
![]() Remove selection
Remove selection
Removes the selected user.
User from system value
With this option, a system value can be defined, that provides a user GUID.
![]() Edit system value
Edit system value
Opens a dialog where the system value can be configured.
If a user is not selected here, the global timer will run in the context of the user who published the process most recently.
Synchronize stamp data
As opposed to files, the stamp data of a document, which was saved in hyparchive via Intrexx, is saved in the Intrexx data group fields. If the stamp data of a document is directly edited in hyparchive, then it cannot be automatically and immediately synchronized in Intrexx. Therefore Intrexx updates the fields of a hyparchive stamp automatically, as soon as the data set is opened on a view or entry page. The user needs to click on "Save" to save the updated data in Intrexx. This method can be automated by a process, so that the metadata of an Intrexx data group is synchronized with the objects in hyparchive on a regular basis.
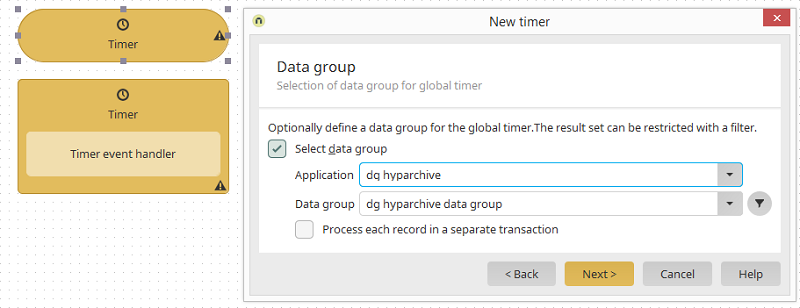
To do that, create a new process that is initiated by a timer (Global timer). In the timer configuration select hyparchive data group and define where appropriate a filter.
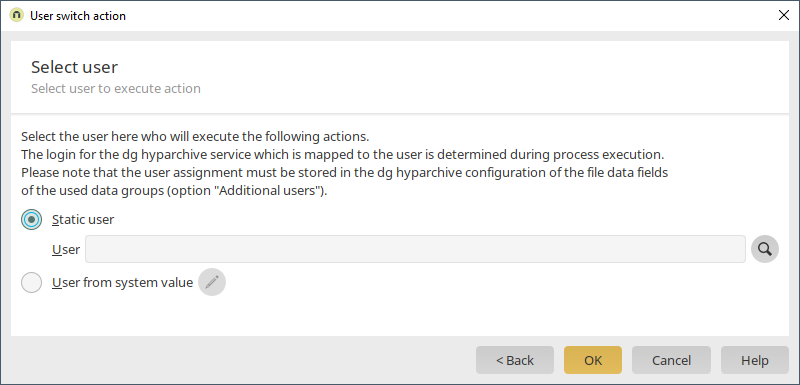
In the next step you need to define the user, whose static login details were recorded in the hyparchive configuration.
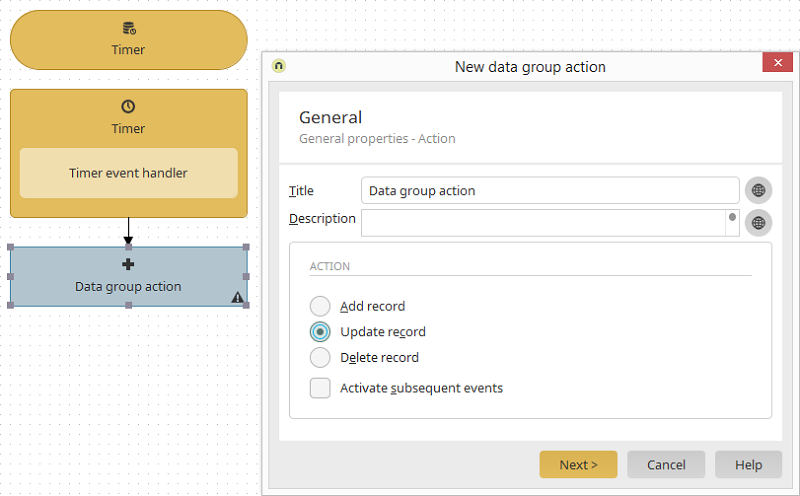
Add a new data group action to the timer event handler and select "Update record".

The target data group is the same as the timer's
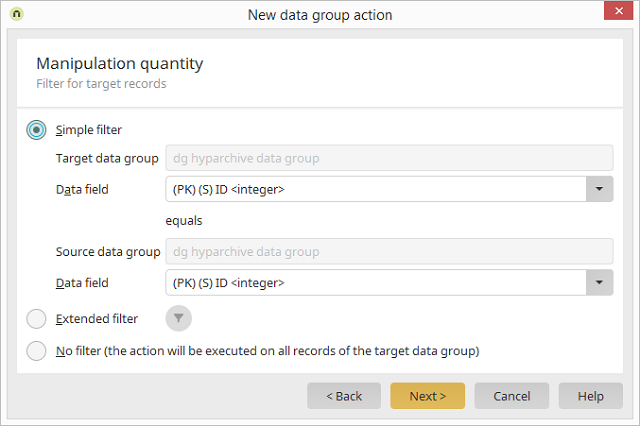
and the two ID fields are selected as a "Simple filter".

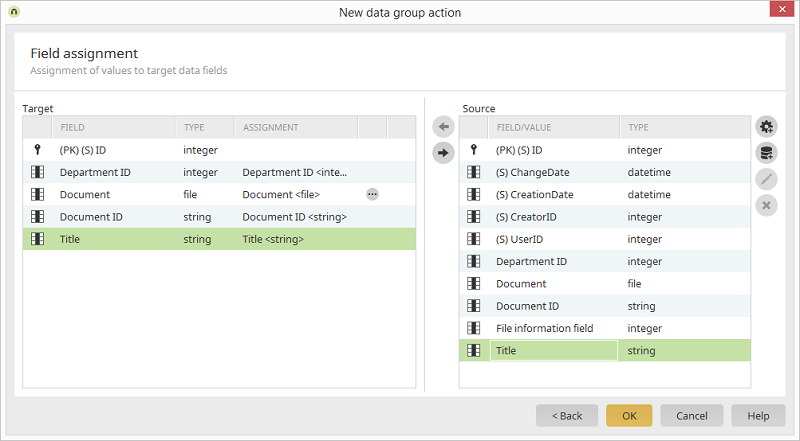
In the field assignment, you can assign fields from the source data group to the target data group that hyparchive stamp data should be reread and resaved for. Please note with this that the data fields cannot be synchronized, as this would otherwise create a new version in hyparchive. Confirm the dialog with "OK" and then save the process. When the records from the source data group are read, the data from hyparchive will be reread and then resaved in the assigned data fields in Intrexx.
File transfer between Intrexx and dg hyparchive
Normally files and documents will be only be physically stored on the hyparchive server and loaded by Intrexx during run time when a user accesses a hyparchive file via the portal. In some circumstances it can also make sense to transfer files from hyparchive to Intrexx or to copy existing files to hyparchive from the Intrexx portal. To do that, data fields between Intrexx and hyparchive data groups can be assigned in the data group action. If information is read from a hyparchive data group and then written in an Intrexx data group, then the files will be copied from hyparchive to the Intrexx portal server. Vice versa, files can be copied from Intrexx applications to hyparchive. This is done by reading from an Intrexx data group and then writing to a hyparchive data group. By using filters on the source data group, you can define which records (and therefore files) should be transferred to the corresponding target system. The following example illustrates the transfer of files from Intrexx to hyparchive:
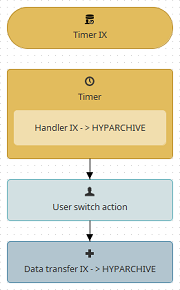
To begin with, the data records are read from an Intrexx data group via a timer-controlled event. Afterwards, a login to hyparchive takes place via a user switch action. Then the files and metadata are transferred from the Intrexx data group fields to hyparchive using a data group action. The field assignment looks like the picture below:
Import and export dg hyparchive configurations
dg hyparchive configurations are automatically exported when the portal is exported, and then imported with the portal. Should it be necessary for a single configuration to be exported to another portal, then this is currently only possible using the file system.
The configuration files are found in the portal directory internal/cfg/dghyparchive. Each configuration consists of an XML file. The file name corresponds to the configuration GUID.
If you need to transfer a configuration to another portal, then you can simply copy the appropriate file and insert it into the subdirectory of the target portal. After restarting the portal server, the configuration will be available in the Integration module.