Here you can find out how to configure a connection for the SAP Gateway connector. Information on configuring an SAP Gateway connection can be found here.
General properties
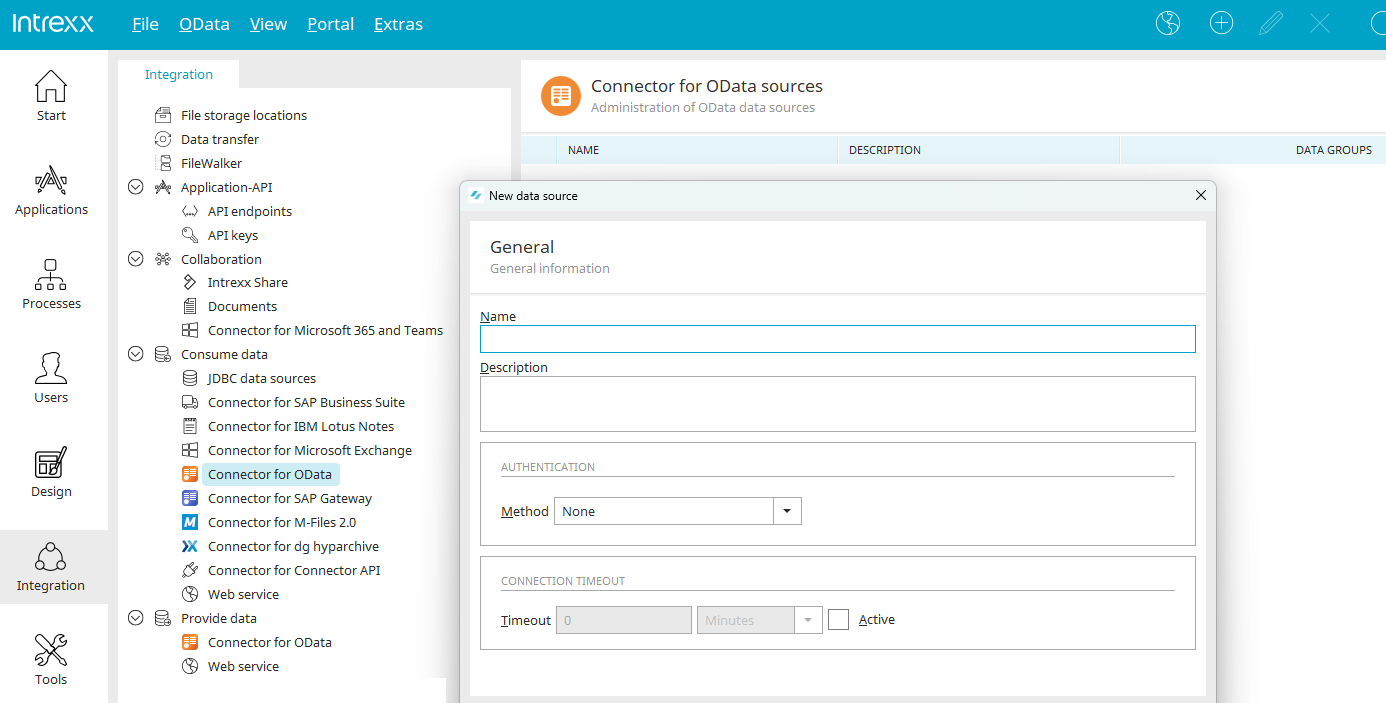
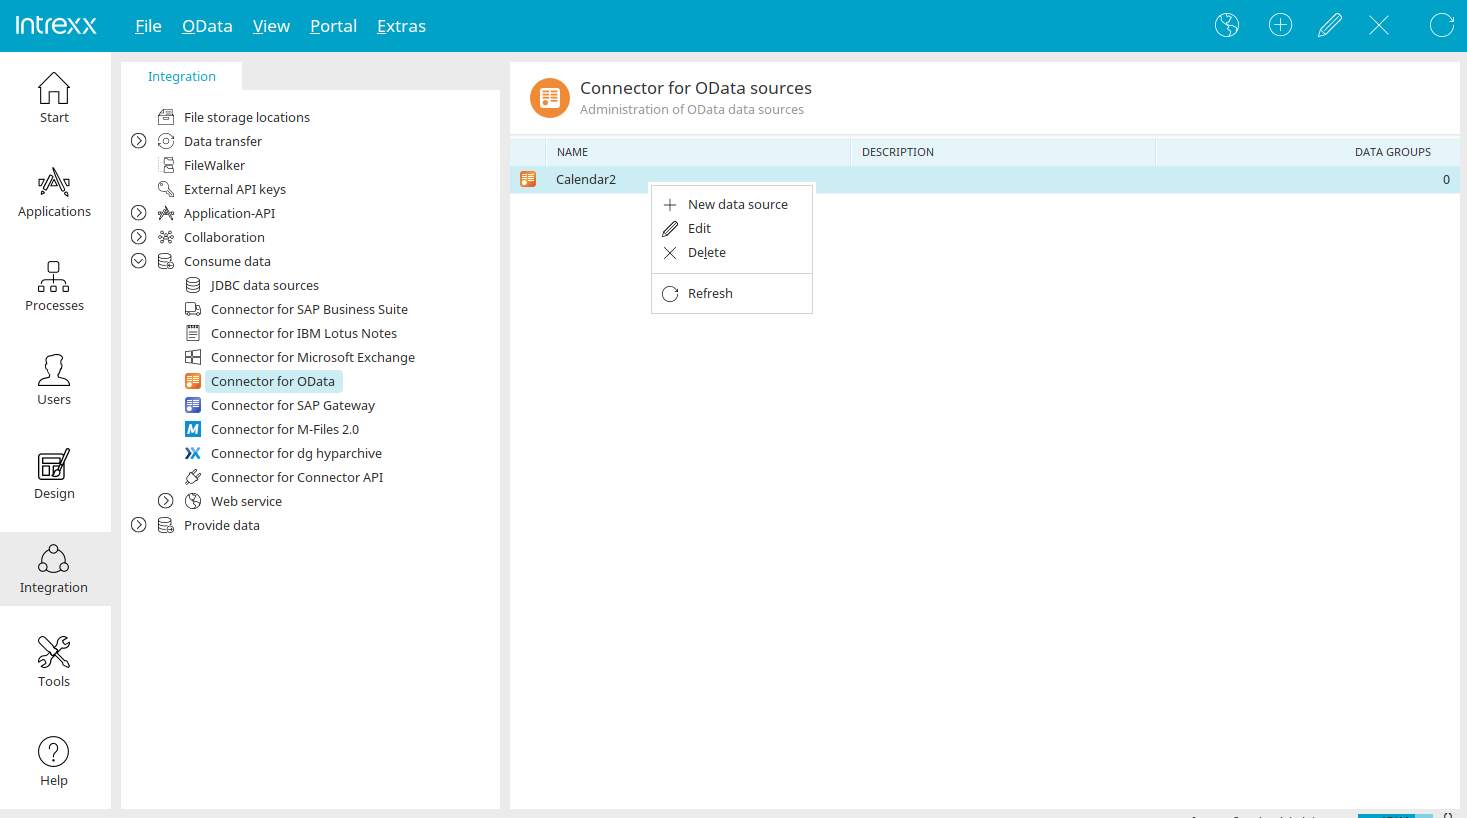
A new connection can be created in the "Integration" module via the main menu "OData / New data source". This option is only available if the Connector for OData under "Consume data" is selected.
The configuration of SAP Gateway connections uses the same dialog as for general information. Click here for information on configuring SAP Gateway connections.
In the general information for an OData connection, you can enter the following entries for our example:
-
Name: Appointments
-
Authentication: HTTP Basic
-
User/Password: A user’s username and password from the portal in which the service is provided. This user requires rights to the sample application "Calendar1", from which the data in the sample service originates.
In addition to the name and a description of the connection, the following authentication methods can be configured in general information:
Authentication
None
For anonymous access.
HTTP Basic
With this method (HTTP Basic), the login information will be requested. The user entered here will only be needed to access the service metadata in the Portal Manager.
If you select the "HTTP Basic" authentication method, it is essential for you to enable the "Use SSL" checkbox when creating the service later. If necessary, the certificate of the OData server must be imported into the certificate store in the consuming portal.
Intrexx (Legacy)
This method is useful for services provided via the Intrexx OData provider. Login information will be transferred encrypted here. To access the metadata, enter an Intrexx user and corresponding password here as well.
Kerberos / Kerberos (HTTP Basic)
These methods are available in Windows environments for using Windows Integrated Authentication for Single Sign-On. The second option for "HTTP Basic" enables authentication for clients that do not support the Kerberos protocol. Please note the following basic requirements for successful authentication with Kerberos:
-
The Intrexx portal must be run with integrated authentication.
-
The users from your Active Directory must have been imported into your portal. Please make sure that at least one user is included in the Administrators group, so that the system may continue to be managed.
-
The server on which Intrexx is installed requires the group policy "Delegation".
-
All clients and servers must be members of the same domain. In Internet Explorer, the security settings for the zone used must have the user authentication setting of "Automatic login with current user name and password". Additionally, the option for "Enable Integrated Windows authentication" must be selected in the advanced settings.
Using Kerberos authentication provides you and your users with true Single Sign-on access to the OData service that uses the Integrated Windows Authentication. If a user cannot be authenticated, the second option will automatically use the standard login method. For successful authentication, it is necessary to specify a Service Principal Name (SPN). The SPN contains information about the service for which a Kerberos ticket should be created. This ticket is required for the Internet Information Server used by the Intrexx Portal Server. The SPN is generally constructed as follows: http/<computer-DNS-name>@<KERBEROS_REALM> Computer-DNS-name: Fully qualified host name (such as "mycomputer.mycompany.com") KERBEROS_REALM: Generally the domain in uppercase letters (such as "MYCOMPANY.COM"). The SPN from the example above would look like this: http/mycomputer.mycompany.com@MYCOMPANY.COM
Kerberos (Intrexx Token Service)
Click here for more information.
X.509
With this method, a certificate store in PKCS12 format can be uploaded. Later, each user can upload their own certificate store using a login form. For authentication with X.509 certification, the root certificate of the authentication authority, which is responsible for issuing the client certificates, must previously have been imported into Intrexx. To do this, click on ![]() "Upload X.509 certificate store".
"Upload X.509 certificate store".
Certificate store
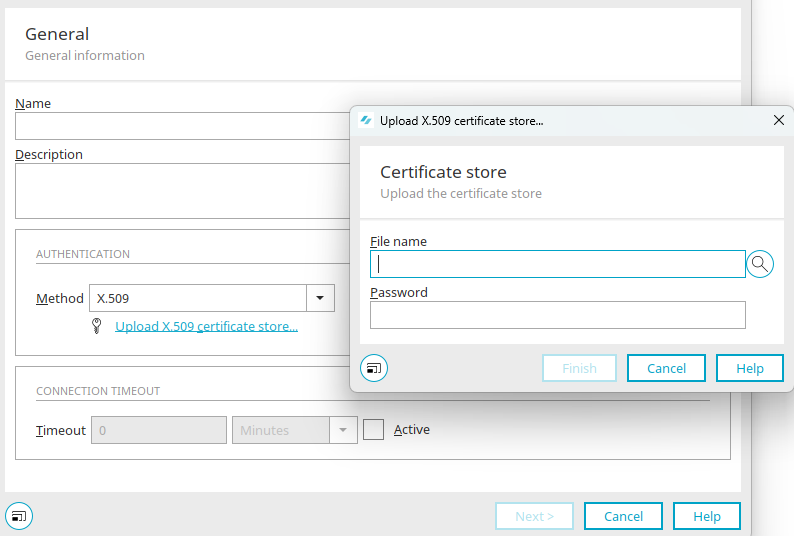
Enter the file name of the certificate and the password. Click on ![]() "Search" to open a dialog in which the certificate file (in PKCS12 format) can be selected. Click "Finish" to close the dialog again.
"Search" to open a dialog in which the certificate file (in PKCS12 format) can be selected. Click "Finish" to close the dialog again.
Restart the portal service afterwards.
OAuth2/OpenID
This authentication method supports services that require OAuth2 authorization from the user. Should the service support an auto approval of the user, the login of a user can be specified here for the metadata. If this is not possible, the metadata document must first of all be saved as a local file and stored in portal directory internal/cfg/odata with the file name: <SERVICE_GUID>.edmx. Currently, the actual configuration of the OAuth2 authorization must be performed in the XML configuration file of the OData consumer directly in the portal directory internal/cfg/odata with the file name <SERVICEGUID>.xml. The following properties are relevant here:
<property name="authenticationType" value="OAUTH2"/> // value has to be OAUTH2
<property name="oauth2.scope" value="<OAuth scopes>"/>
<property name="oauth2.authenticationScheme" value="<Schema>"/>
<property name="oauth2.clientId" value="<Client ID>"/>
<property name="oauth2.grantType" value="<Grant Type>"/>
<property name="oauth2.clientAuthenticationScheme" value="<Client Schema>"/>
<property name="oauth2.userAuthorizationUri value="<end point for the authentication>"/>
<property name="oauth2.clientSecret"value="<Client Secret>"/>
<property name="oauth2.redirectUri" value="<Redirect URL>"/>
<property name="oauth2.accessTokenUri" value="<end point for the request of a token>"/>
In the following, excerpts of some example configurations for commonly used OAuth2 services are listed. Many of these services cannot be used as OData services. Nevertheless, OAuth2 authentication can be used for direct HTTP access to the service in Groovy scripts.
Spring Security OAuth2 Identity Provider
<?xml version="1.0" encoding="UTF-8"?>
<odata xmlns="urn:schemas-unitedplanet-de:lucy:server:odata:consumer:cfg" xmlns:xsi="https://www.w3.org/2001/XMLSchema-instance" xsi:schemaLocation="urn:schemas-unitedplanet-de:lucy:server:odata:consumer:cfg consumer.xsd">
		<consumer description="" guid="30378A6DEDA601F69D525C7FCAFA7E12CEC114C8" name="SpringOAuth2">
		<property name="authenticationType" value="OAUTH2"/>
		<property name="additionalAuthenticationTypes" value=""/>
		<property name="userName" value="user"/>
		<property name="password" value="E54F94C0106981A41312FC14955B164C"/>
		<property name="servicePrincipalName" value=""/>
		<property name="isSapService" value="false"/>
		<property name="sapUseDefaultClientId" value="false"/>
		<property name="sapClientId" value=""/>
		<property name="sapNetweaverGatewayHost" value=""/>
		<property name="sapNetweaverGatewayPort" value=""/>
		<property name="sapNetweaverGatewayUseSSL" value="false"/>
		<property name="sapSolutionManagerRegistered" value="false"/>
		<property name="authTypeSource" value=""/>
		<property name="authLoginSource" value=""/>
		<property name="authPasswordSource" value=""/>
		<property name="authSapClientIdSource" value=""/>
		<property name="oauth2.grantType" value="authorization_code"/>
		<property name="oauth2.clientAuthenticationScheme" value="form"/>
		<property name="oauth2.accessTokenUri" value="https://localhost:9999/uaa/oauth/token"/>
		<property name="oauth2.userAuthorizationUri" value="https://localhost:9999/uaa/oauth/authorize"/>
		<property name="oauth2.scope" value="openid"/>
		<property name="oauth2.clientId" value="acme"/>
		<property name="oauth2.clientSecret" value="acmesecret"/>
		<property name="oauth2.redirectUri" value="https://localhost/devportal/oauth2"/>
		<services>
			<service guid="E2050082619BBD33EEDEA97BDCC9223B25244191" name="SpringOauth2" odataSpecVersion="V2" sapCsrfTokenRequired="false" serviceRootURI="https://localhost:8888/res/" useSSL="false"/>
		</services>
		<userMappings/>
	</consumer>
</odata>
Values shown in italics need to be modified.
Microsoft Outlook Online (only http, no OData)
<property name="authenticationType" value="OAUTH2"/> // value has to be OAUTH2
<property name="oauth2.scope" value="https://outlook.office.com/mail.read"/>
<property name="oauth2.authenticationScheme" value="form"/>
<property name="oauth2.clientId" value="<Client ID>"/>
<property name="oauth2.grantType" value="authorization_code"/>
<property name="oauth2.clientAuthenticationScheme" value="form"/>
<property name="oauth2.userAuthorizationUri value="https://login.microsoftonline.com/common/oauth2/v2.0/authorize"/>
<property name="oauth2.clientSecret"value="<Client Secret>"/>
<property name="oauth2.redirectUri" value="https://localhost/devportal/oauth2"/>
<property name="oauth2.accessTokenUri" value= "https://login.microsoftonline.com/common/oauth2/v2.0/token"/>
<services>
	<service guid="XXXXXXXXXXXXXXXXXXXXXXXXXXXXXXX" name="Outlook" odataSpecVersion="V2" sapCsrfTokenRequired="false" serviceRootURI="https://outlook.office.com/api/v2.0/me/messages" useSSL="true"/>
</services>
GoogleMail (only http, no OData)
<property name="authenticationType" value="OAUTH2"/> // value has to be OAUTH2
<property name="oauth2.scope" value="https://mail.google.com/"/>
<property name="oauth2.authenticationScheme" value="header"/>
<property name="oauth2.clientId" value="<Client ID>"/>
<property name="oauth2.grantType" value="authorization_code"/>
<property name="oauth2.clientAuthenticationScheme" value="header"/>
<property name="oauth2.userAuthorizationUri value="https://accounts.google.com/o/oauth2/auth"/>
<property name="oauth2.clientSecret"value="<Client Secret>"/>
<property name="oauth2.redirectUri" value="https://localhost/devportal/oauth2"/>
<property name="oauth2.accessTokenUri" value= "https://accounts.google.com/o/oauth2/token"/>
<services>
	<service guid="XXXXXXXXXXXXXXXXXXXXXXXXXXXXX" name="GMail Inbox" odataSpecVersion="V2" sapCsrfTokenRequired="false" serviceRootURI="https://www.googleapis.com/gmail/v1/users/firstname.lastname@googlemail.com/messages/" useSSL="true"/>
</services>
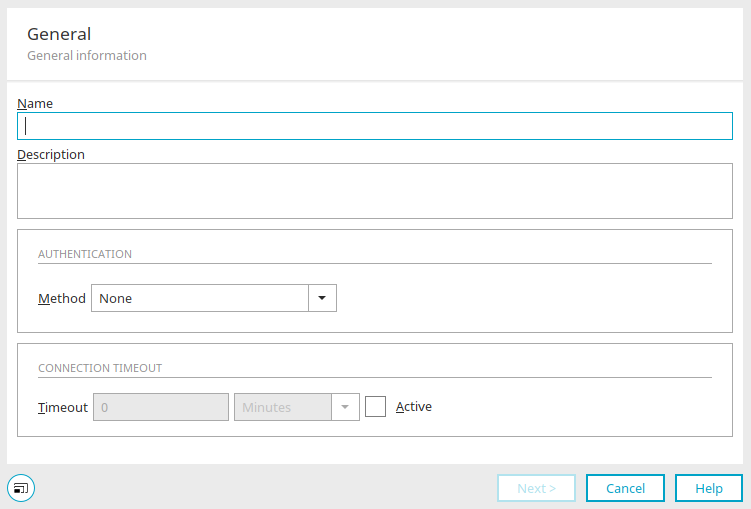
Connection timeout
If the "Active" setting is enabled here, you can define the connection timeout if required.
Click "Next".
OData services
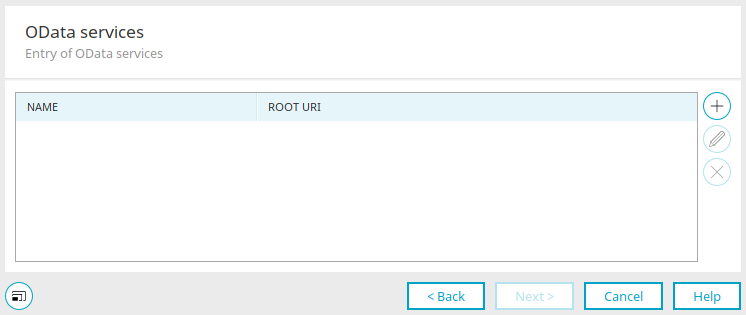
In this dialog you can create a new service by clicking on ![]() "Enter service".
"Enter service".
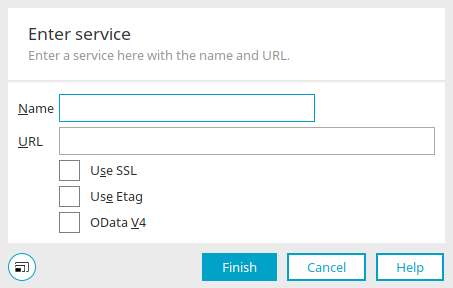
Enter service
The same dialog is used in the configuration for SAP gateway connections. Click here for more information.
If you want to use our example for the OData connection, enter the name "Appointments" and the service URL in this dialog. You can find the endpoint URL in General information in OData services you have created yourself. It can be adopted and entered here as a service URL.
Use SSL
If the service requires an encrypted SSL connection, activate this checkbox.
Activate Etag
If the Etag Header needs to be set for data manipulation purposes, enable this checkbox.
OData V4
With this setting, OData V4 services can be consumed. In this case, a subset of the OData V4 features, which corresponds to the range of functions for OData V2, is supported by Intrexx.
Click on "Finish".
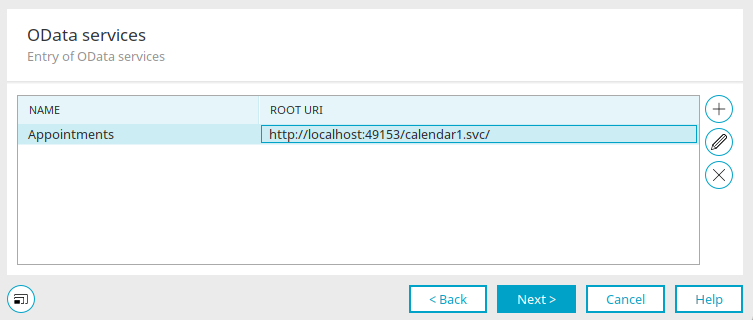
The service settings can be edited by clicking on ![]() "Edit service".
"Edit service". ![]() "Remove service" deletes the currently selected service. Services can only be deleted if they are not already being used in an application or process.
"Remove service" deletes the currently selected service. Services can only be deleted if they are not already being used in an application or process.
Click "Next".
Registration information
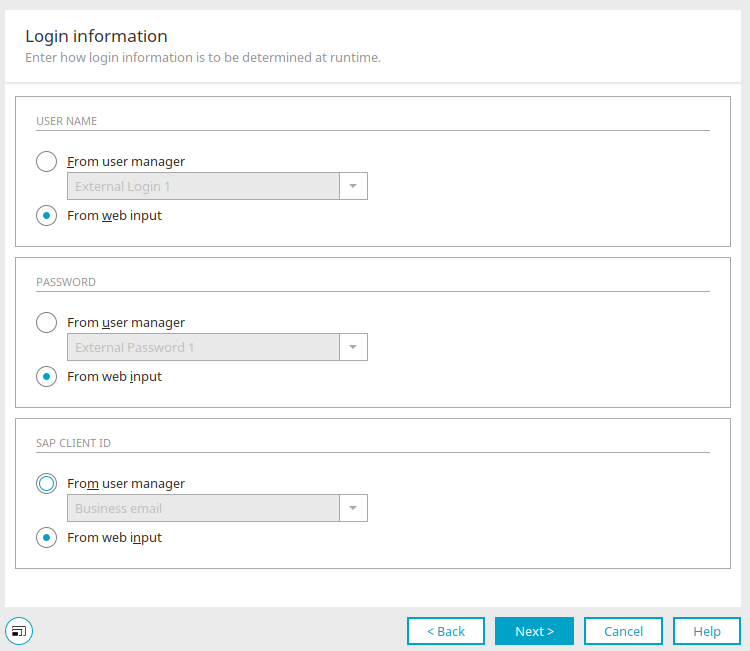
Username / Password / SAP Client ID
From user management
With this option, the information will be taken from the User Manager.
From web input
With this option, the login information will be requested, when the application that uses the connection is opened.
Click "Next".
Additional users
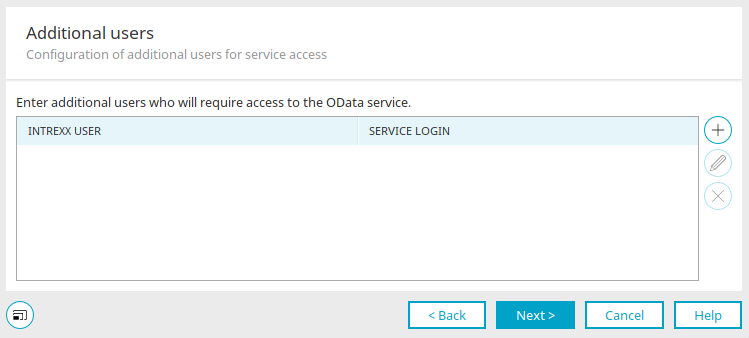
Additional users for service access can be defined here. This is needed for example for processes where the access to the system or service must always be made with a specific user, regardless of which user is logged into Intrexx.
"Intrexx user" column
Displays the name of the user with the path from the user structure.
"Service login" column
Displays the assigned service login.
![]() Add additional user /
Add additional user / ![]() Edit additional user
Edit additional user
Opens a dialog in which an additional user can be selected or edited.
User selection
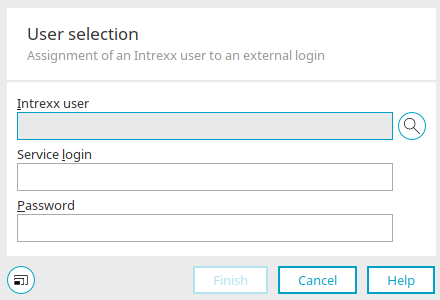
Intrexx user
Displays the path and name of a selected user.
![]() Select user
Select user
Opens a dialog in which a user can be selected from the "Users" module.
Depending on the authentication method, you can then specify a certificate file, service login and password.
File name
Displays the path and name of the certificate file.
![]() Select file
Select file
Opens a dialog where the certificate file can be selected.
Service login
Enter the service login here.
Password
Enter the password.
Click "Finish" to save changes and close the dialog.
![]() Remove additional user
Remove additional user
Removes the currently selected additional user from the list.
Click "Next".
Connection test
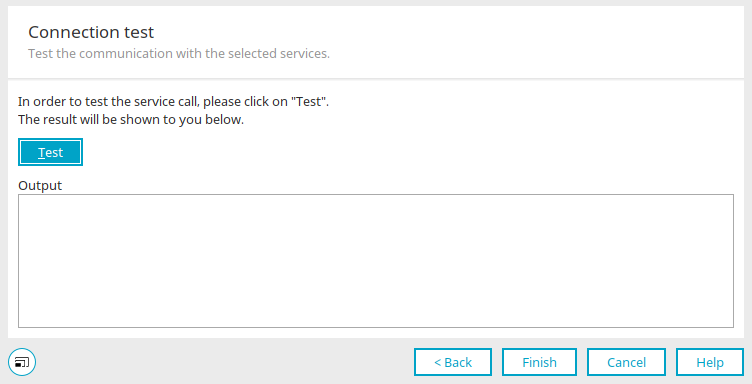
Click on "Test" to test the connection. Corresponding messages can be found in the output field. The configuration is completed by clicking "Finish".
Edit connection
The connection is now shown on the right. All the functions available for editing can be accessed via the "OData" main menu or the context menu for the connection, if the connection is selected.
"Data groups" column
The number of data groups, which are integrated into applications as external data groups, is shown here.
Kerberos (Intrexx Token Service)
The Intrexx Kerberos Token Provider is a Web service which an Intrexx Portal server can use to request Kerberos tokens for Single Sign On authentication for portal users with external systems. This service is especially needed if it is necessary to access an external system multiple times while a user enquiry is being processed; every access, however, requires a Kerberos ticket for authentication. Per Web request, only one ticket for each external system is available to the portal server. The portal server can use this to log in to the Intrexx Kerberos Token Provider in the context of a portal user and will then receive multiple tokens for processing each request for the external system.
System requirements
Integrated Windows authentication must be activated for the Intrexx portal and the Connector. This feature is supported by Windows Server version 2008 and upwards. The Internet Information Server and .NET 4.5 must be installed on the Intrexx server.
Installation and configuration
The web application for the Kerberos Token Service is located as a ZIP file "ixkrbtokenservice.zip" in the installation directory "adapter/odata/kerberos". Unpack the files to a folder of your choice on the server e.g. "C:\inetpub\wwwroot\ixkrbtokenservice". Now create a new Web application in IIS with the following settings:
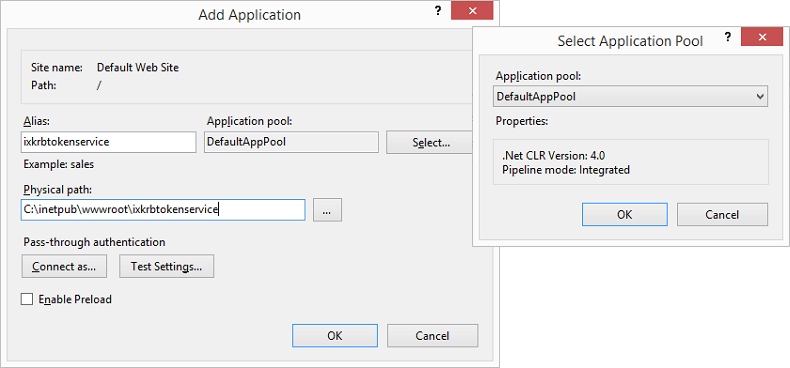
Select an application pool which supports .NET Framework Version 4.0.
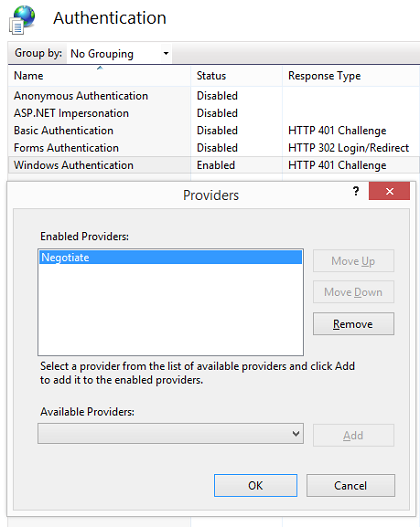
Subsequently, you need to open the "Authentication" overview for the application. Deactivate all methods apart from "Windows Authentication". "Negotiate" must be set as the provider and Kernel-mode authentication also needs to be activated. The service can now be tested in the browser. To achieve this, open the URL "https://localhost/ixkrbservice/api/Token" in the browser. Additionally, the query parameter "spn" can be used to directly provide the Service Principal Name of the SharePoint server to test the ticket request. A message like the one below should appear in the browser:
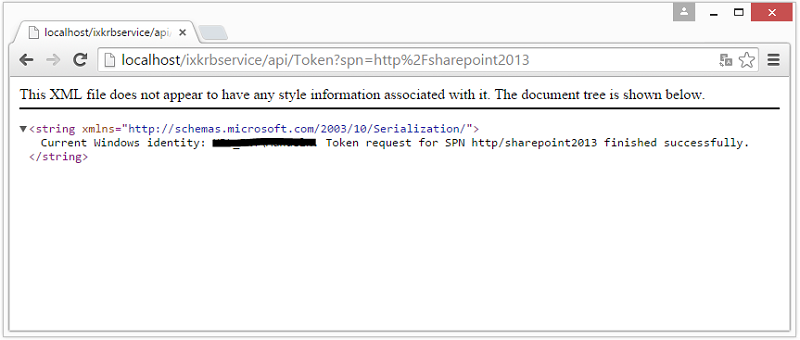
Depending on the browser, the result can either appear as an XML or JSON document. The number of tickets to be created can be setup in the "web.config" file in the service directory with the parameter "maxTokenCount". By default, five tickets are generated per request.
Next steps
To use the data from the connection, integrate the connection into any application in the next step. Click here for more information.