Edit documents via the portal
Below you will find step-by-step instructions on how you, as a portal user, can upload documents to the Intrexx Portal Server via your portal and then open, edit and save them.
Step-by-step guide
-
Open the application assigned to access the WebDAV documents.
-
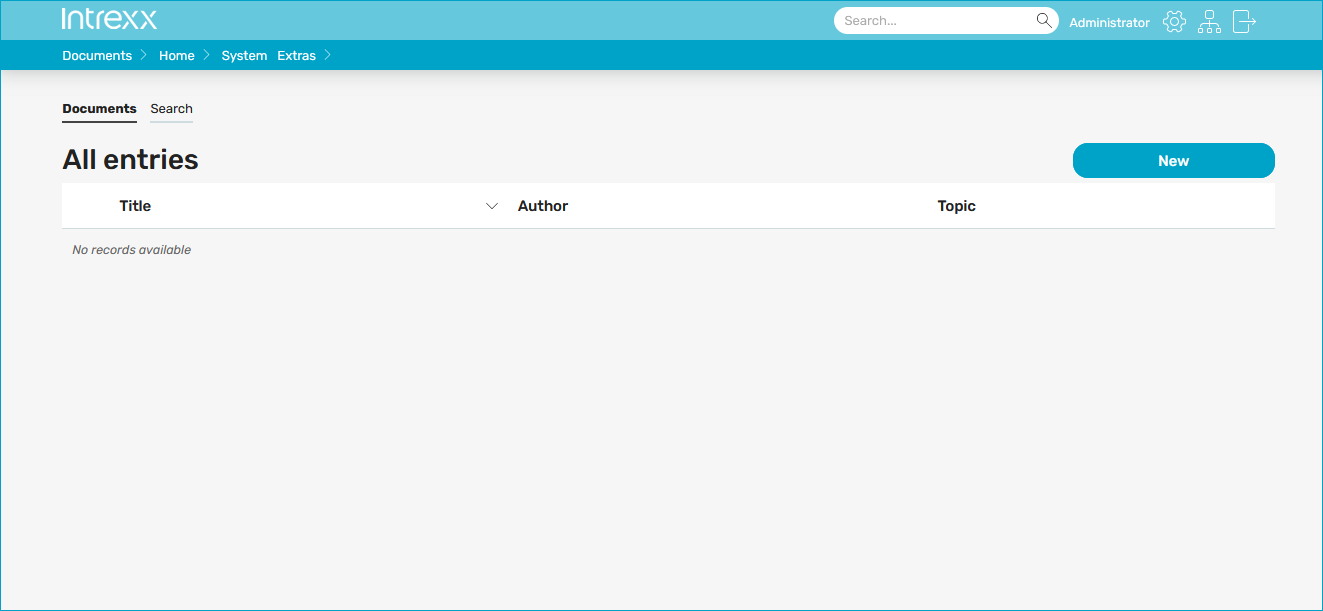
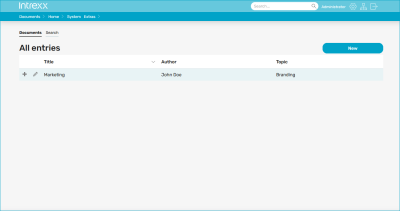
Open the page containing the view table with the buttons for uploading and editing documents.

Upload documents
-
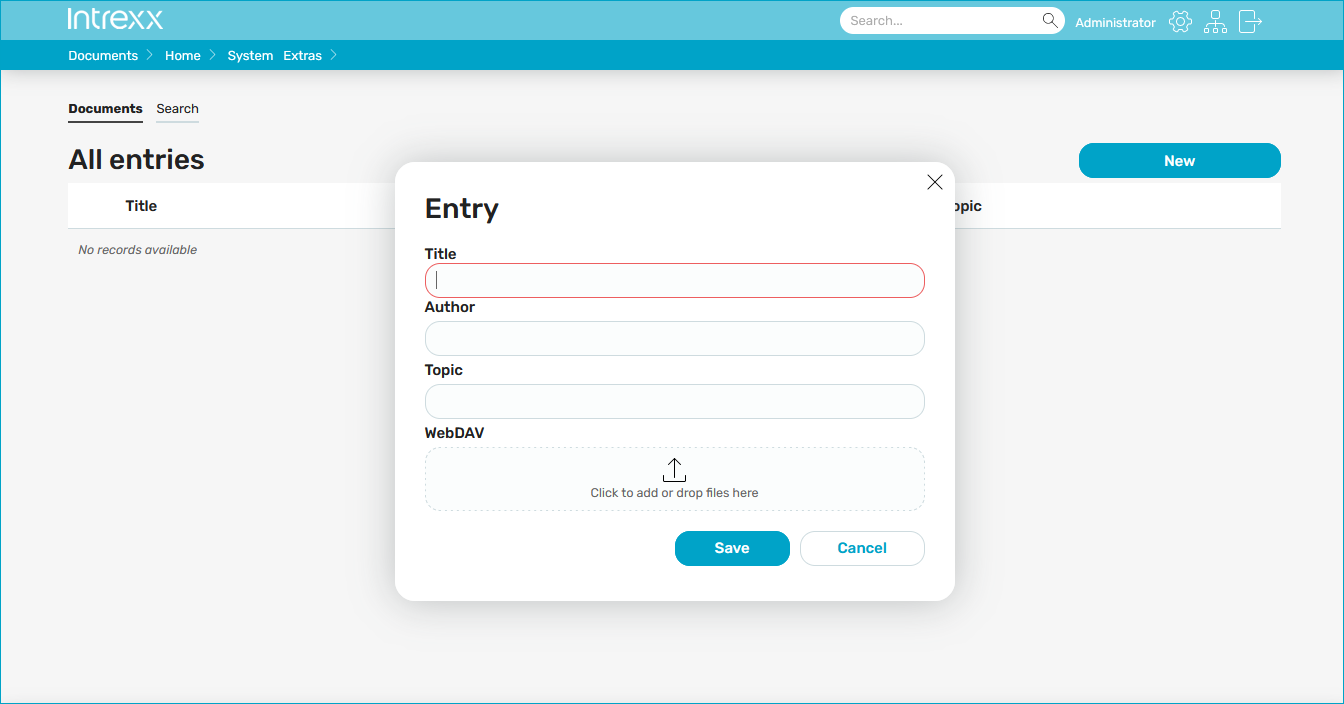
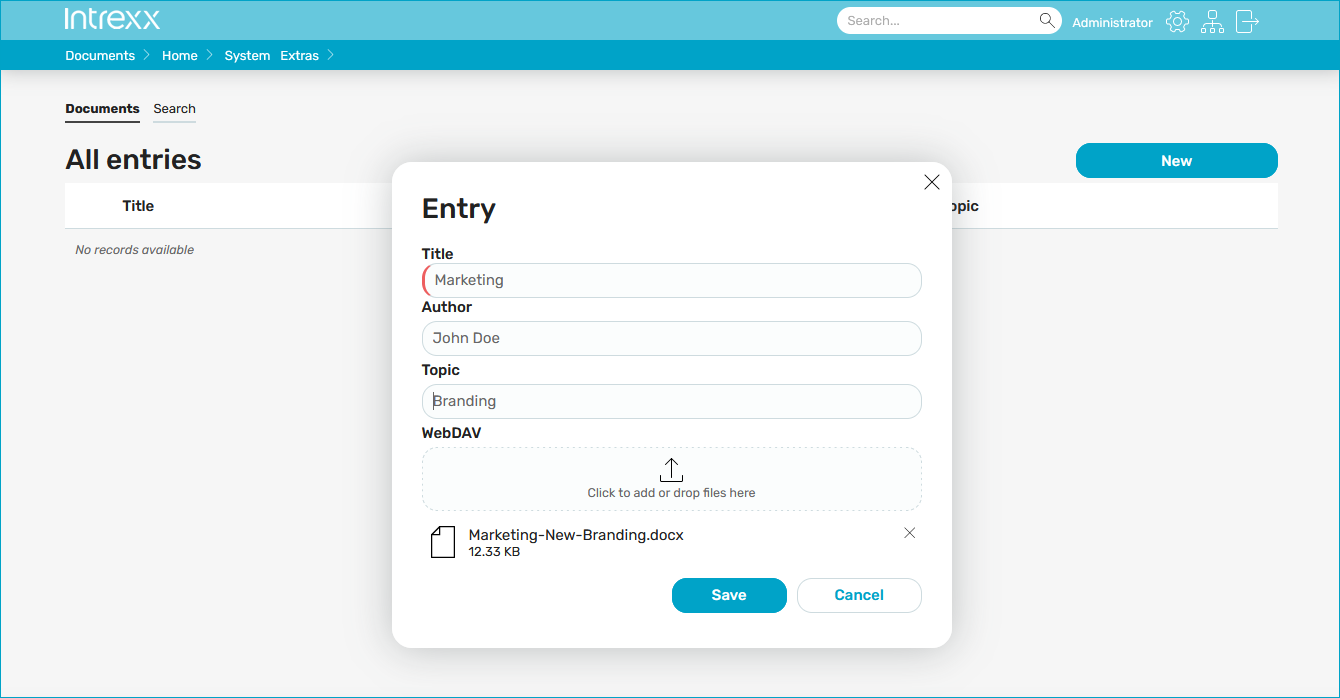
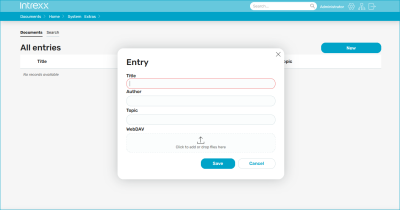
Click on .
A pop-up dialog is displayed.
-
Enter values in the input fields.
-
Upload one or more documents with the "Add file" button.

-
Click on .
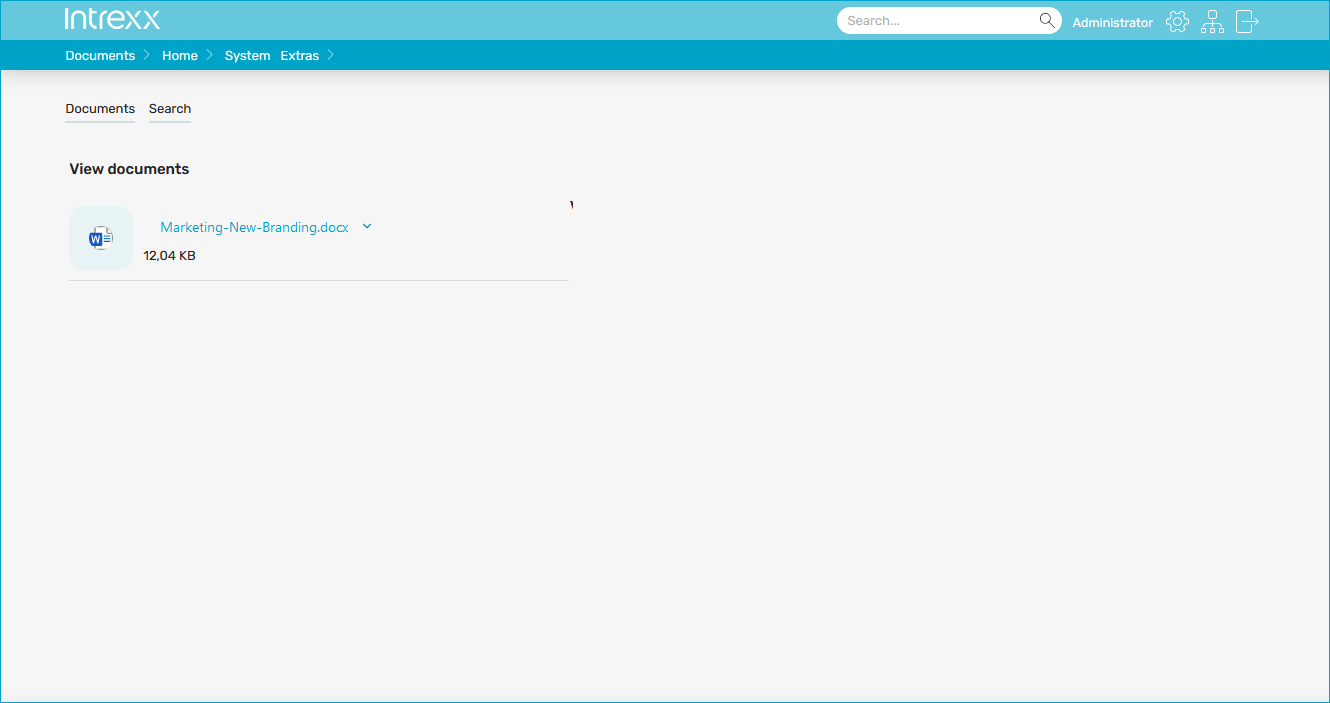
You return to the page with the view table.
Open document
-
Click on the icon that has the view page with the "File selection view" element as the link destination.
The page with the view of the previously uploaded document is displayed.

-
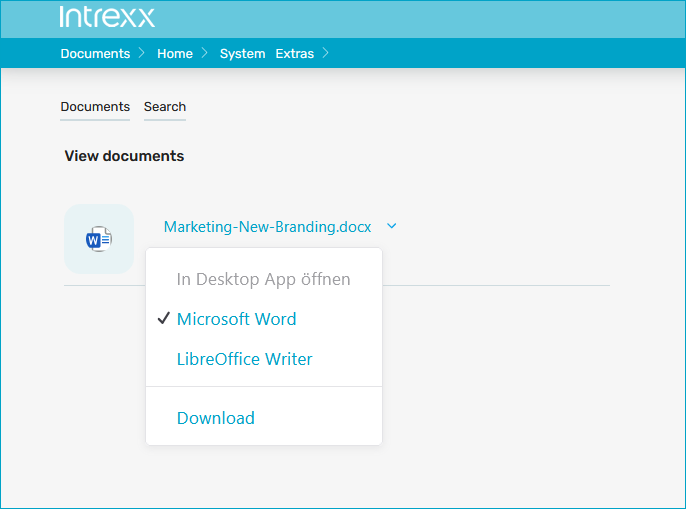
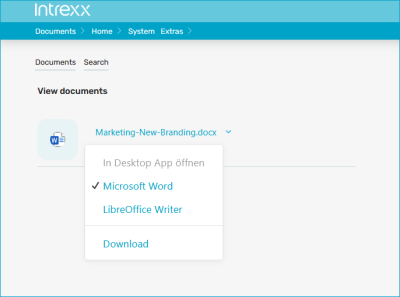
Click on the hyperlink.
A drop-down menu is displayed.
-
Click on the program you want to use to open the document.
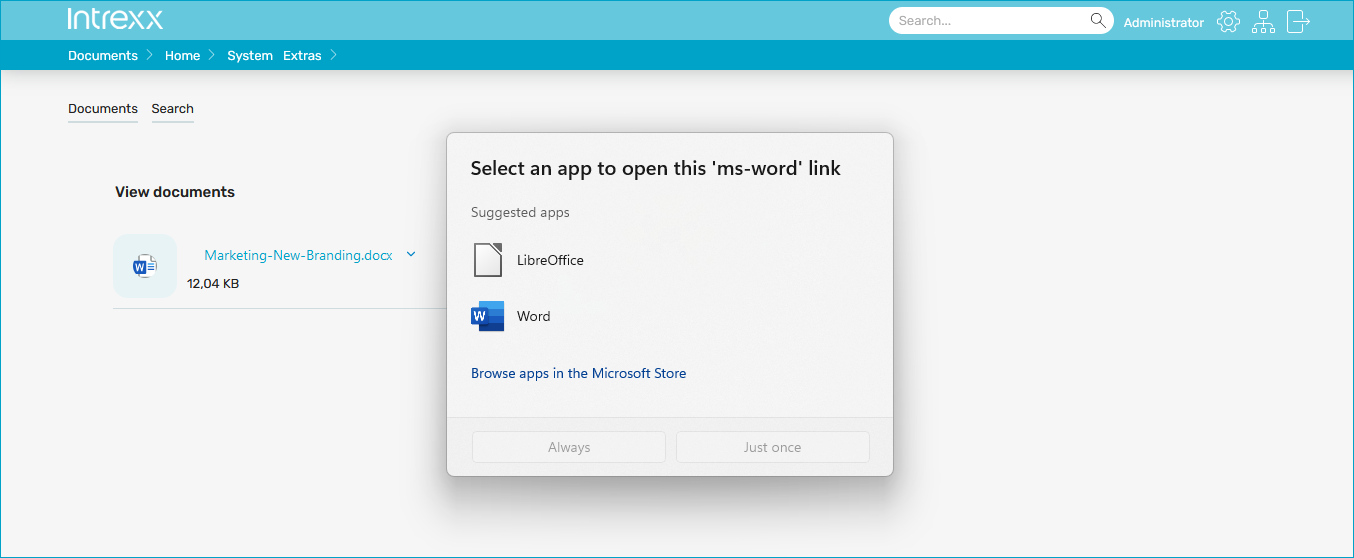
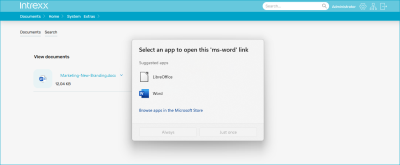
Where appropriate, a dialog box is displayed in which you must select the app to open the document.
-
Select the app.
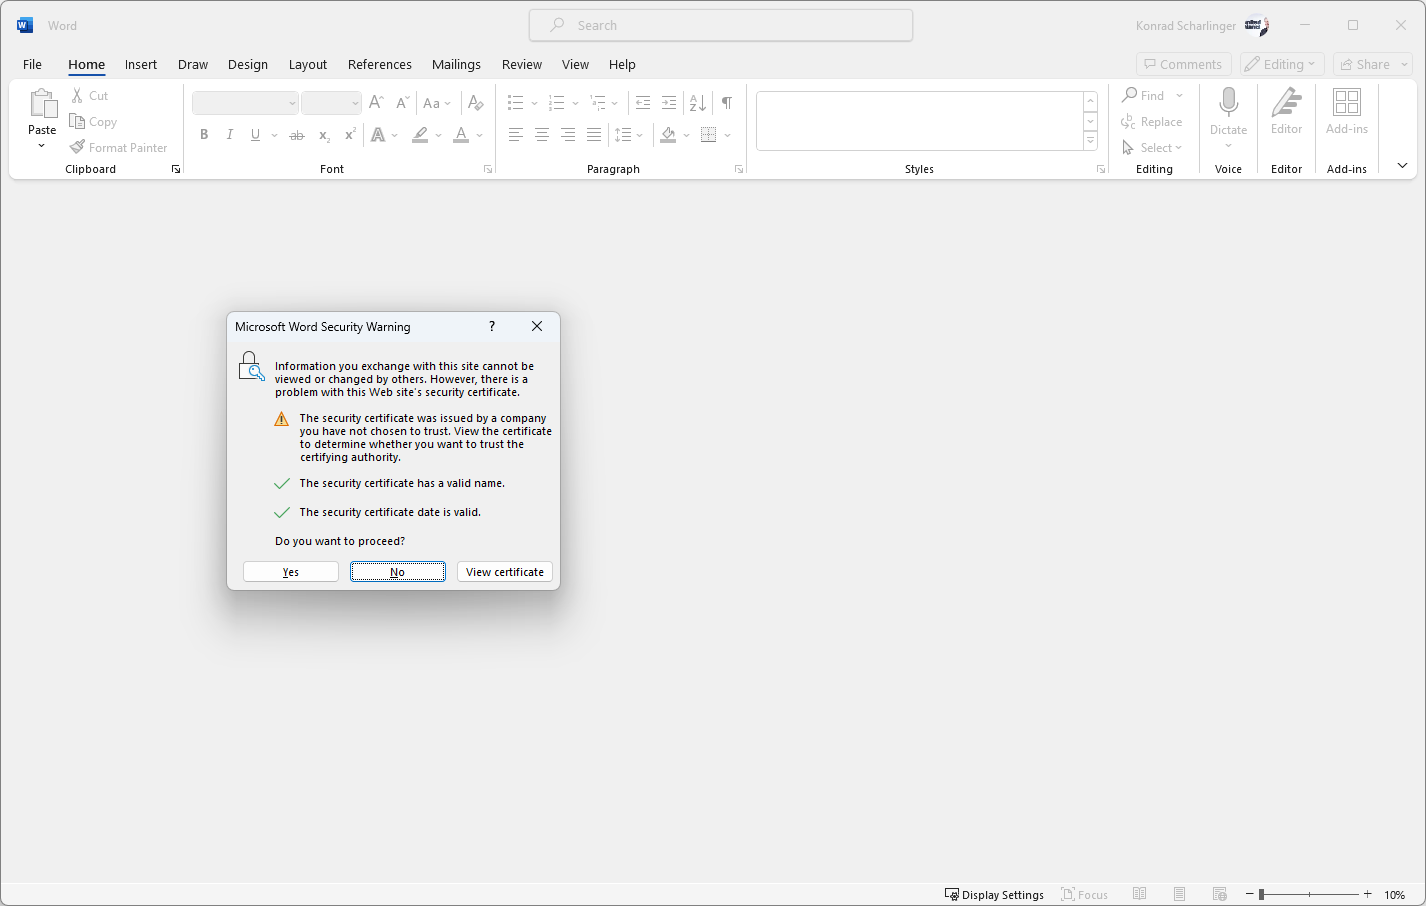
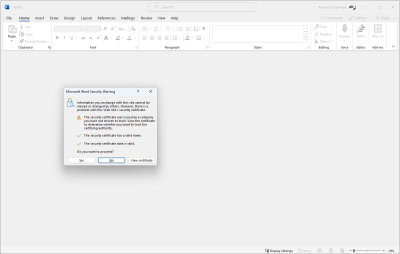
Where appropriate, a dialog is displayed in connection with required certificates.
-
Confirm the dialog.
-
A dialog for authentication on the Intrexx Portal Server is displayed.
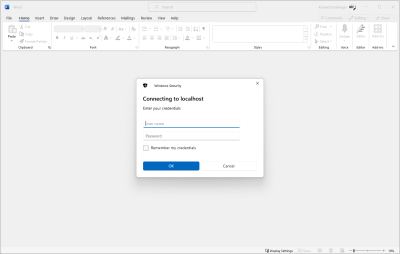
-
Enter your login information.
The authentication data you have to use depends on the authentication type that has been defined for accessing documents via the WebDAV network protocol.
The same login details are often used to access documents and to log in to the portal.
If necessary, contact your administrator for more information.
-
Click on "OK".
-
The document is opened with the selected program.
You can now edit the document and then save it.