Migrate portal database
You have the option of migrating your portal database. You can change the database type when doing so.
Migrating a database is essentially the same as creating a new database when creating a new portal. Refer also to the section Create database.
Step-by-step guide
Proceed as follows to perform a database migration:
-
Click on .
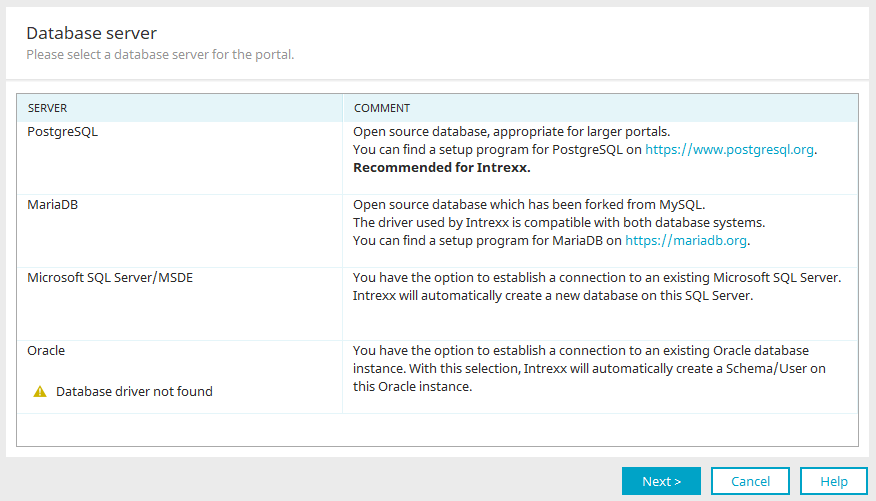
The "Database server" dialog box is displayed.

-
Select the desired SQL (database) server instance.
For the Oracle database server, you must obtain the database drivers directly from the manufacturer.
The subsequent dialogs where the connection to the database server is configured varies from database to database.
In this guide, PostgreSQL will be used as an example. -
Click on "Next".
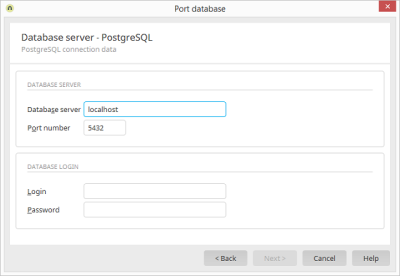
The "Database server - PostgreSQL (1)" dialog box appears.
-
Enter the PostgreSQL connection data.
-
Click on "Next".
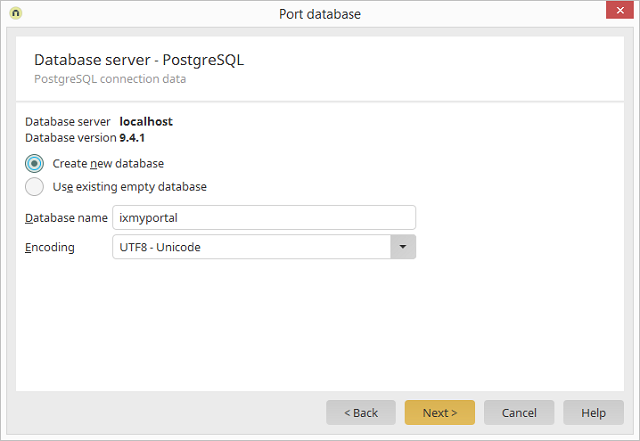
The "Database server - PostgreSQL (2)" dialog box appears.

-
Enter the PostgreSQL database details.
-
Click on "Next".
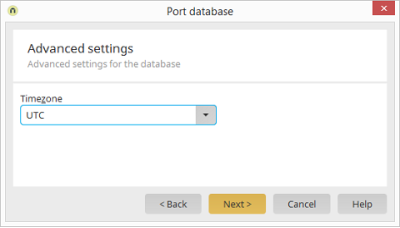
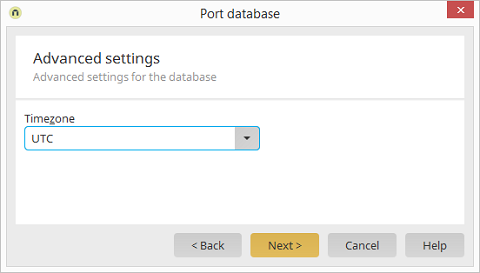
The "Advanced" dialog box appears.
-
Enter the time zone in which the database is located here.
-
Click on "Next".
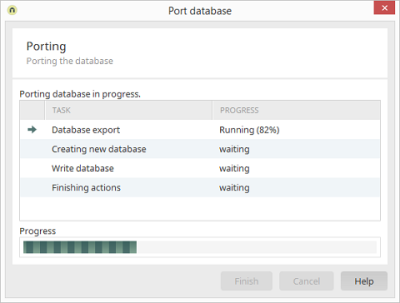
The "Porting" dialog box appears.

-
Click on "Start".
The database migration starts. The "Porting" dialog box appears.
-
Click on "Finish" when all actions have been carried out.
This takes you back to the "Portal properties".

After the migration, the portal is automatically connected to the newly created database. All entries will then be stored in this database with immediate effect.
You can change the database login in the "Integration" module under "Consume data / JDBC data source".