Virtual directories - Applications
Virtual directories and applications have similar functions in IIS. Both terms are sometimes used interchangeably.
Virtual directories and applications have been separate objects since IIS 7.
Detailed information on this can be found under the following link: Understanding Sites, Applications, and Virtual Directories on IIS 7
In the following sections, the term virtual directory is used. In the narrower sense, it refers to applications. These are represented by the following icon in IIS: ![]()
You cannot use virtual directories in Intrexx. You must use websites instead.
What are virtual directories in IIS?
Up to and including Intrexx 19.03, you could use virtual directories in IIS to define the URL that is used to reach the portal in the browser. The virtual directory was usually created under "Default Web Site" in IIS.
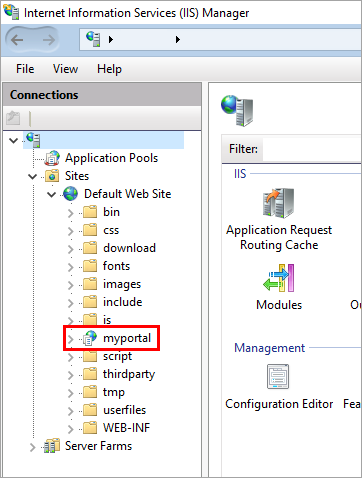
In the browser, you could then access your portal by entering your domain and the virtual directory.
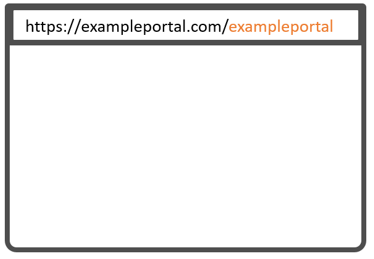
Example
|
Your domain (host name) |
exampledomain.com |
|
Portal name (in the portal properties) |
exampleportal |
|
Name of the virtual directory / alias |
exampleportal |
|
URL |
https://exampledomain.com/exampleportal/ |
You could run multiple portals with the same domain or host name but with different virtual directories.
The corresponding URLs could look like this, for example:
|
URL |
https://exampledomain.com/exampleportal-1/ |
|
URL |
https://exampledomain.com/exampleportal-2/ |
|
URL |
https://exampledomain.com/exampleportal-3/ |
What are websites IIS?
In the context of your portal's URL, websites have a similar function to virtual directories in IIS.
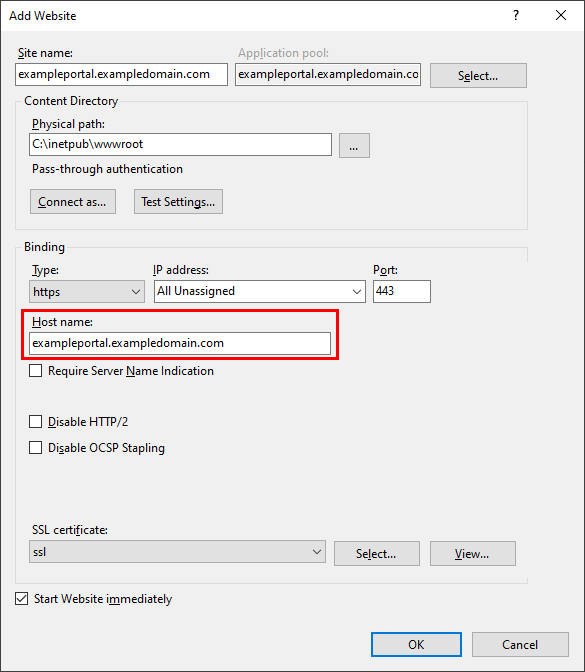
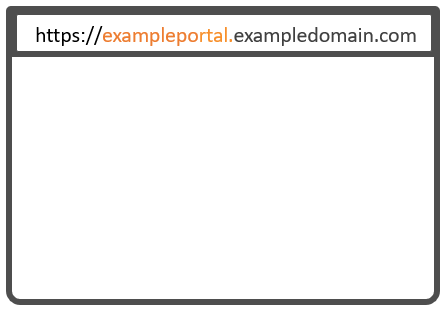
When creating a website in IIS, you can enter the URL, which is used to access the portal in browser, in the "Host name" field.
The website looks like this in the navigation area on the left of IIS:
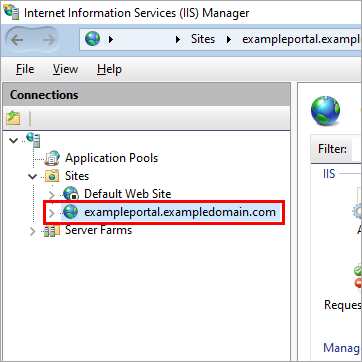
You can access the portal in the browser by entering the host name defined here and your domain.
Example
|
Your domain (host name) |
exampledomain.com |
|
Portal name (in the portal properties) |
exampleportal |
|
Host name in IIS |
exampleportal.exampledomain.com |
|
URL |
https://exampleportal.exampledomain.com |
A key difference between using virtual directories and websites when running multiple portals is that you need to create a website in IIS for each portal.
The corresponding URLs look like this:
|
URL |
https://exampleportal1.exampledomain.com |
|
URL |
https://exampleportal2.exampledomain.com |
|
URL |
https://exampleportal3.exampledomain.com |
What are the advantages of websites?
-
The use of websites is future-proof in terms of security. The constantly growing security requirements for web applications can only be met by websites.
-
Using virtual directories can already lead to security problems if multiple web applications are hosted on the same website (Same origin policy).
-
Using virtual directories can cause errors if multiple Intrexx portals are hosted on the same website.
-
Virtual directories make it more difficult to configure front-end web servers and web connectors and are very prone to errors.
-
URLs with the format "https://exampleportal.exampledomain.com" are seen as contemporary (in comparison to "https://exampledomain.com/exampleportal/").
How to switch from existing virtual directories to websites.
-
Create a website for every virtual directory (cf. Add a website in IIS).
Apply the binding settings from the Default Web Site to your new site.
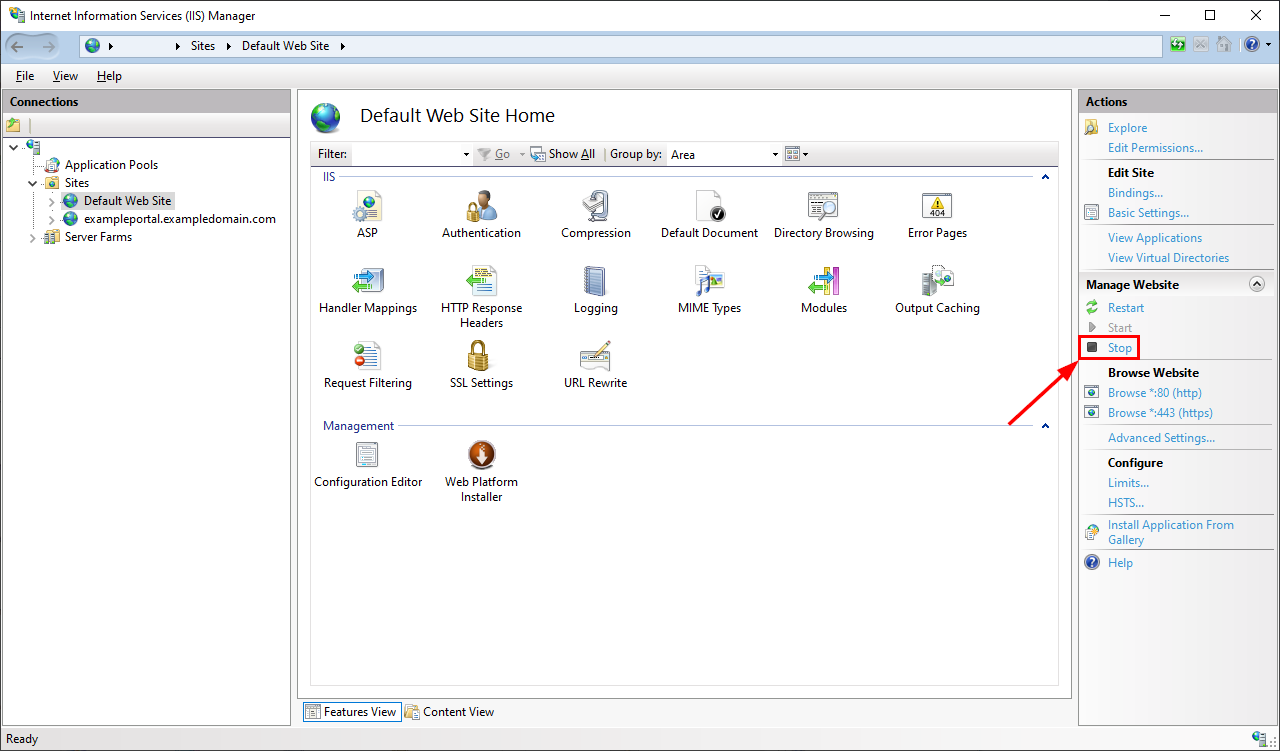
-
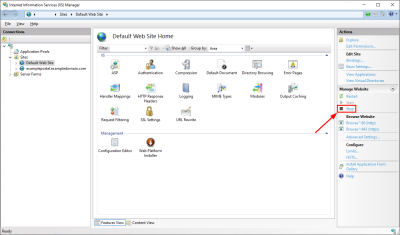
Stop the Default Web Site.
-
Start IIS.
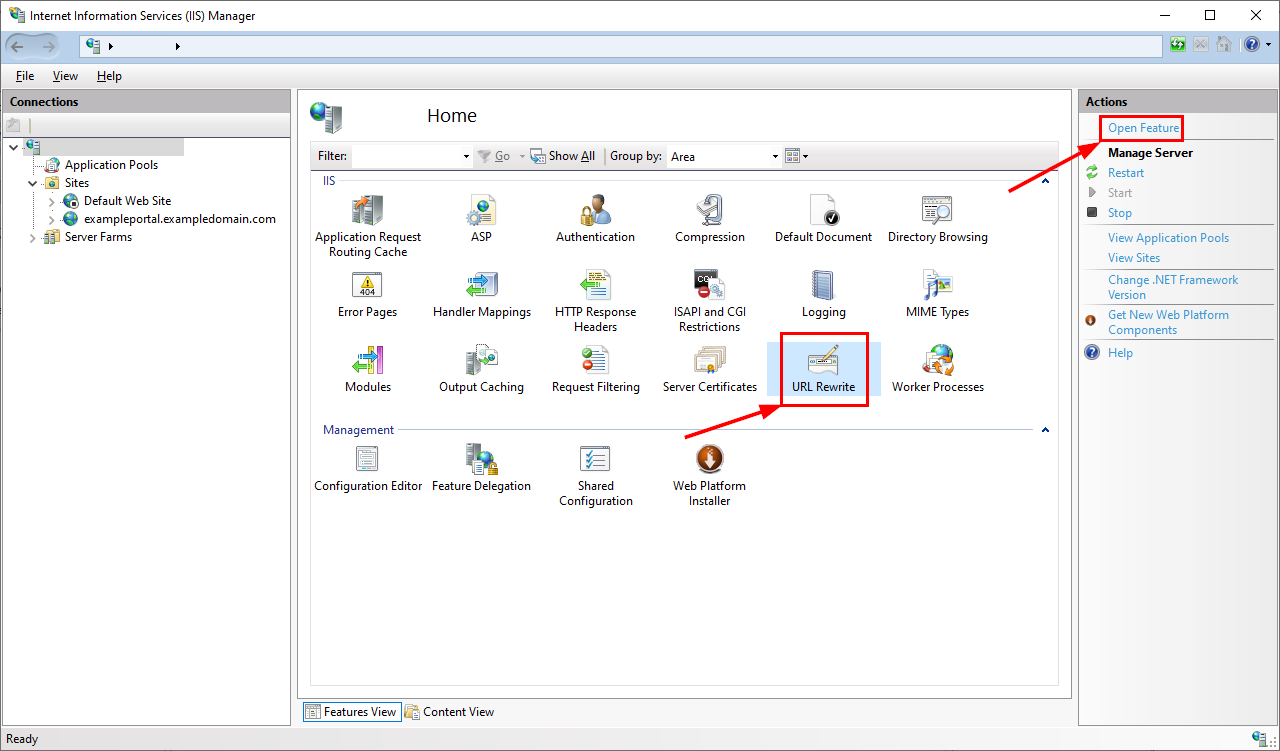
Please make sure that you have selected the first entry on the left (under "Start Page").
-
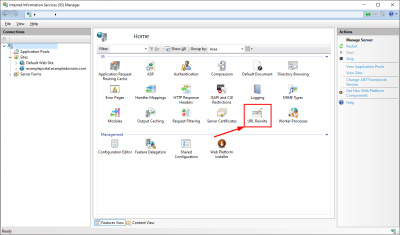
Click on the "URL Rewrite" icon.
-
Click on "Open Feature".
(Alternatively, you can double-click on the "URL Rewrite" icon.)

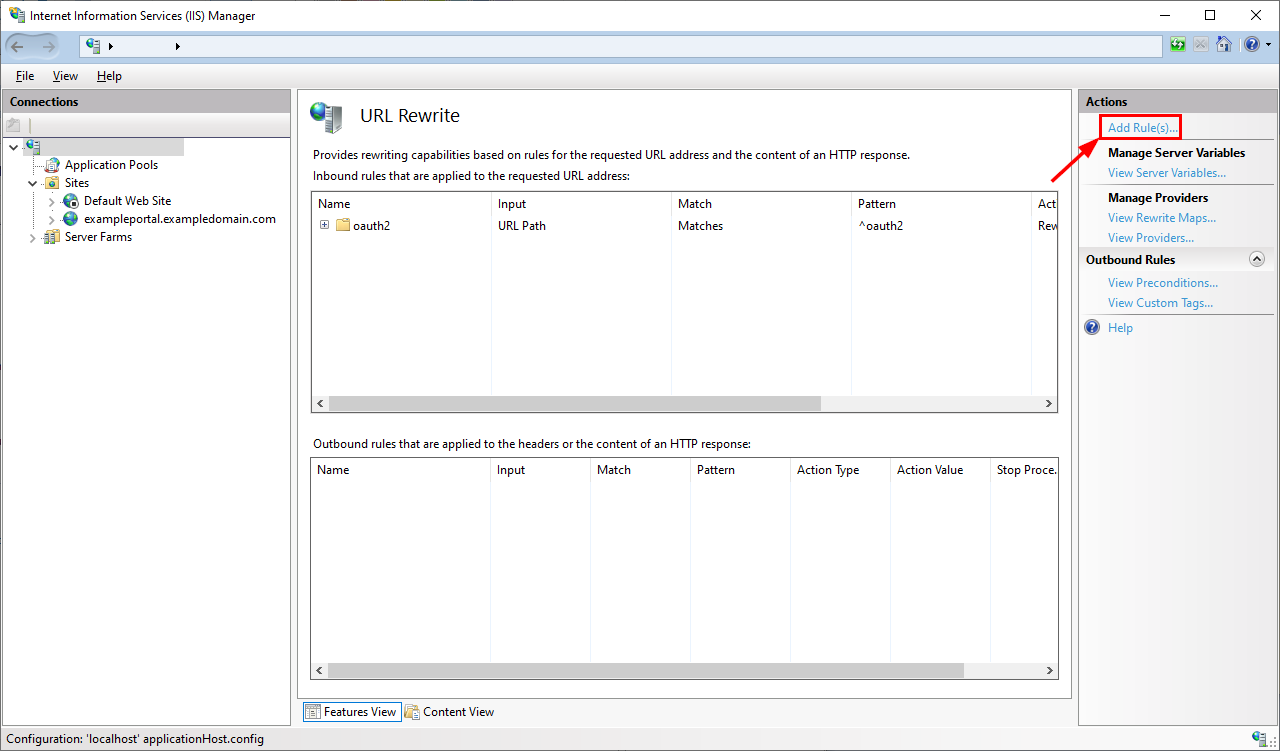
You will now be on the "URL Rewrite" page.
-
Click on "Add Rule(s)..." under "Actions" on the right.
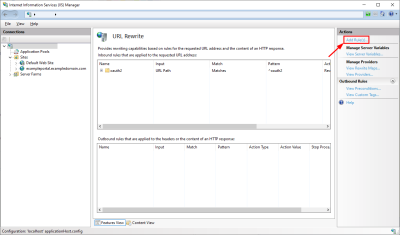
The "Add Rule(s)" dialog will open.
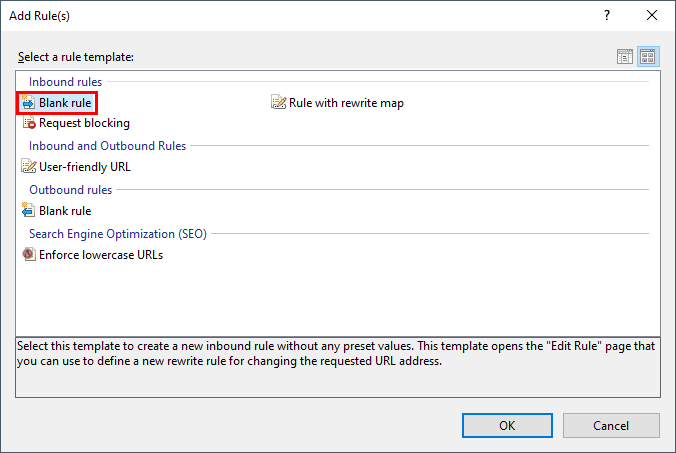
-
Select "Blank rule".

-
Click on "OK".
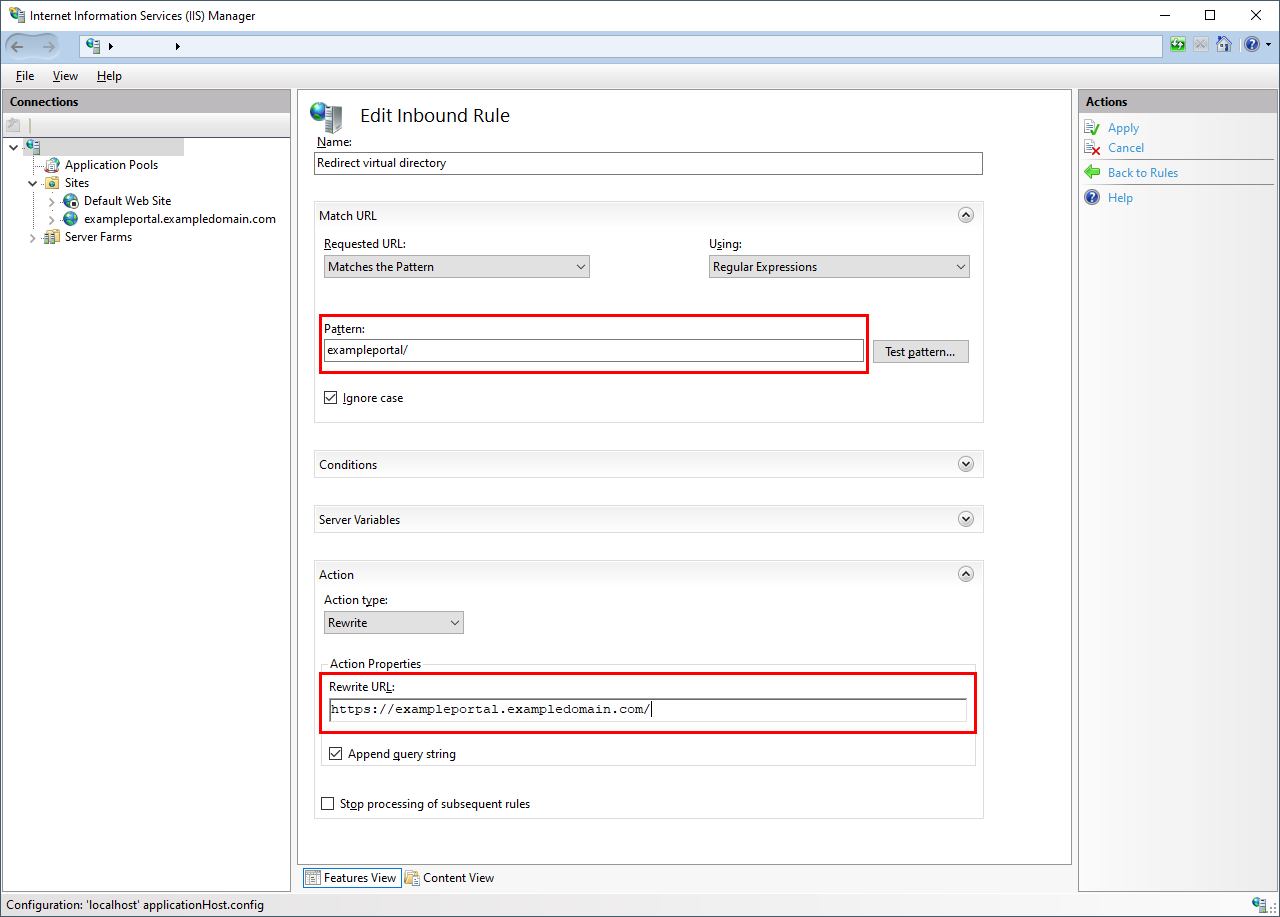
The "Edit Inbound Rule" page will open.
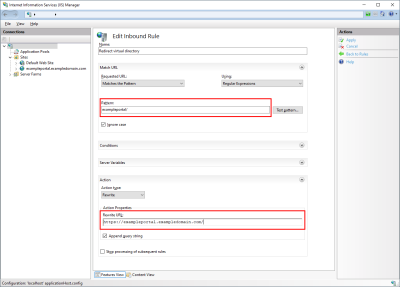
The central edit fields for setting up the redirection from a virtual directory
to a website are the fields Pattern and URL.Name
Description
Name
Enter a name for the redirection rule here.
Requested URL
Select the value "Corresponds to pattern" here.
Using
Select the value "Regular expressions" here.
Pattern Enter the name of the virtual directory here with a closing backslash. Test pattern
This button allows you to test the redirection.
Ignore upper/lower case
Select this checkbox.
Conditions
Refer to the IIS online help to determine whether you should use conditions.
Server variables
Refer to the IIS online help to find out whether you should use server variables.
Action type
Select the value "Redirect" here.
Redirect URL Enter the URL of your portal here with a closing backslash. Append query string
Select this checkbox.
Redirection type
Select the value "Permanent (301)" here.
-
Click on "Apply" on the right.
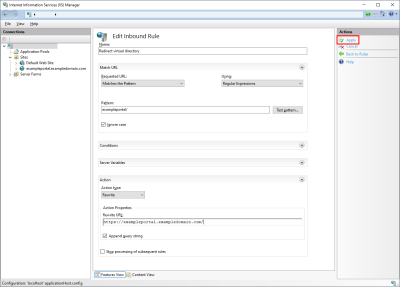
You will now return to the "URL Rewrite" page.
The rule you just created will now appear in the list.
You have now configured a redirect rule for a URL with a virtual directory to a URL with a website.
You that your links that refer to virtual directories continue to work correctly, we recommend that you add one or more redirect rules in the URL rewrite module in ISS.
The section below provides a detailed guide to configuring a redirect rule in IIS.
Please consult the IIS online help if needed: https://www.iis.net/.
Step-by-step guide
To configure a redirect rule for a URL with a virtual directory to a URL with a website, please proceed as follows: