Tips & Tricks - Microsoft Exchange - Set out of office message
This workshop demonstrates how an out of office message for an Exchange user account can be defined and activated with the Connector for Microsoft Exchange. The example application for this workshop can be downloaded here and imported into your portal as usual. Make sure the expert options have been activated so that all of the dialogs explained in this example are available. A connection to Microsoft Exchange is also required.

The "All Entries" page of the example application contains a static text element. You will find the following script on the General tab in the properties dialog:
#set($bIsEnabled = $ExchangeMailboxCallable.isOutOfOfficeEnabled())
#if($bIsEnabled)
Out of office message enabled
#else
Out of office message not activated
#end
On the Options tab, the option "Programming, only default language" is selected. The script is performed when the page is loaded in the browser and states whether an out of office message has been activated or not.
The text for the out of office message can be defined in the browser on the "Change status" page. The page also contains the checkbox "Activated". Neither of these edit elements requires a data field link.
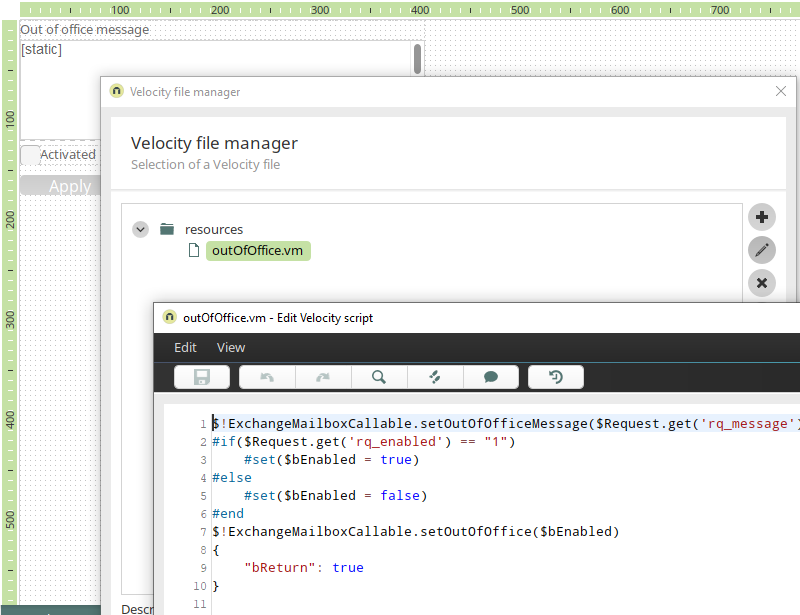
With the help of a VTL Include element, a VM file was created on the page called "outOfOffice.vm". The file contains the following script:
$!ExchangeMailboxCallable.setOutOfOfficeMessage($Request.get('rq_message'))
#if($Request.get('rq_enabled') == "1")
	#set($bEnabled = true)
#else
	#set($bEnabled = false)
#end
$!ExchangeMailboxCallable.setOutOfOffice($bEnabled)
{
	"bReturn": true
}
The VTL Include element was deleted afterwards as it is no longer necessary.
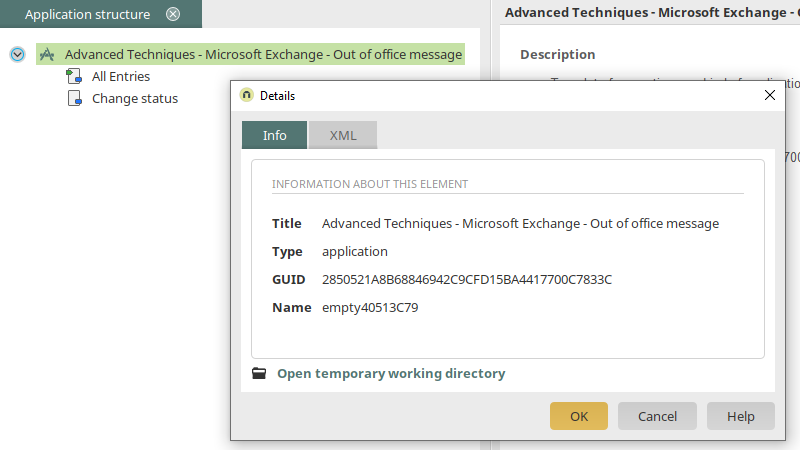
The script can be edited later via the application node. To do this, select "Details" from the context menu. In the "Details" dialog, click on the "Open temporary working directory" link. The "outOfOffice.vm" file is stored in the "resources" folder.

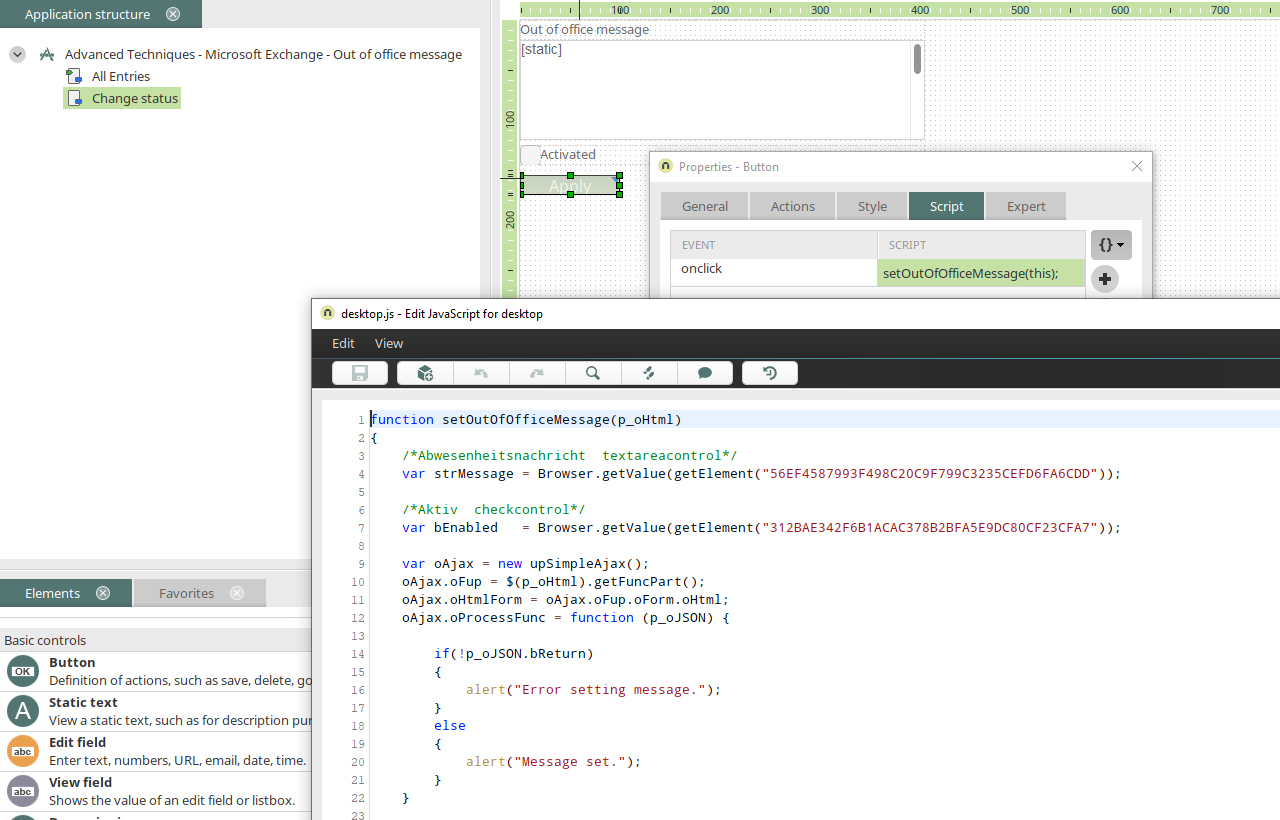
The "Edit status" page also contains a button called "Apply". Its link destination is also the "Edit status" page meaning the page is reloaded when the user clicks on the button. The following script has been defined on the "Script" tab:
function setOutOfOfficeMessage(p_oHtml)
{
	/*Out of office message  textareacontrol*/
	var strMessage = Browser.getValue(getElement("GUID_TEXTFIELD"));

	/*Active  checkcontrol*/
	var bEnabled   = Browser.getValue(getElement("GUID_CHECKBOX"));

	var oAjax = new upSimpleAjax();
	oAjax.oFup = ContainerAgent.getFuncPart(p_oHtml);
	oAjax.oHtmlForm = oAjax.oFup.oForm.oHtml;
	oAjax.oProcessFunc = function (p_oJSON) {

		if(!p_oJSON.bReturn)
		{
			alert("Error setting message.");
		}
		else
		{
			alert("Message set.");
		}
	}

	oAjax.bAsync = true;
	oAjax.bAddHistory = false;
	oAjax.loadAppSnippetJsonVm("internal/application/resource/0A3832BBDDECE6DA29F712724BF368B70B228711/outOfOffice.vm", {rq_message: strMessage, rq_enabled: bEnabled});

	return true;
}
If you would like to use the script in other applciations, the following values need to be adjusted:
-
getElement("GUID_TEXTFIELD")
GUID of the text area "Out of office message" -
getElement("GUID_CHECKBOX")
GUID of the checkbox "Activated" -
0A3832BBDDECE6DA29F712724BF368B70B228711/outOfOffice.vm Replace "0A3832BBDDECE6DA29F712724BF368B70B228711" with the GUID of your application.
All GUIDs can be determined directly in the editor using the Application structure area. With the aid of this function, the defined VM script is called and performed via an AJAX call. The script has been assigned to the onclick event of the button with the parameter "this". This means it is performed when the user clicks on the button in the browser.

When you open the application for the first time in the browser, you need to enter you Exchange login information and log in. Afterwards, you can activate the out of office message on the "Change status" page. Once the message has been applied, it is immediately activated in your Exchange inbox.