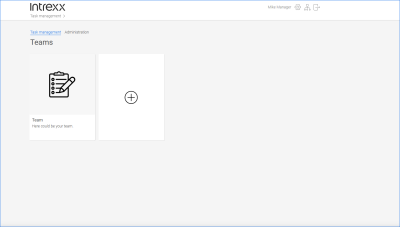
Manage teams, boards and projects
![]() As a portal user with the "Manager" role, your main function is to create and manage teams, boards, and projects. You can create new teams, for example, and specify which portal users with the role "User" should be members of a team. You also define how many statuses the team board should have. This allows you to determine how many steps each task should go through. Furthermore, you can create projects to which team members can assign tasks. Finally, you can archive tasks that should no longer be processed.
As a portal user with the "Manager" role, your main function is to create and manage teams, boards, and projects. You can create new teams, for example, and specify which portal users with the role "User" should be members of a team. You also define how many statuses the team board should have. This allows you to determine how many steps each task should go through. Furthermore, you can create projects to which team members can assign tasks. Finally, you can archive tasks that should no longer be processed.
Below you will find detailed instructions on how to perform all the activities related to teams, boards and projects...
Create a team
Step-by-step guide
To create a team, proceed as follows:
-
Go to the "Task scheduler" page.
-
Click on .
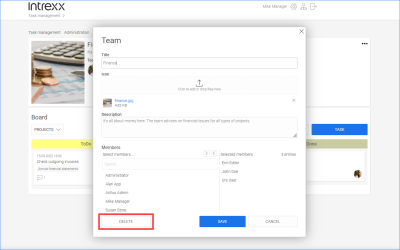
The "Team" dialog box is displayed.
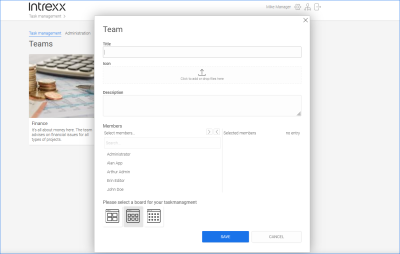
Title
Enter a title for the team.
Icon
You can store an icon or even a picture for the team. The image can be up to 150px x 150px.
Description
Enter a description for the team.
Members
Using the arrow buttons you can move the portal users from the left pane ("Select members") to the right pane ("Selected members") and thus make them team members.
In the left pane ("Select members”), every portal user with the role "User" is displayed.
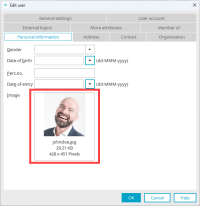
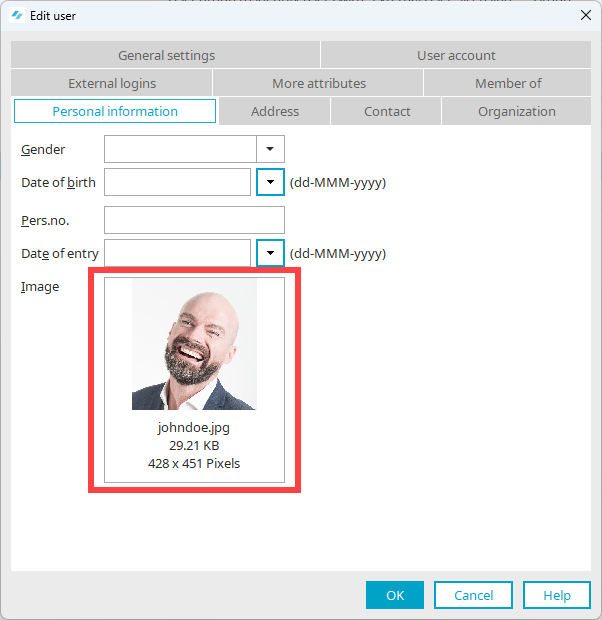
Pictures of team members
If you have stored images for the team members in the user administration, they will be displayed in the team board.
In the Portal Manager, the images are stored in the "Users" module for each user under "Personal information".
Board Template
Select one of the board templates displayed by clicking the corresponding icon.
By default, the application contains three board templates. These differ in the number of statuses that the tasks pass through.
 Board with two statuses
 Board with three statuses
 Board with four statuses
 -


Edit or delete team
Step-by-step guide
To edit or delete a team, proceed as follows:
-
Click on the Team tile.
The team board is displayed.
-
 icon (Options) (
 ).
). ).
).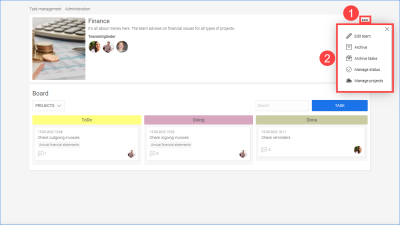
-
Click on
 "Edit Team".
The "Team" dialog box is displayed.
-
Make the desired changes to the team.
Or
-
Click to delete the team.


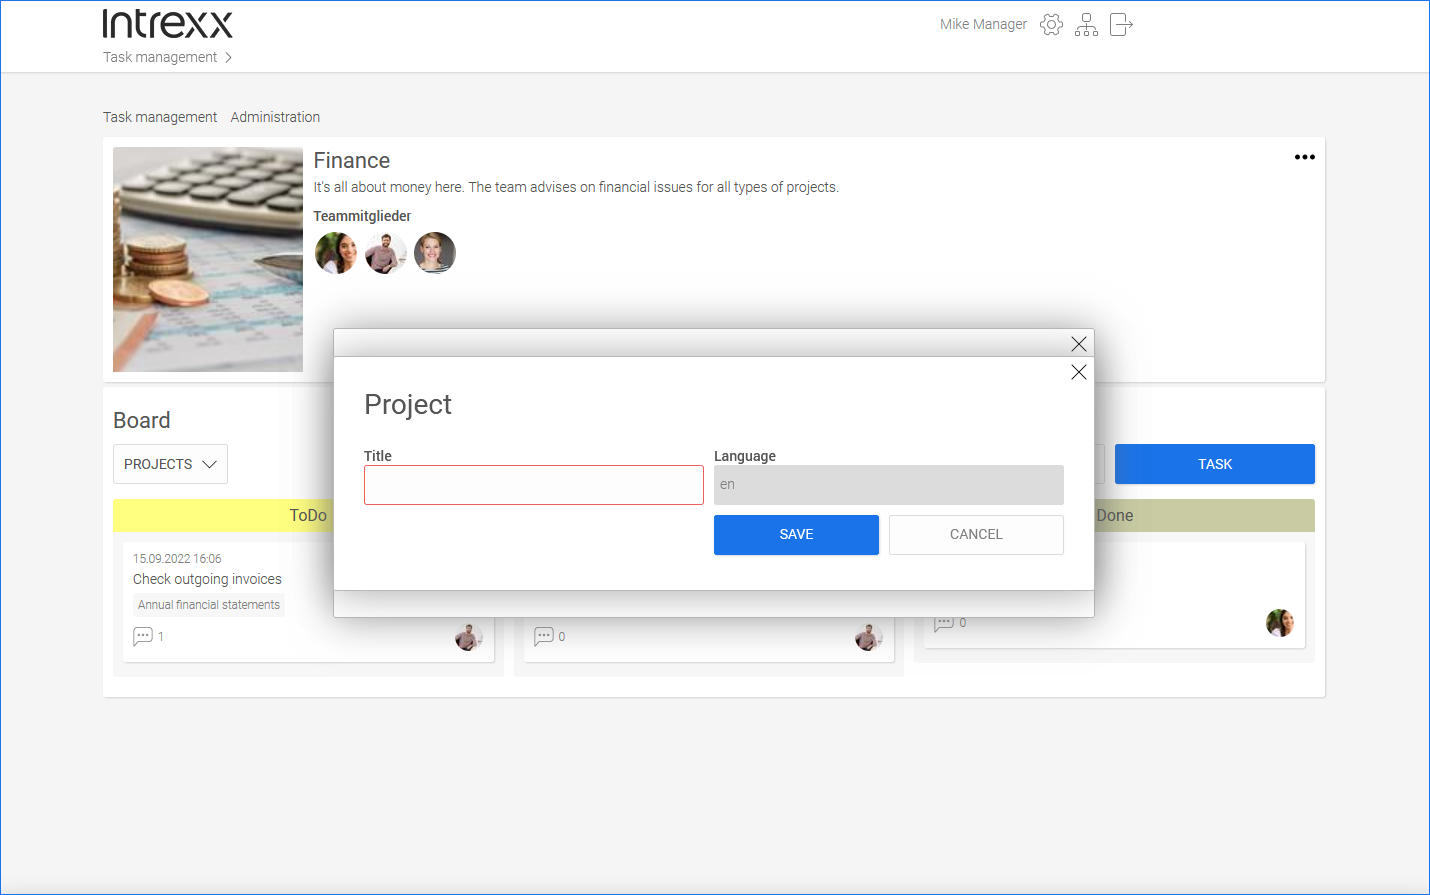
Create a project
Step-by-step guide
To create a new project, proceed as follows:
-
Click on the Team tile.
The team board is displayed.
-
icon (Options) ().).
-
Click
 "Manage projects".
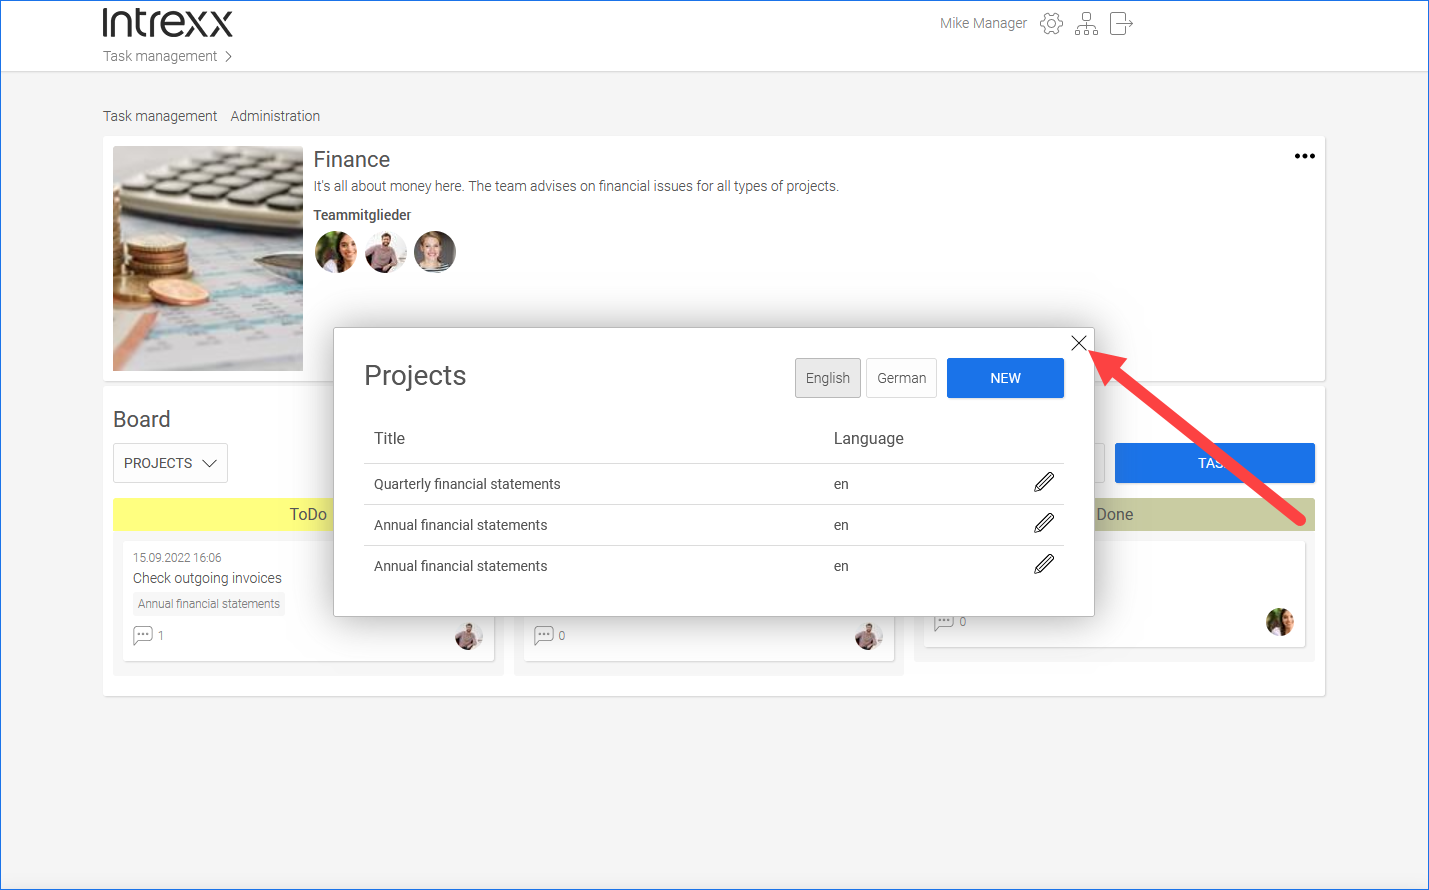
The "Projects" dialog box (1) is displayed.
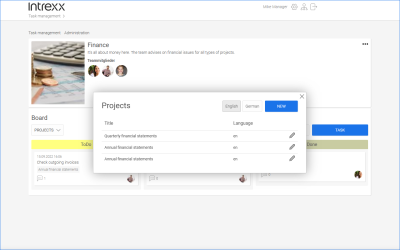
-
Click on .
The "Projects" dialog box (2) is displayed.

-
Enter a title for the project.
-
You will return to the "Projects" dialog box (1).

-
(Optional) Enter the title of the project in English.
-
Close the dialog box by clicking "X".
You will return to the team board.
The selection field is displayed.
-
Open the field.
The new projects are displayed.
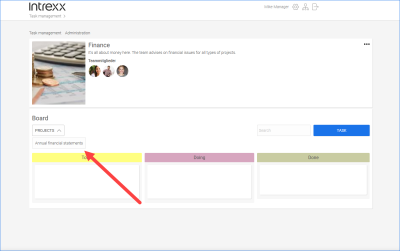
Filter tasks by project
You can view the tasks for a project by clicking on the project.


Adjust status
Step-by-step guide
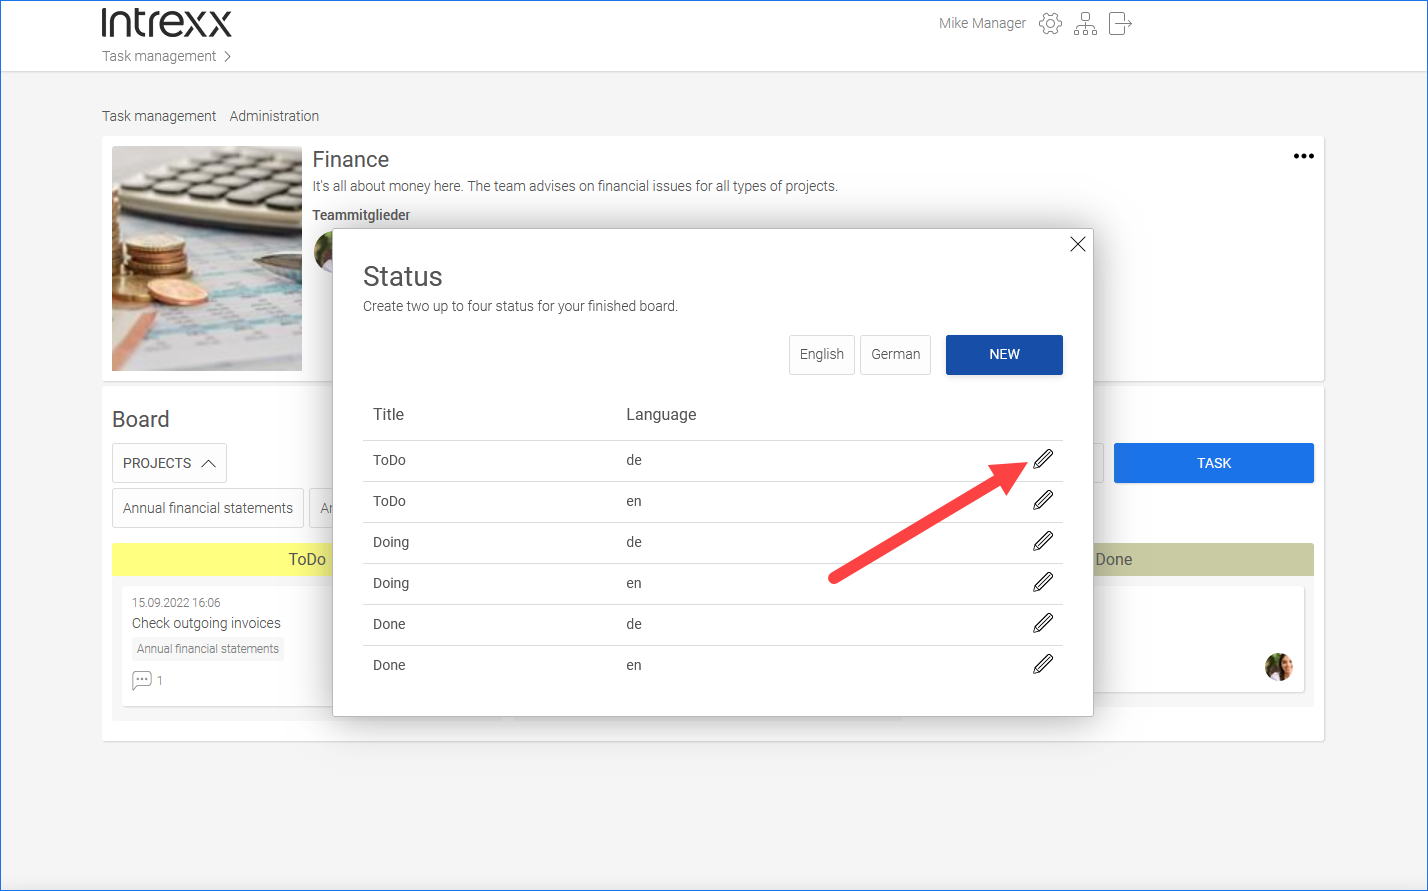
To adjust or create a new status, proceed as follows:
-
Click on the Team tile.
The team board is displayed.
-
icon (Options) ().).
-
Click
 Manage Status.
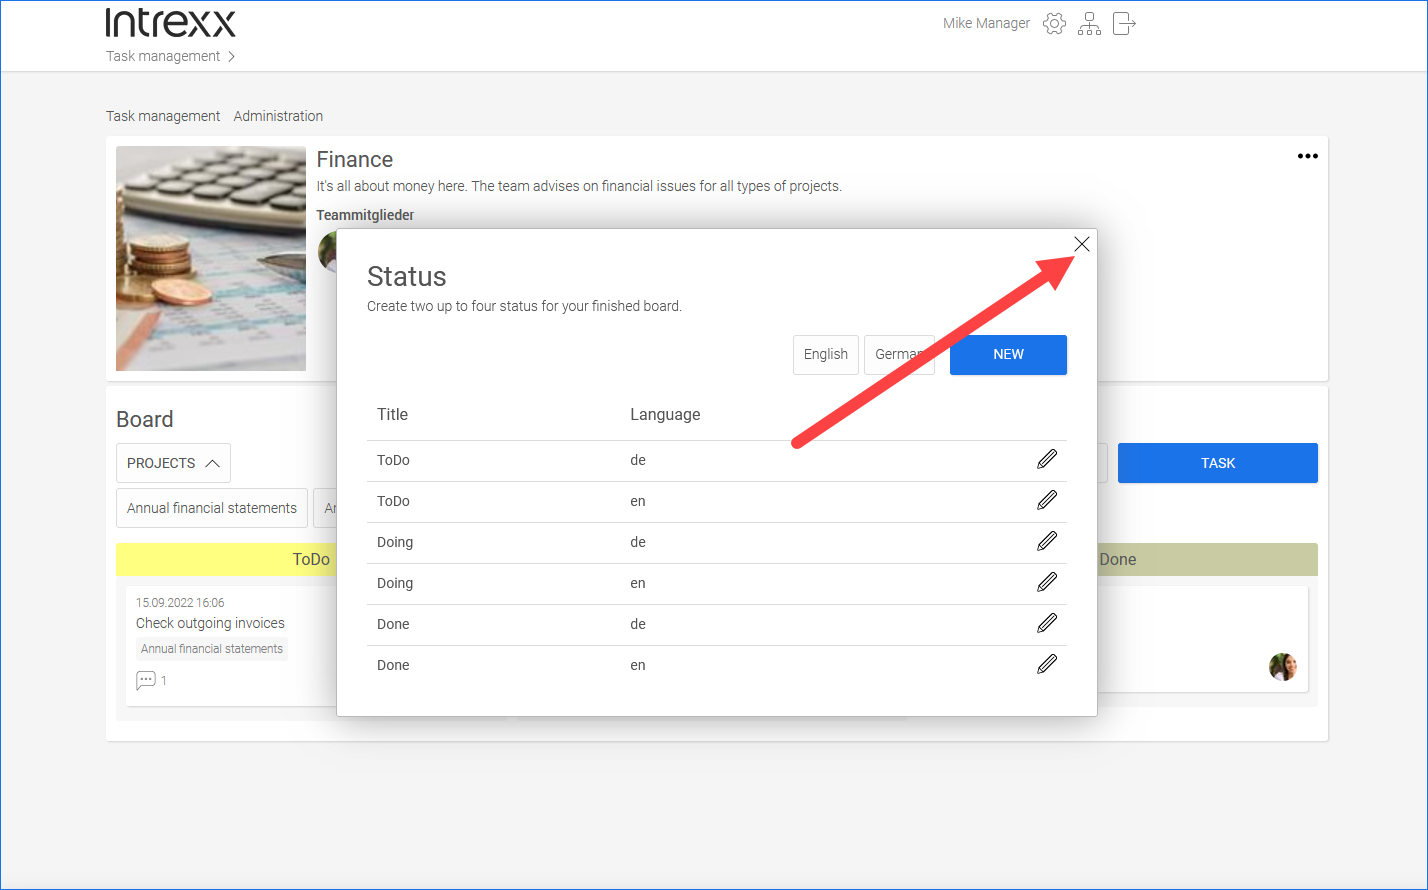
The "Status" dialog box (1) is displayed.
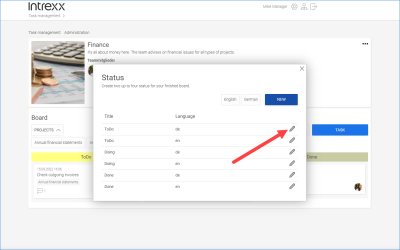
-
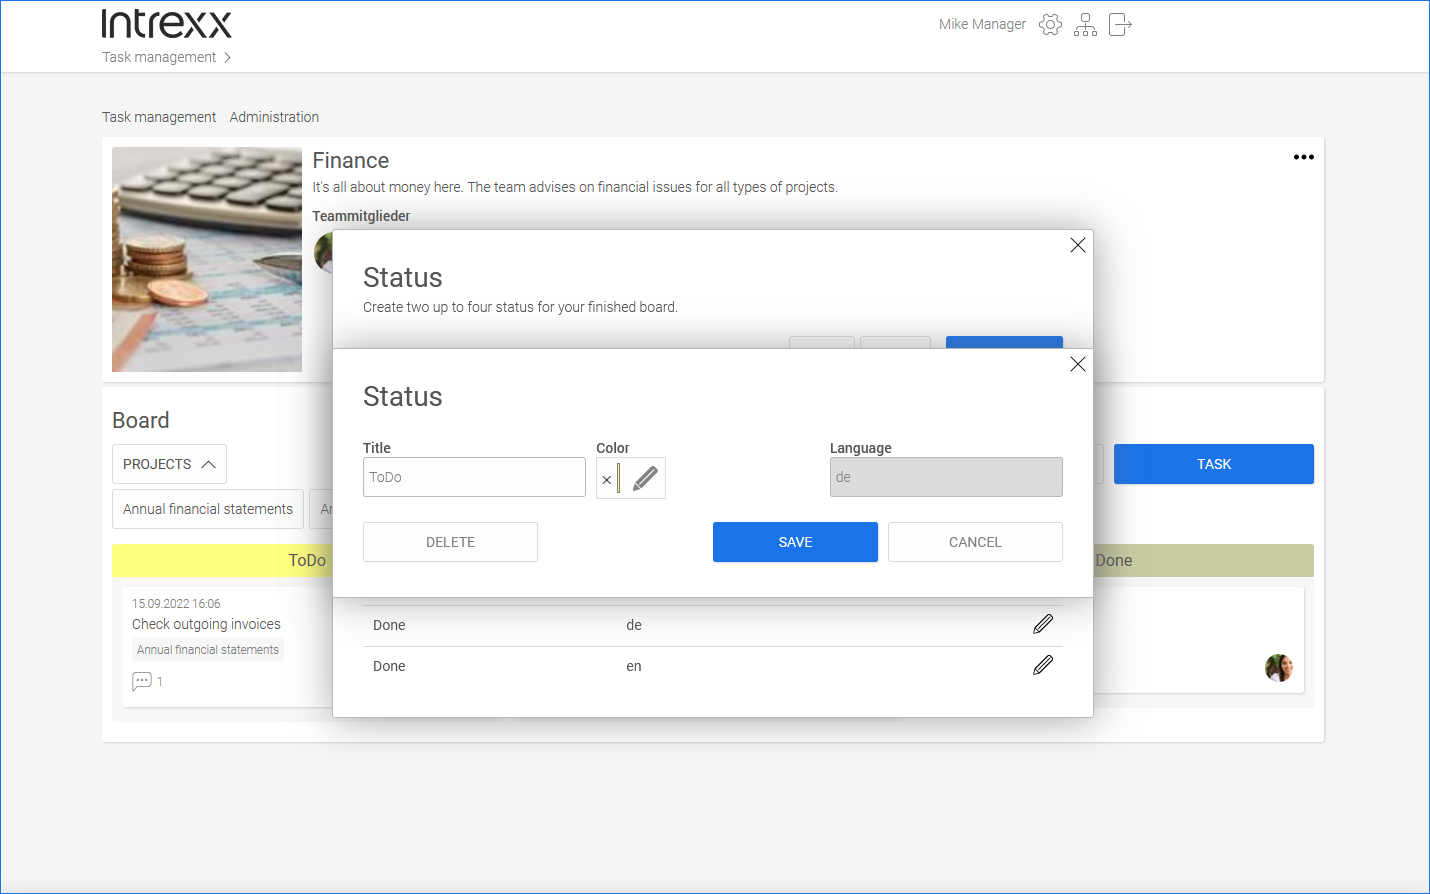
Click on the pencil icon
(edit).The "Status" dialog box (2) is displayed.

-
Enter a title for the status.
-
Adjust the color.
-
You return to the "Status" dialog box (1).
-
Close the "Status" dialog box (1) by clicking "X".
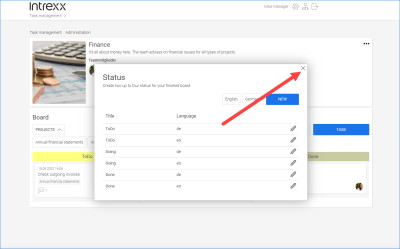
-
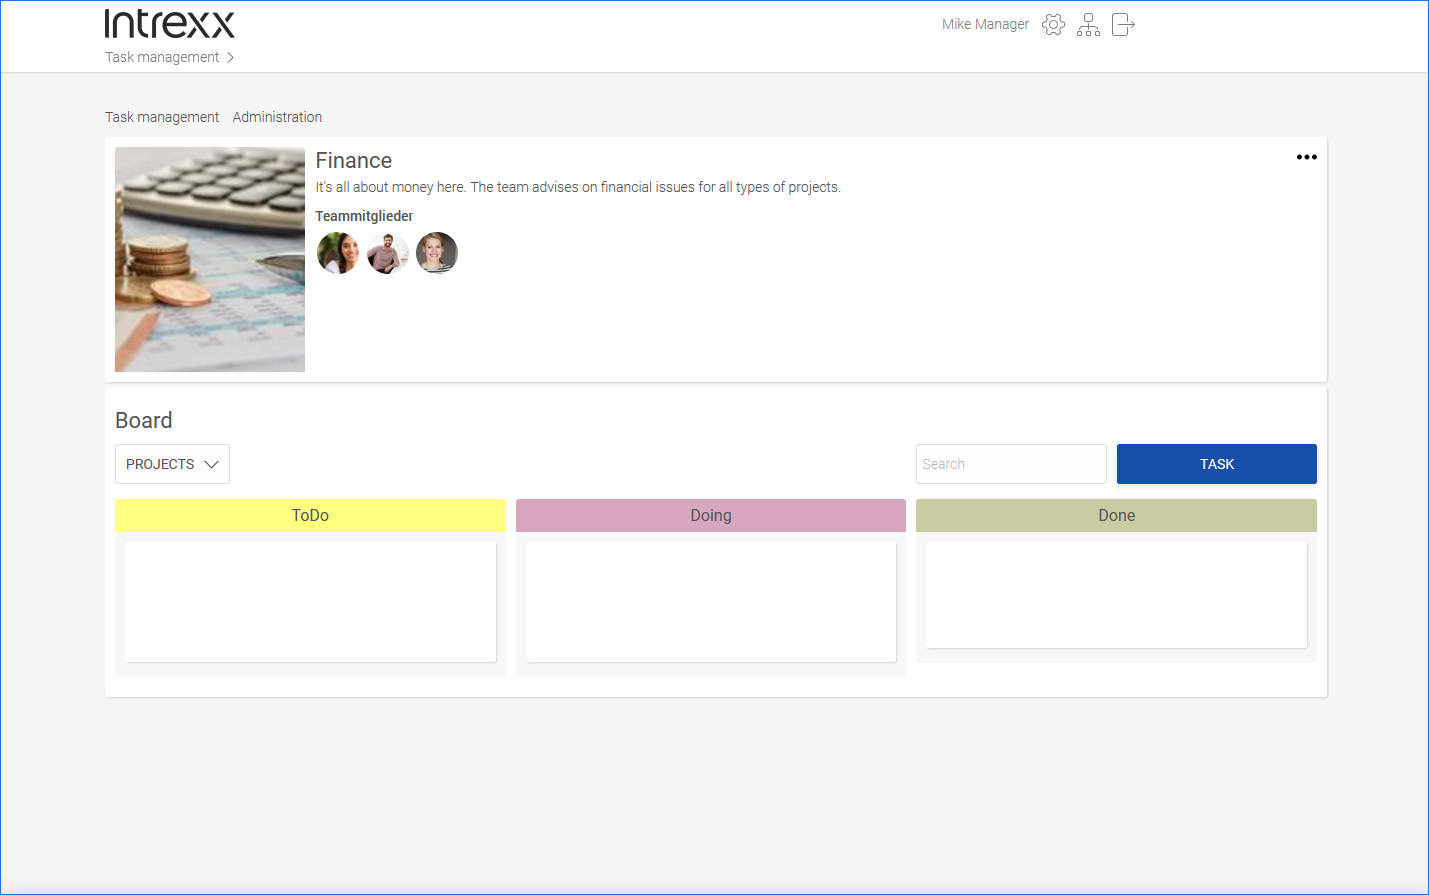
You will return to the team board.

The statuses you have edited are displayed.
More information