Manage phonebook
In the "Manager" role, you have access to the "Administration" page. You can create departments and positions there, among other things.
![]()
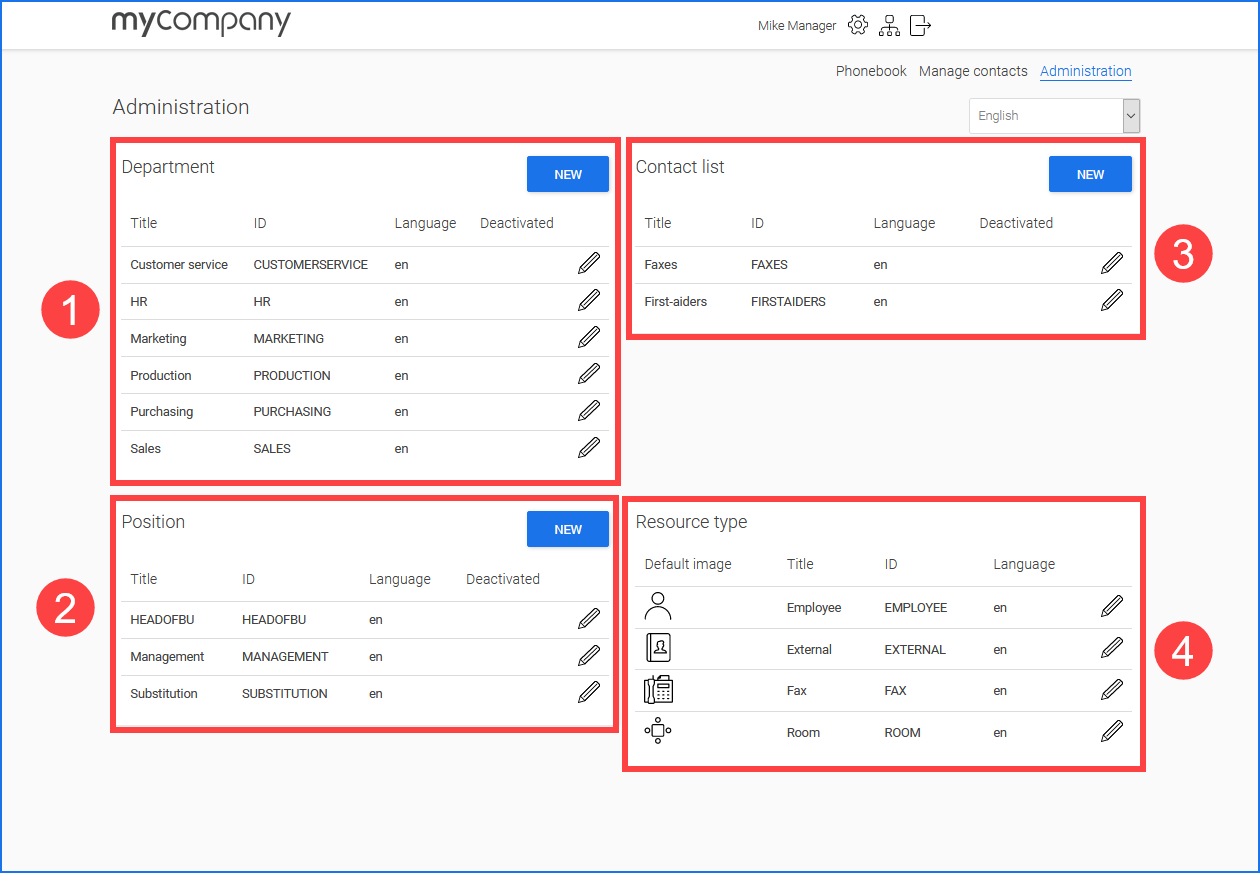
Enter, edit and delete departments
You can create different departments for the phone book.
The departments are displayed on the "Phonebook" page and make it easier to search and find contacts.
Click on to create a new department.
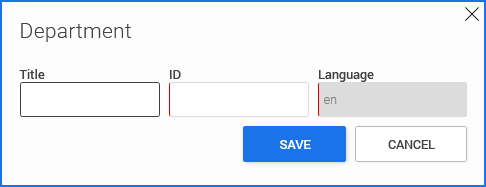
The ID cannot be changed once it has been saved.
Click on pencil icon ![]() (edit) to create or edit a department.
(edit) to create or edit a department.
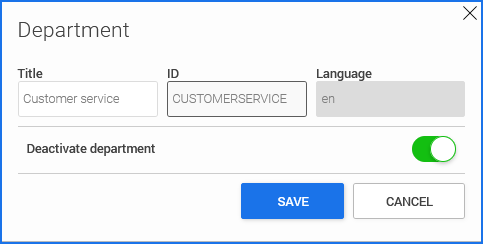
The ID and the language cannot be edited afterwards.
Activate the "Deactivate department" toggle switch in the dialog box to deactivate the department.
Deactivated contact lists are automatically deleted by a background job at regular intervals.
Enter, edit and delete positions
You can define positions. You can assign these to contacts.
Click on to create a new position.
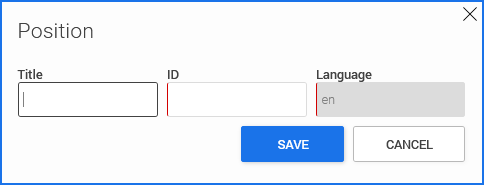
The ID cannot be changed once it has been saved.
Click on pencil icon ![]() (edit) to create or edit a position.
(edit) to create or edit a position.
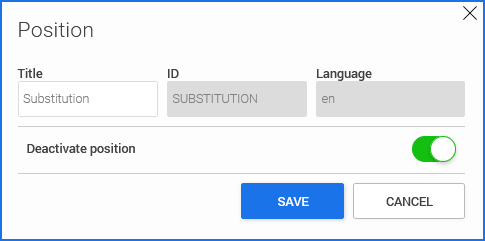
The ID and the language cannot be edited afterwards.
Activate the "Deactivate position" toggle switch in the dialog box to deactivate the department.
Deactivated contact lists are automatically deleted by a background job at regular intervals.
Create, edit and delete categories
You can create contact lists for the phonebook. Categories are suitable for summarizing contacts across departments. This allows you to group together contacts with the same qualifications, for example. For example, contacts can then be found in the phonebook who have English as their first language or who are trained as first-aid helpers.
Click on to create a new category.
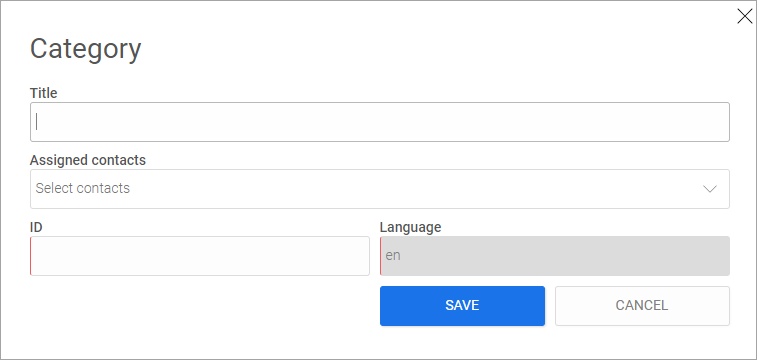
The ID cannot be changed once it has been saved.
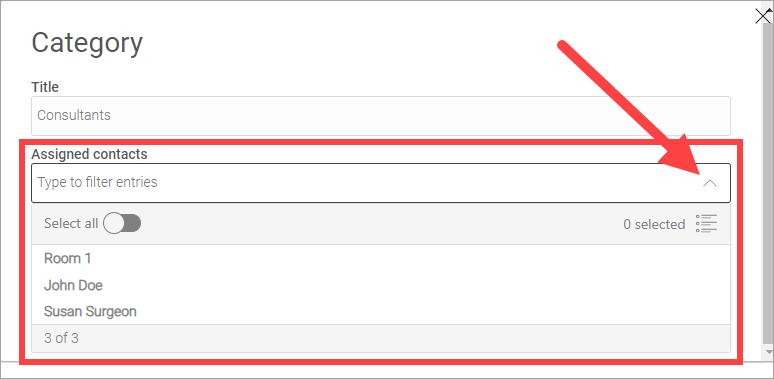
Use the arrow buttons to move contacts from the left to the right pane to assign them to the contact list.
Open the "Assigned contacts" selection list.
Click on the contacts you want to assign to the category.
If you want to assign all contacts to the category, you can activate the "Select all" switch.
Click on pencil icon ![]() (edit) to create or edit a contact list.
(edit) to create or edit a contact list.
The ID and the language cannot be edited afterwards.
Activate the "Deactivate contact list" toggle switch in the dialog box to deactivate the department.
Deactivated contact listsare automatically deleted by a background job at regular intervals.
Edit resource types
Click on the pencil icon ![]() (edit) to edit a resource type.
(edit) to edit a resource type.
You can edit the title and the default image.
More information