Help desk
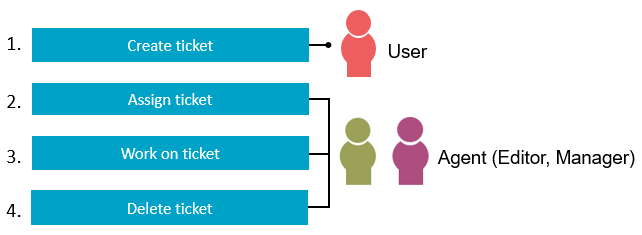
The "Helpdesk" application template is an application that portal users with the "User" role can use to submit tickets. Tickets can be assigned to different categories such as "Hardware" or "Software". Portal users with the "Manager" role can create any number of additional categories for the tickets or change the categories provided by default. The tickets pass through different statuses during their processing. These are, by default, "Open", "Assigned", "In progress" and "Completed". Portal users with the "Editor" or "Manager" role edit the tickets and change the statuses accordingly.
The following diagram represents a typical workflow for creating and editing tickets.
Actions in the portal
Creating a ticket
The "User" role gives you access to the "Ticket" page. You can create tickets there.
![]()
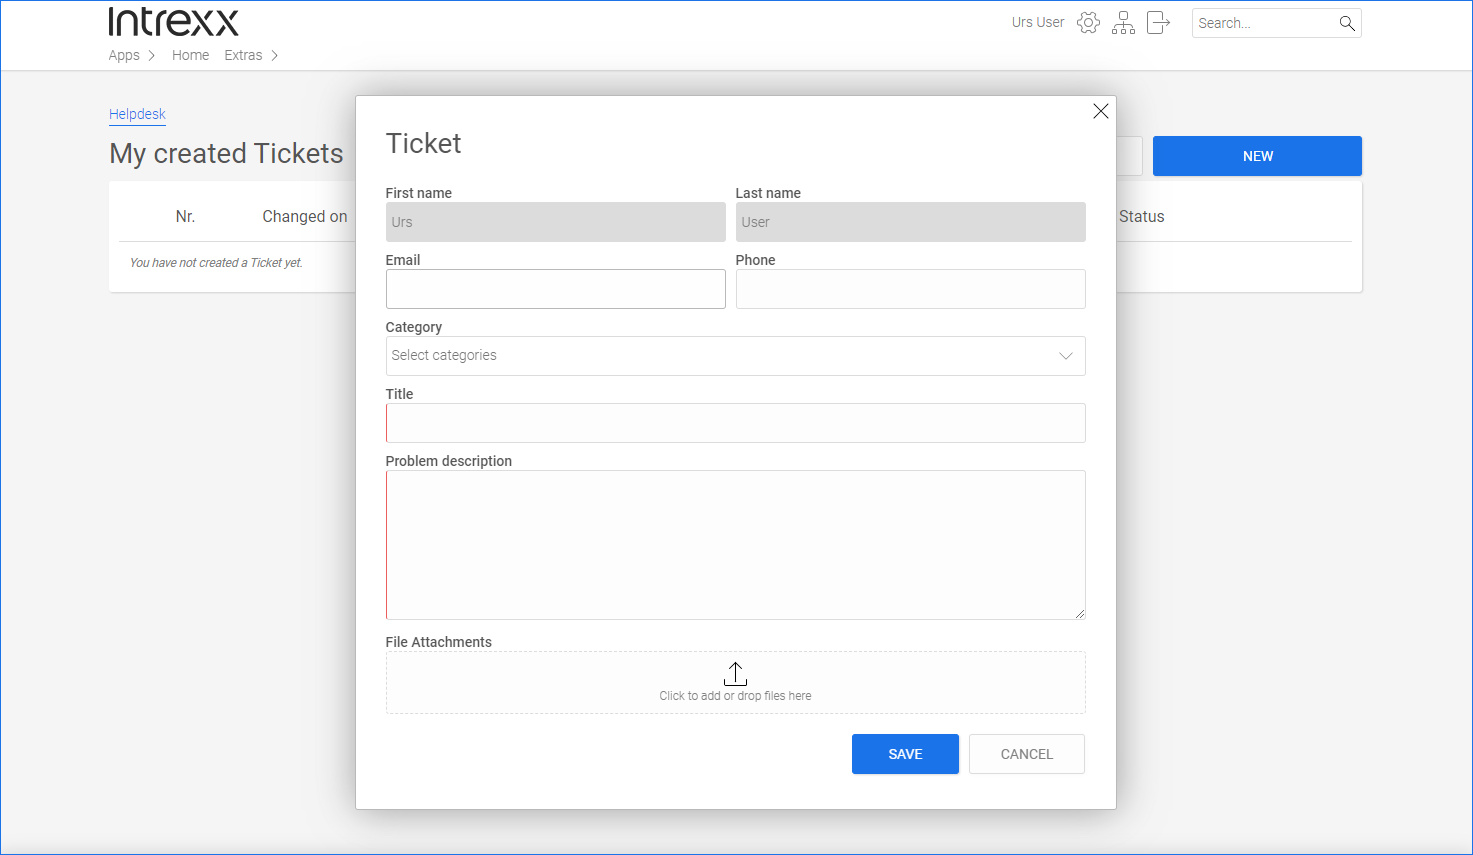
First name, Last name
Your first and last name will be displayed here.
Your email address is displayed here if it is stored in the user master data.
You can also enter an email address manually.
Email notification
You may receive an email notification when a new ticket is created for you, a comment is recorded for your ticket, and when your ticket is completed (resolved). To receive email notifications, the "Email notification" action has to be enabled in the Portal Manager. Compare with the section Send emails.)
Phone
The phone number is displayed here if it is stored in the user master data.
You can also enter a phone number manually.
Categories
You can assign a category to a ticket by opening the "Category" selection list and selecting one or more categories with the mouse.
Title
Enter a meaningful title for your ticket.
Problem description
Enter problem description for your ticket.
File attachments
You can add file attachments to the ticket.
Assign tickets - Enter processor
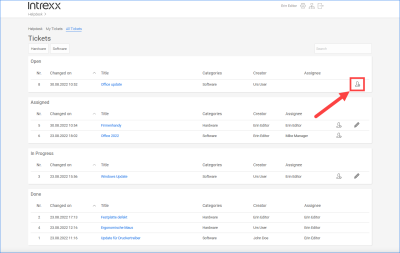
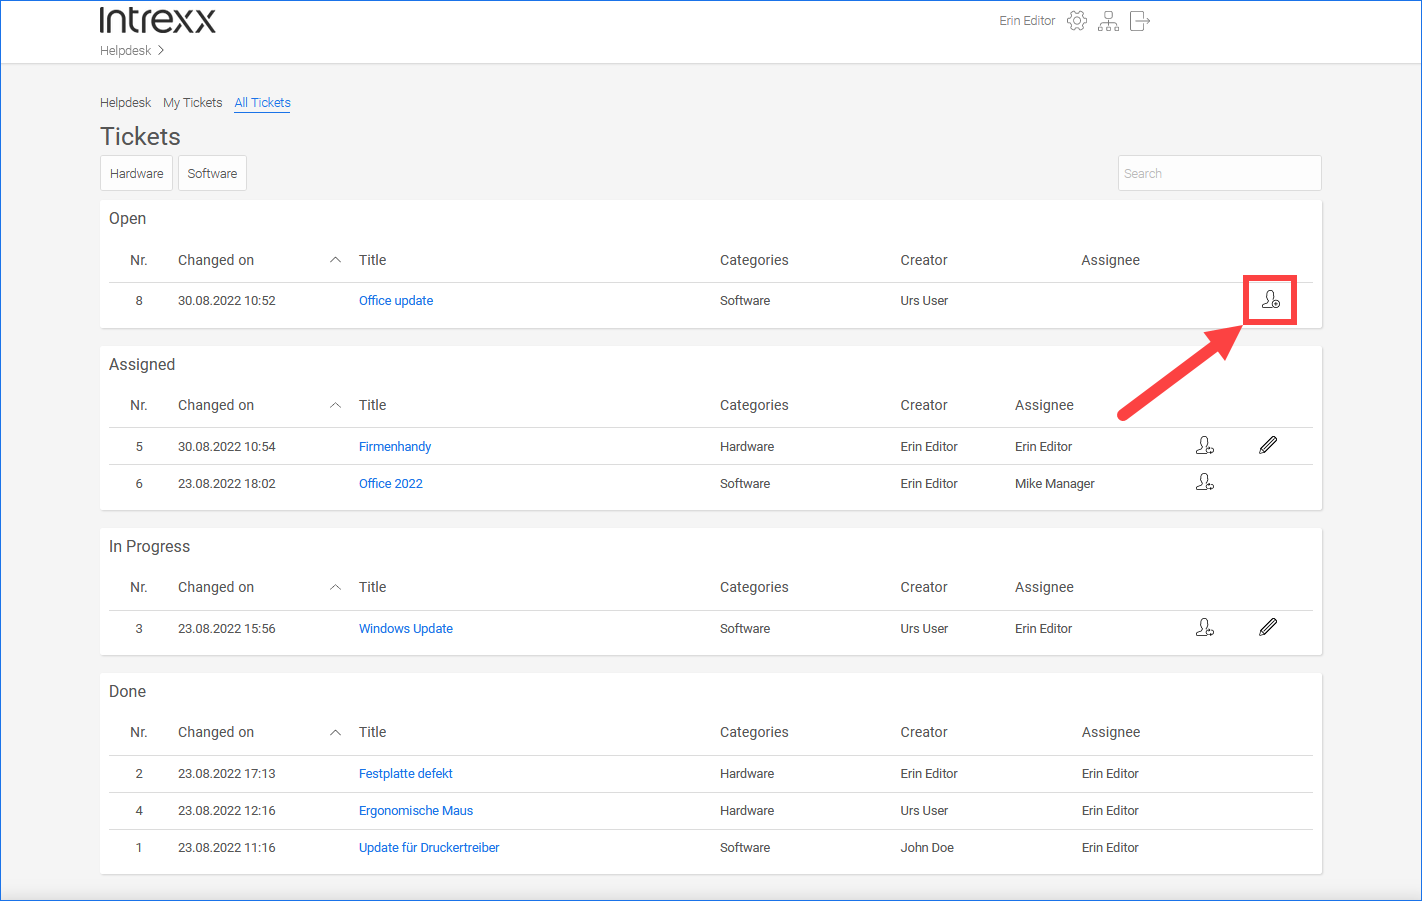
In the "Editor" or "Manager" role, you have access to the "All tickets" page. There you can assign tickets to yourself or to another agent (portal user with the "Editor" or "Manager" role).
Step-by-step guide
-
In the "Open" table, click
 (Assign) for the ticket you want to assign to yourself or to another agent.

The "Enter agent" dialog box is displayed.

-
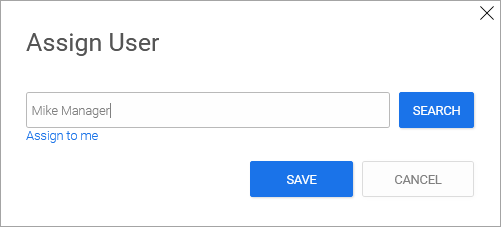
Click Assign to me if you want to assign the ticket to yourself.
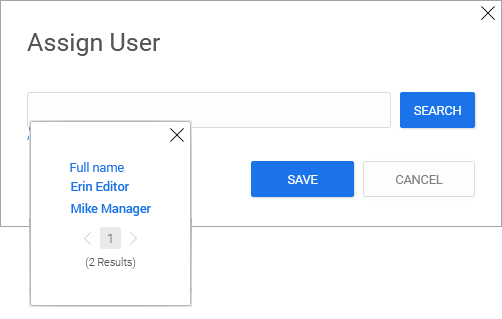
Click on to display all editors.

Or
Enter the first letters of an agent. The name is auto-completed in the Input field.
-
Select the desired agent.
-
Click on .
The ticket is now displayed in the "Assigned" table.
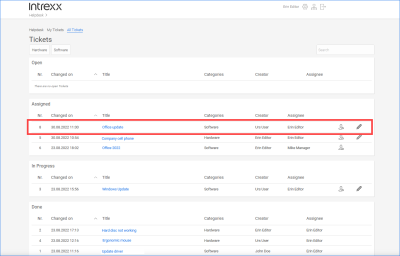
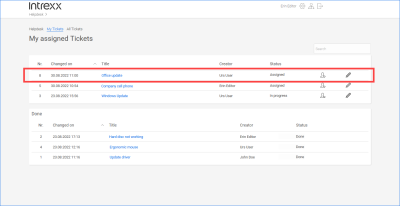
At the same time, the ticket will be displayed on the assigned agent's "My Tickets" page.


Change agent
You can change a ticket’s agent by clicking ![]() (Change agent).
(Change agent).
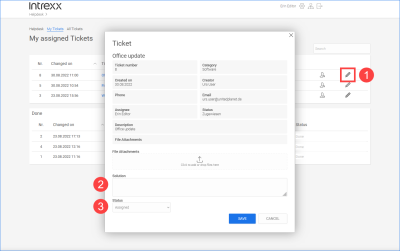
Edit tickets - Change status of a ticket
In the "Editor" and "Manager" role, you can change the status of a ticket. The following describes how to set the status of a ticket to "Completed".
Email notification
You may receive an email notification when a new ticket is created for you, a comment is recorded for your ticket, and when your ticket is completed (resolved). To receive email notifications, the "Email notification" action has to be enabled in the Portal Manager. Compare with the section Send emails.)
Step-by-step guide
To set the status of a ticket to "Completed", proceed as follows:
-
Click on the pencil icon
 (edit) (
 ).
).The "Ticket" dialog box is displayed.
-
In the "Solution" field, enter a text that describes the solution for the ticket (
 ).
). -
In the "Status" field, select the value "Completed" (
 ).
). -

Enter comment for ticket
Permissions
For users to be able to enter, edit, and delete comments, they must belong to the "App_Helpdesk_User" user group. This also applies to users with the "Editor" and "Manager" role.
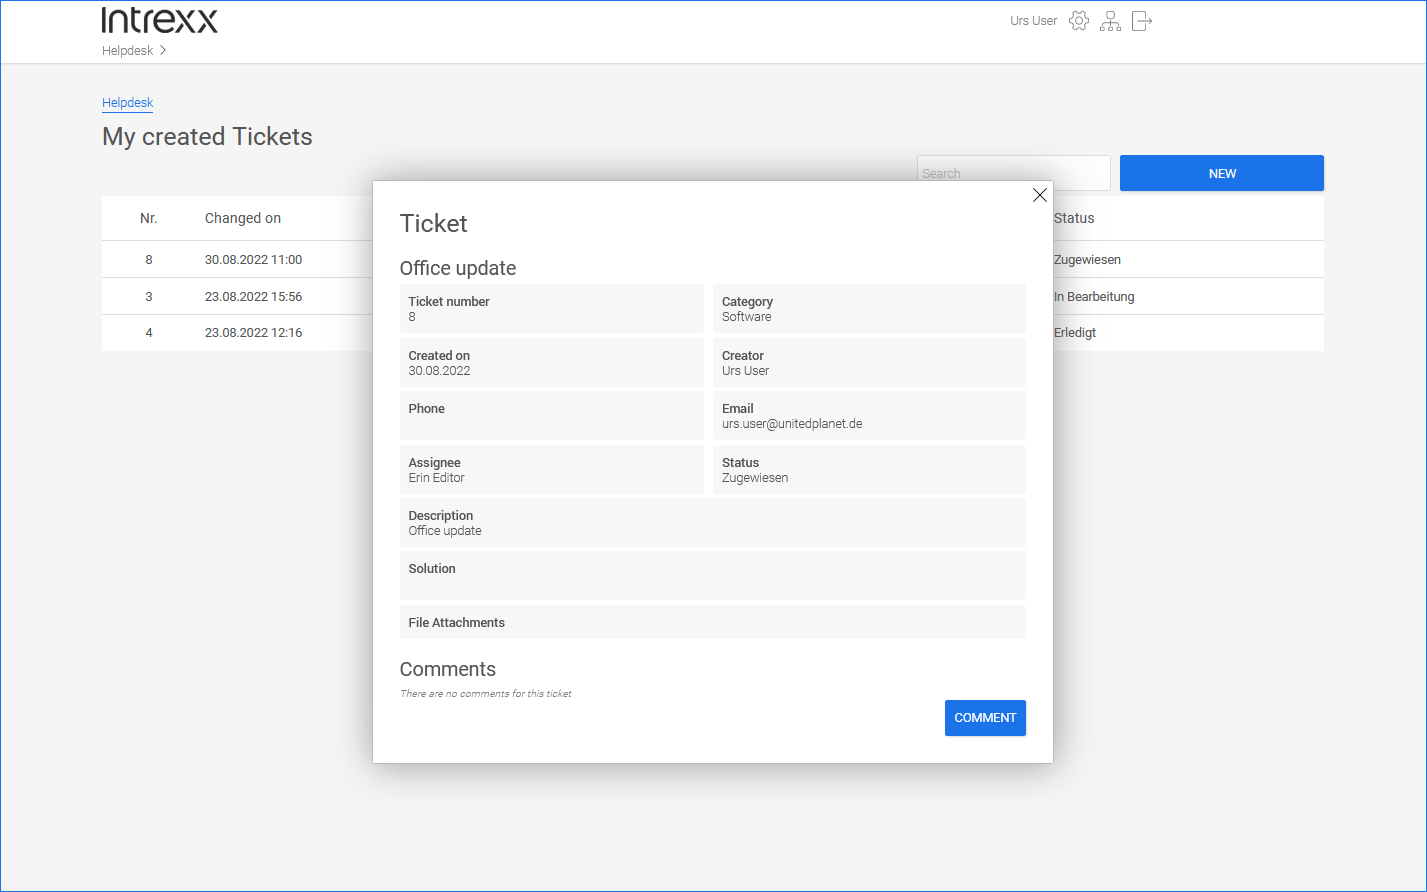
As the creator of a ticket, you can enter comments about your tickets on the "Helpdesk" page. In the comment you can store helpful notes for processing the ticket, among other things.
As the editor of a ticket, you can store comments related to editing the ticket on the "My tickets" and "All tickets" pages.
To enter a comment on a ticket, you need to click on the ticket title.
Email notification
You may receive an email notification when a new ticket is created for you, a comment is recorded for your ticket, and when your ticket is completed (resolved). To receive email notifications, the "Email notification" action has to be enabled in the Portal Manager. Compare with the section Send emails.)
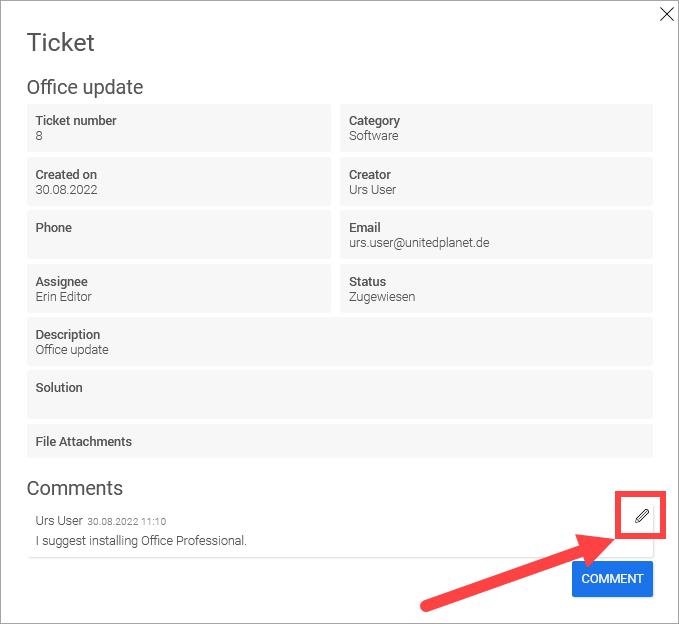
Step-by-step guide
To enter a comment on a ticket, proceed as follows:
-
Click the title of the ticket for which you want to enter a comment.


The "Ticket" dialog box is displayed.

-
Click .
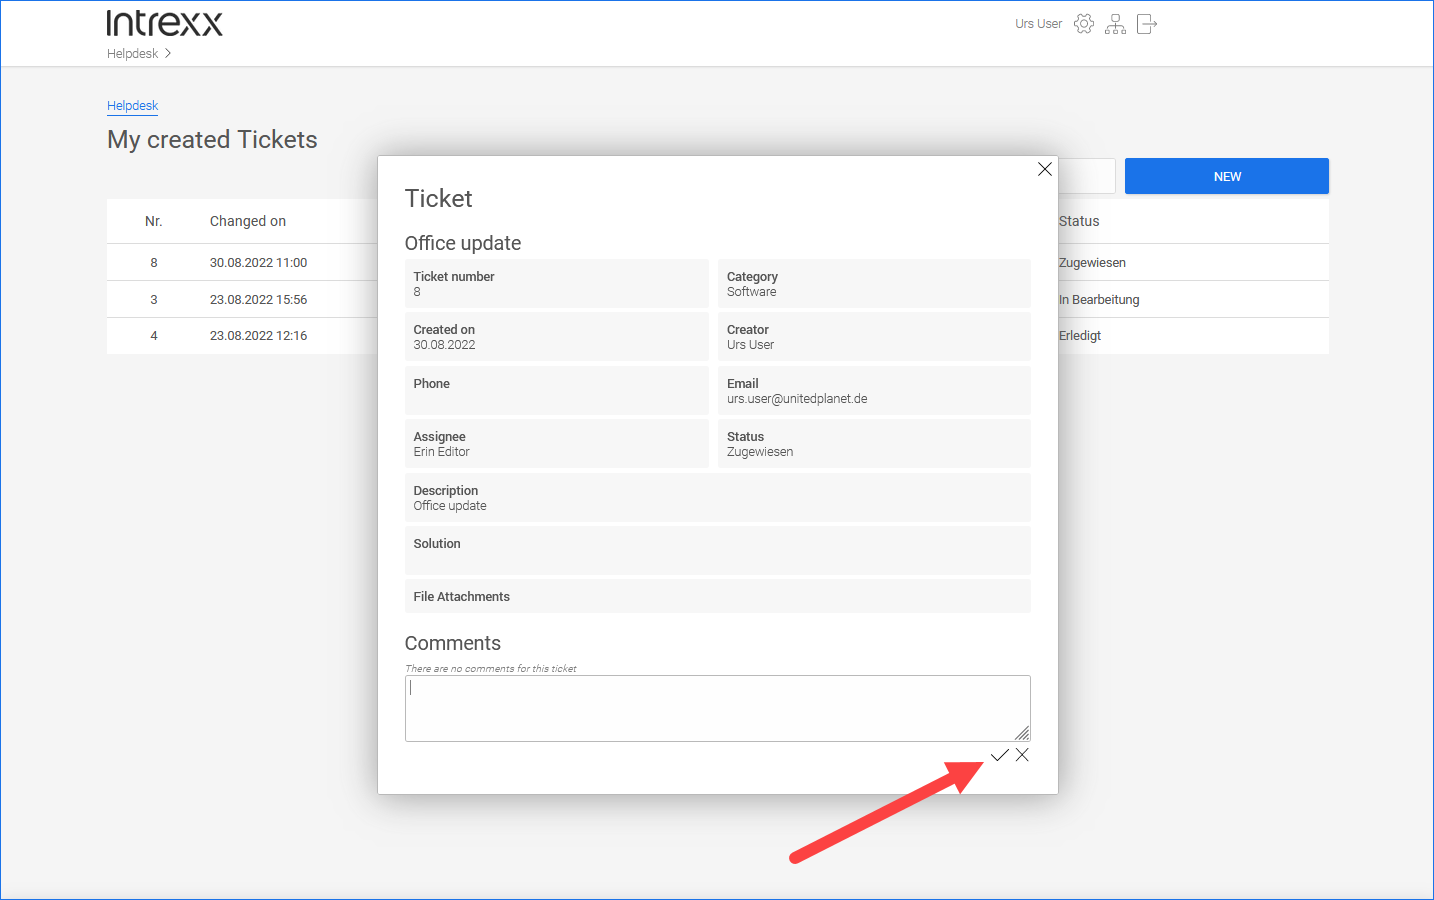
The "Comments" field is displayed.
-
Enter the comment.
-
Click on
 (Save).

You will return to the "Ticket" dialog box.

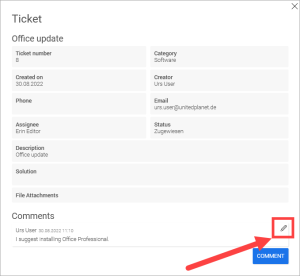
Delete comment
Step-by-step guide
To delete a comment, proceed as follows:
-
Click the title of the ticket for which you want to delete a comment.
-
Place the mouse over the comment field.
The pencil icon
(edit) is displayed.
-
Click on the pencil icon
(edit).The comment field can be edited. The
 (Delete) icon is displayed.
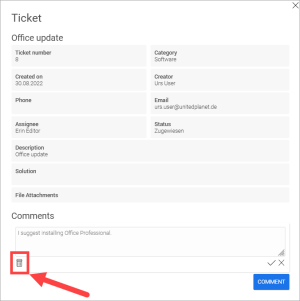
-
Click the
(Delete) icon. -
Confirm the deletion process.

Add status
In the "Manager" role, you have access to the "Administration" page. You can create a new status there.
With the status, you can map the work progress of a ticket. You can create as many statuses as you like and thus define the states of a ticket as granularly as you like.
![]()
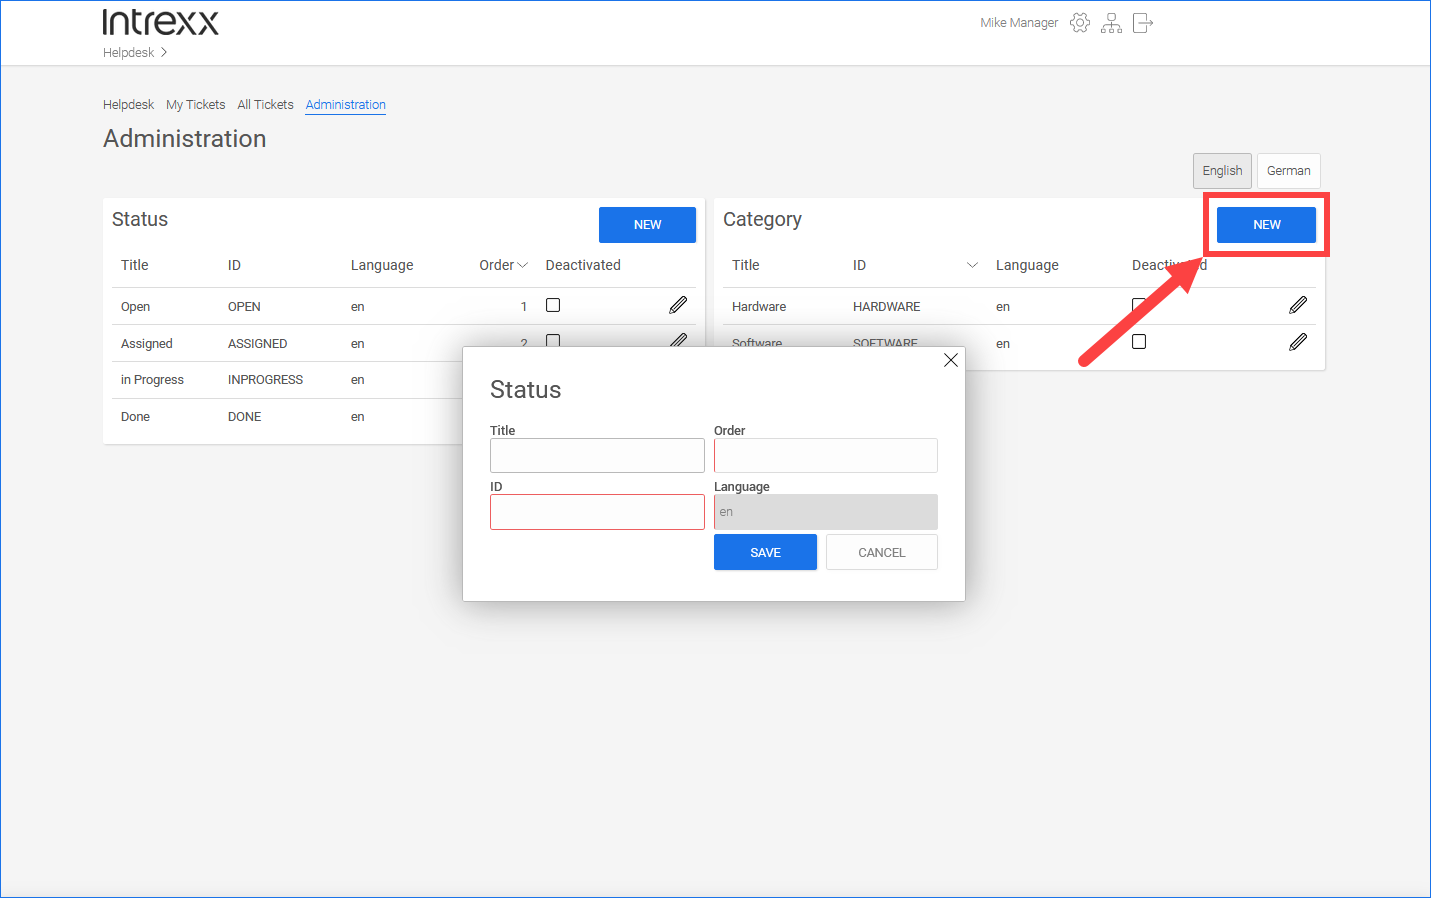
Click on the button to create a new status.
Title
Enter a title for the status here.
ID
Enter an ID for the status here. You can use any characters for the ID.
The ID cannot be changed once it has been saved.
Sort
You can sort the different statuses by entering integers. This can be used to map the workflow that tickets go through.
Customization in Portal Manager
After you add a status, you must create a new table in the Portal Manager that displays the status. If you change a status, you must adjust the table or its filters accordingly.
Add category
In the "Manager" role, you have access to the "Administration" page. You can create new categories there. Tickets can be assigned to a category when they are entered in the portal.
![]()

Click on the button to create a new category.
Title
Enter a title for the category that is as meaningful as possible.
ID
Provide the category with an ID. You can use any characters for the ID.
The ID cannot be changed once it has been saved.
Deleting statuses, deactivating statuses
Statuses cannot be deleted manually. They must be deactivated first. The deletion will then be carried out automatically by Intrexx.
In the "Manager" role, you can deactivate statuses on the "Administration" page.
![]()
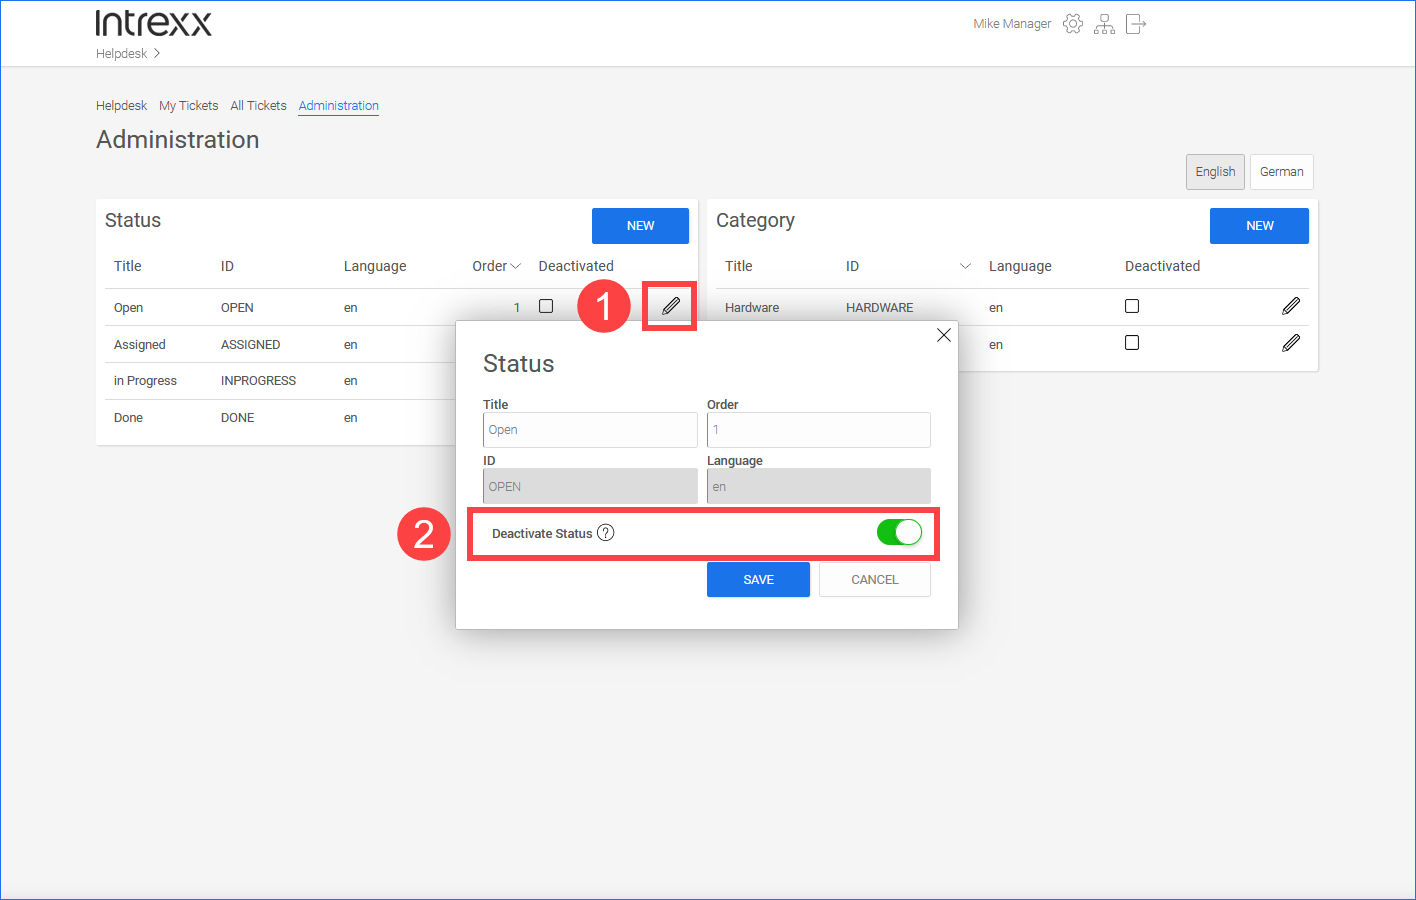
Click on the pencil icon (![]() ) to do that.
) to do that.
In the dialog box, activate the "Deactivate status" toggle (![]() ).
).
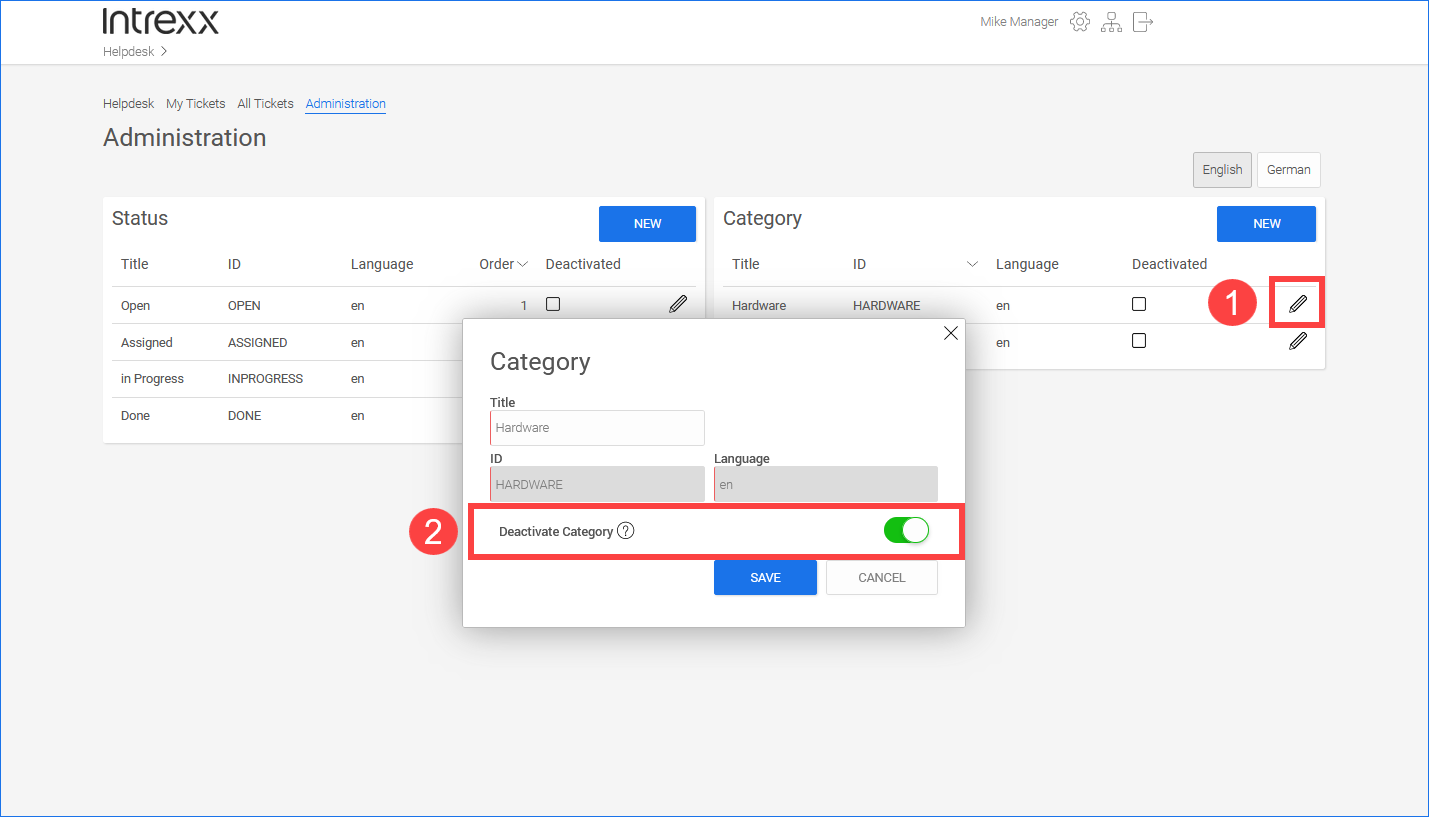
Delete category, deactivate category
Categories cannot be deleted manually. They must be deactivated first. The deletion will then be carried out automatically by Intrexx.
In the "Manager" role, you can deactivate categories on the "Administration" page.
Click on the pencil icon (![]() ) to do that.
) to do that.
In the dialog box, activate the "Deactivate category" toggle (![]() ).
).
![]()
Actions in the Portal Manager
After you have imported the online application template "Helpdesk", it will appear like this in the Portal Manager ("All tickets" page):
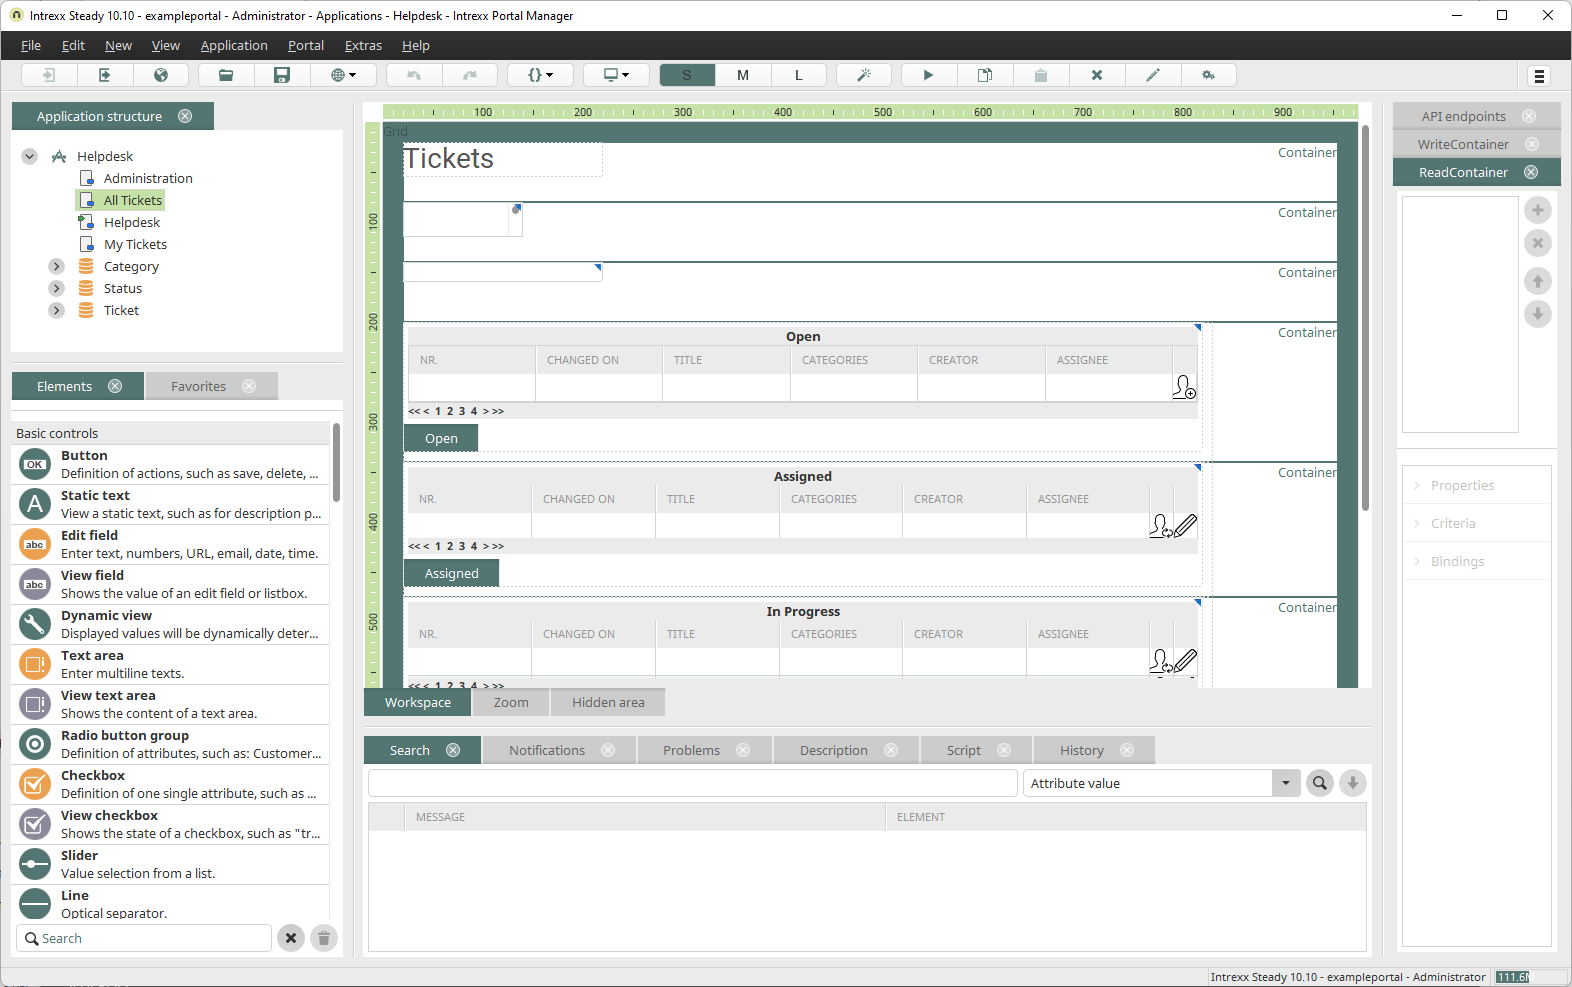
You can edit the application as usual. Please note that the application implements a responsive layout.
Send emails
Email notification options
With the application template “Helpdesk”, notifications about certain changes to ticket statuses can be sent via email. It includes the following status changes:
-
New ticket has been created
As soon as a new ticket is created, each user with the "Editor" role receives a notification by email. The "editors" are therefore constantly informed about newly created or incoming tickets and can react accordingly.
-
Comment has been recorded
As soon as a new comment has been recorded, the creator and the editor of the ticket receive a notification by email.
-
Ticket is resolved
As soon as a ticket is assigned the status "Complete", the creator is notified by email. In addition, the ticket’s current agent receives a copy of the email (cc).
Enable email notifications
The email notifications are part of the "Helpdesk" application template. They are disabled by default. To use email notifications, you must enable them in the "Processes" module.
Step-by-step guide
To enable email notifications, do the following:
-
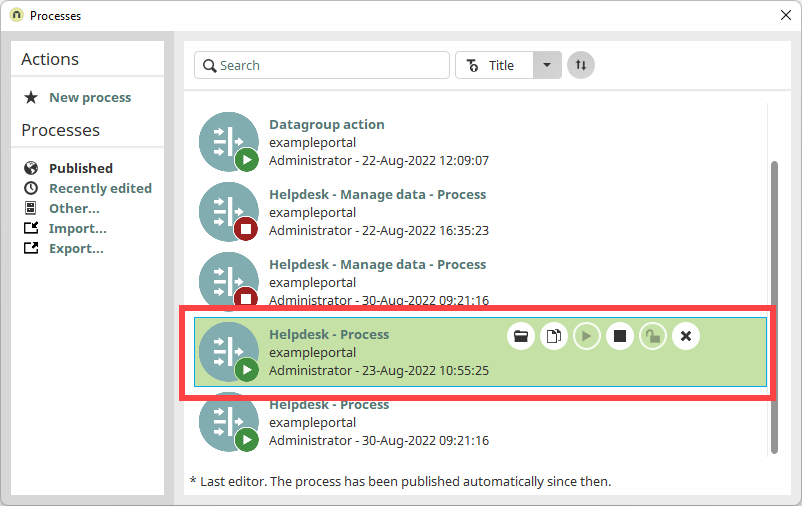
Open the "Processes" module.
-
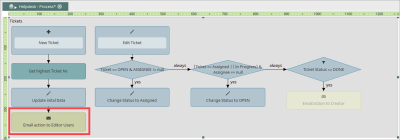
Open the "Helpdesk - Process" process.

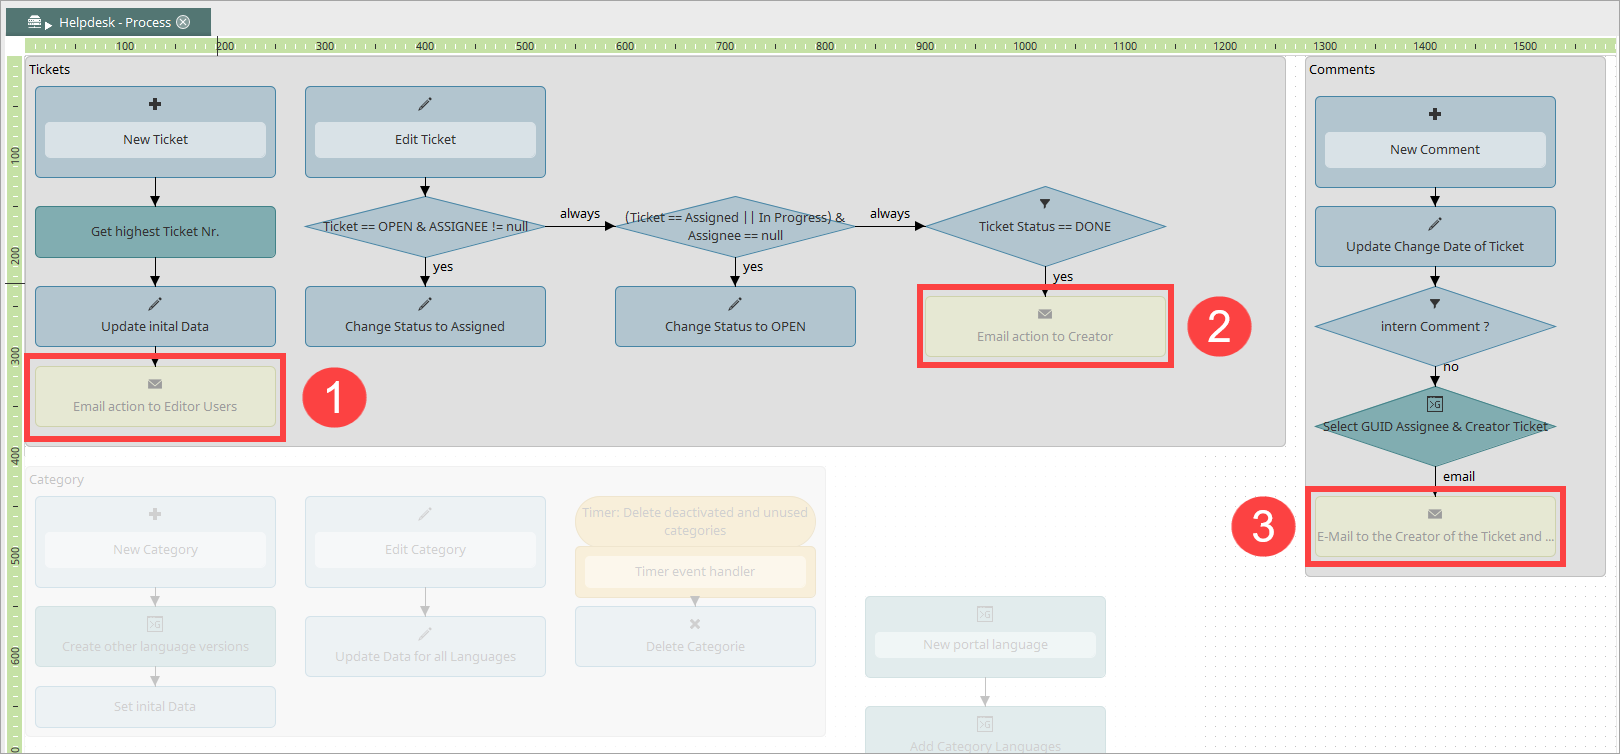
The "Helpdesk - Process" process with the three associated email actions is displayed.

-
Email action to the editor users (
) -
Email action to creator (
) -
Email the creator of the ticket and the person responsible (
)
-
-
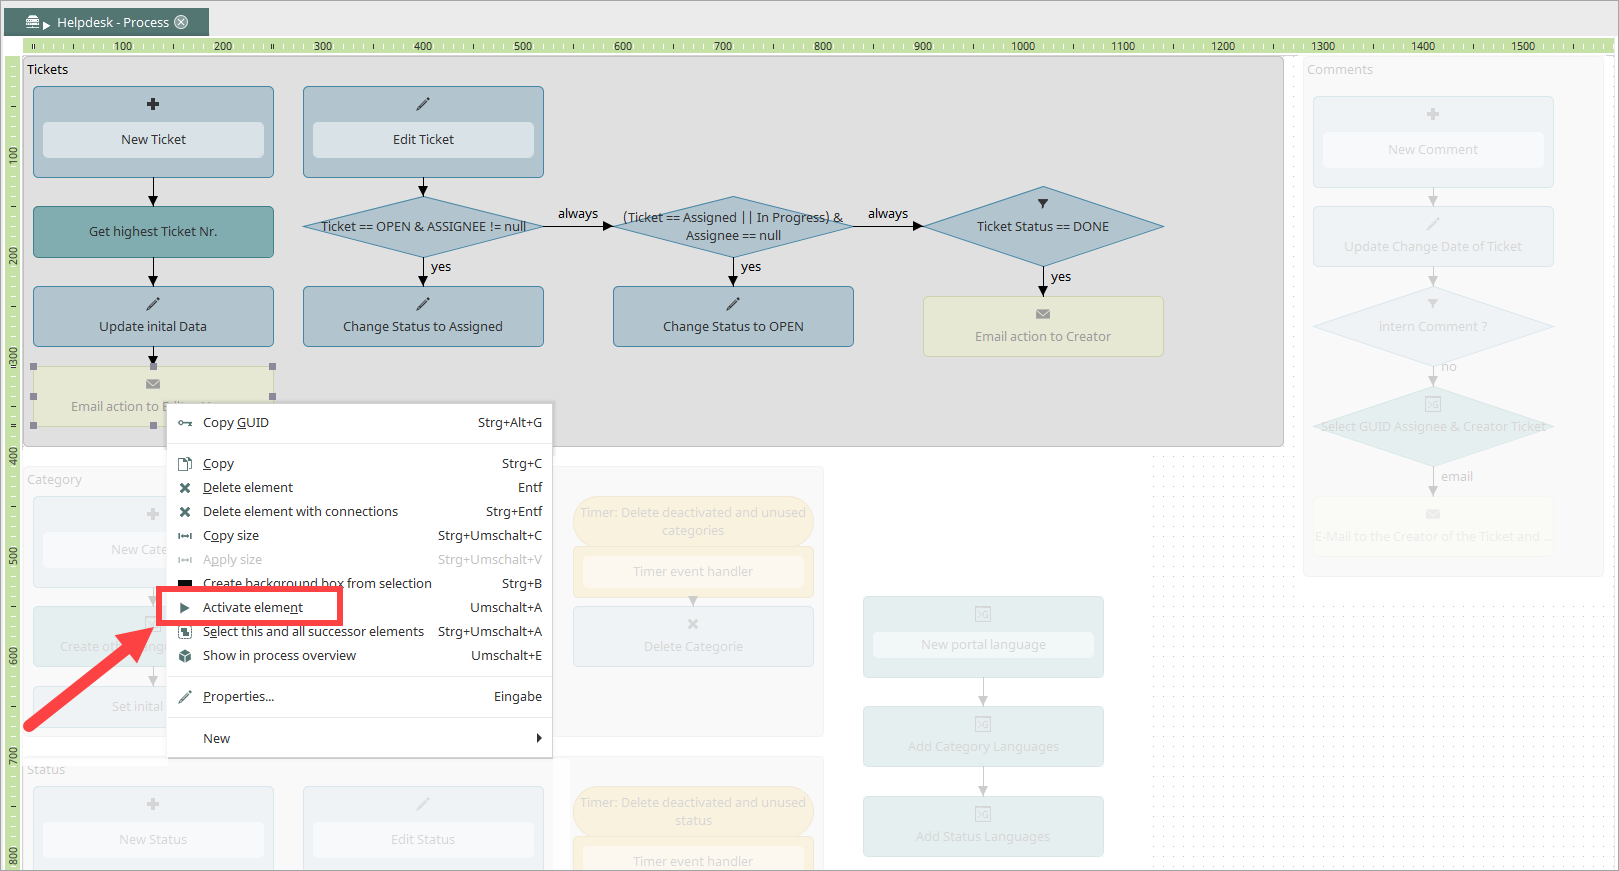
Highlight an email action.
-
Right-click on it.
A context menu is displayed.
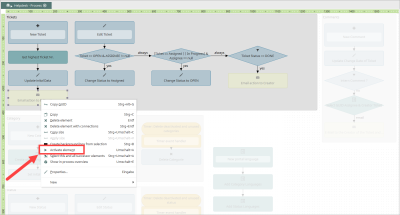
-
Select the "Activate element" option.
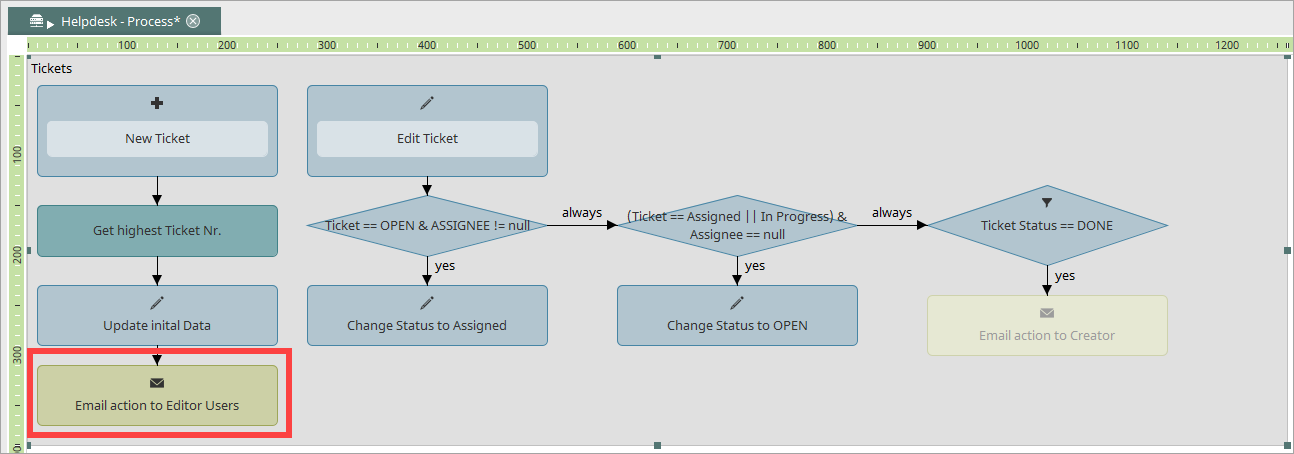
The element is now active.
-
Repeat the process for the other email actions.
More information