Documents
The "Documents" application template provides you with a system with basic functionalities for storing, managing and versioning documents.
After the import and when using the sample data, the application is configured in such a way that every portal user ("User" role) can upload documents to the server.
Portal users with the "Manager" role can, among other things, create and delete categories for documents, which are useful for organizing, searching for and finding documents.
General
Document
|
|
You can upload documents in the "Documents" application template. One document corresponds to one file. You can upload documents in any file formats.
|

Document data records
|
|
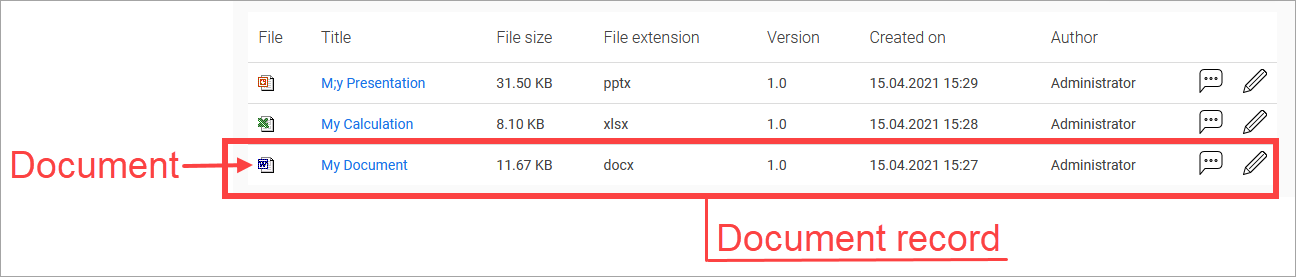
A document data record is created for every document that you upload. In addition to the document itself, the document data record also contains information about the file size, the user who uploaded the document (author) and the date on which the document was uploaded. You can also store comments about the document in the document data record. A document data record must contain at least one document. |
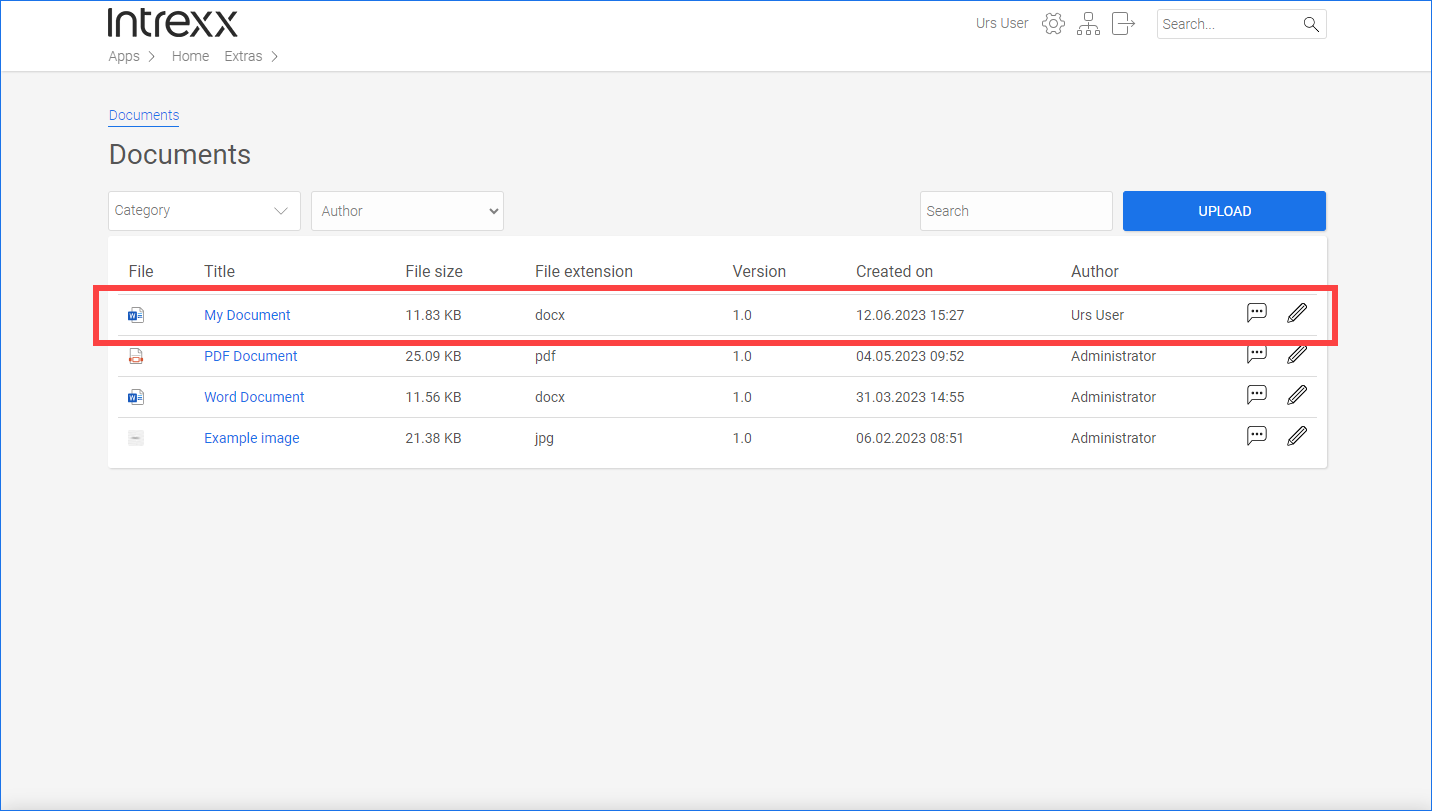
In the portal, a document data record looks like this:
Document version
|
|
You can upload versions of a document. Document versions are stored in the same document data record.
|
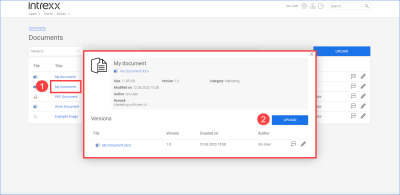
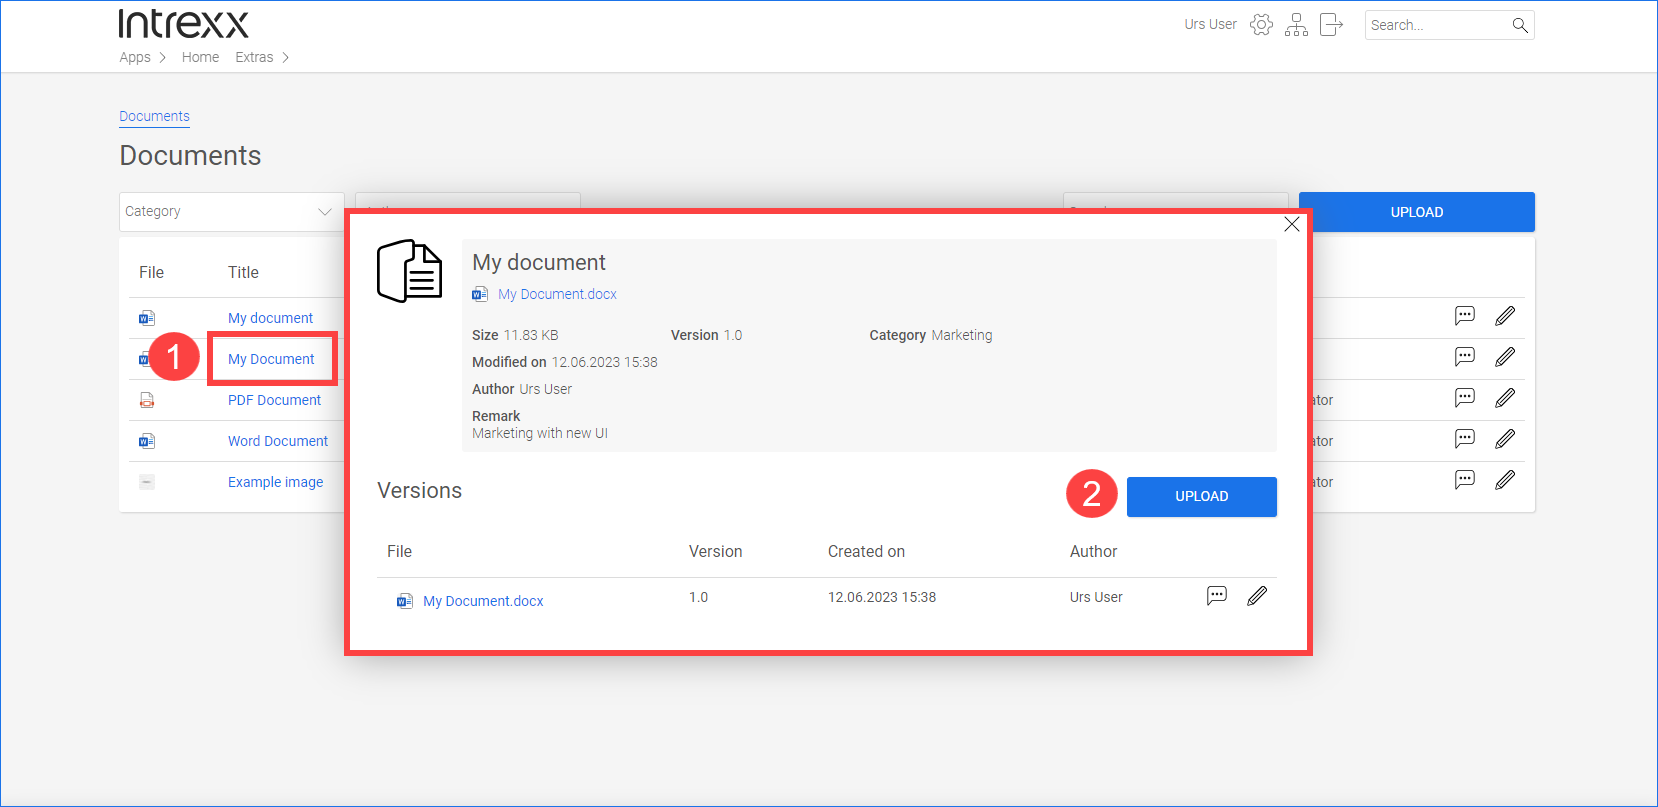
In the portal, a document data record with document versions looks like this:
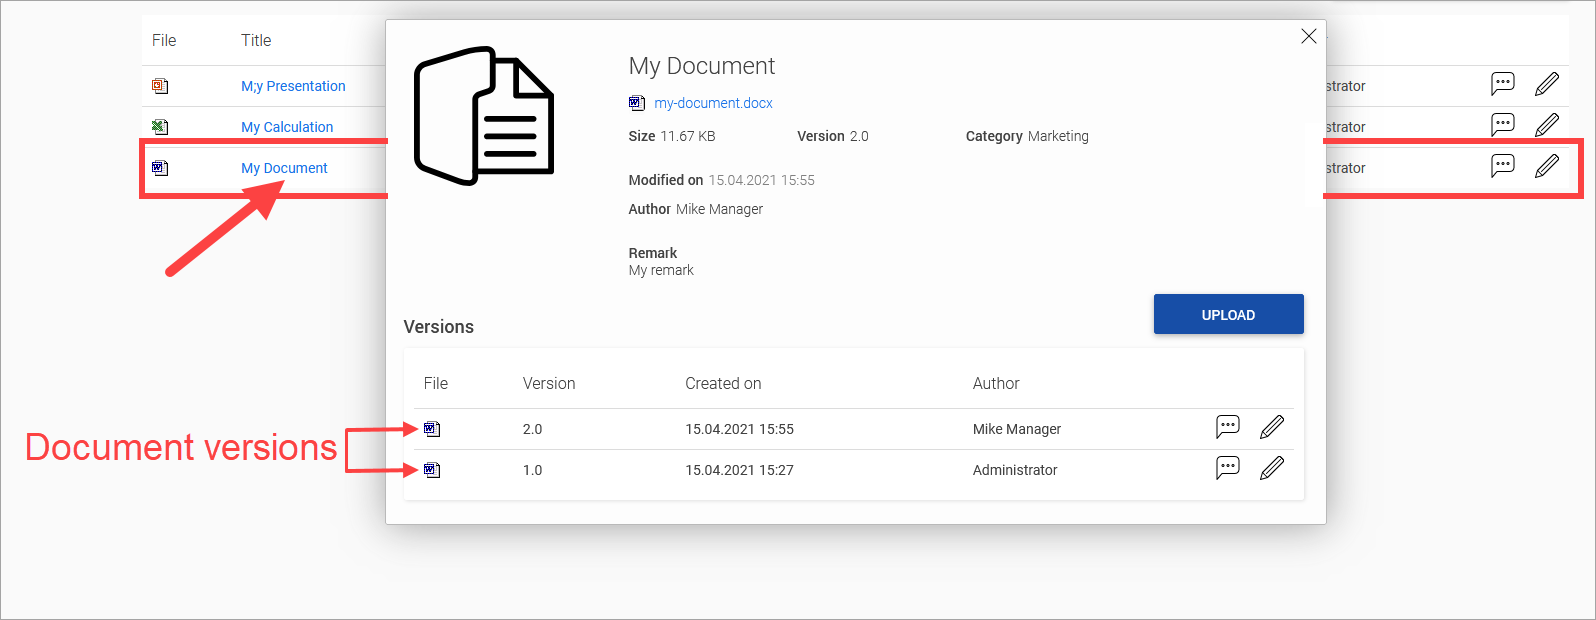
When you click on the title in the document data record, a dialog with the document versions is displayed.
Actions in the portal
Upload documents
Step-by-step guide
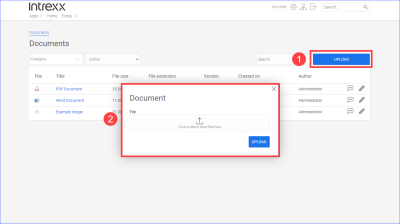
To upload a document, please proceed as follows:
-
Click on (
 ).
).A dialog box where a file can be uploaded will appear (
 ).
).
-
Drag and drop the file onto the designated area of the dialog.
Or
-
Click on the designated area of the dialog and then select the file.
-
Click on .
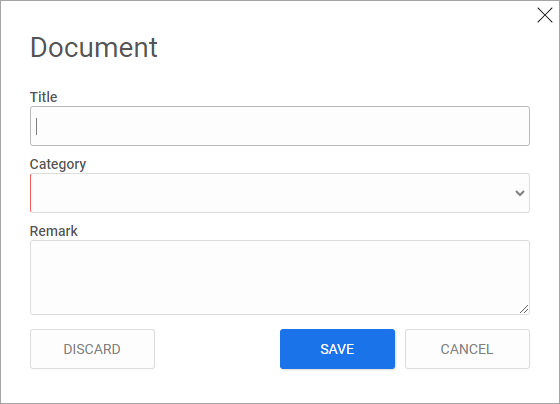
A new dialog will appear.

Enter a title and a category that you want to assign the document to.
The category will be helpful for finding and filtering documents later.
You can create and manage categories in the "Manager" role.
-
(Optional) Add a comment to the document. You can see the comment, among others, in the documents overview. Descriptive comments help you to find out about the contents of a document without having to open it.
-
Click on .
The uploaded document is shown.


Documents with the same file name
You can upload documents with the same file name multiple times. When uploading via the button on the "Documents" page, the application recognizes that a document with the same file name has already been uploaded before.
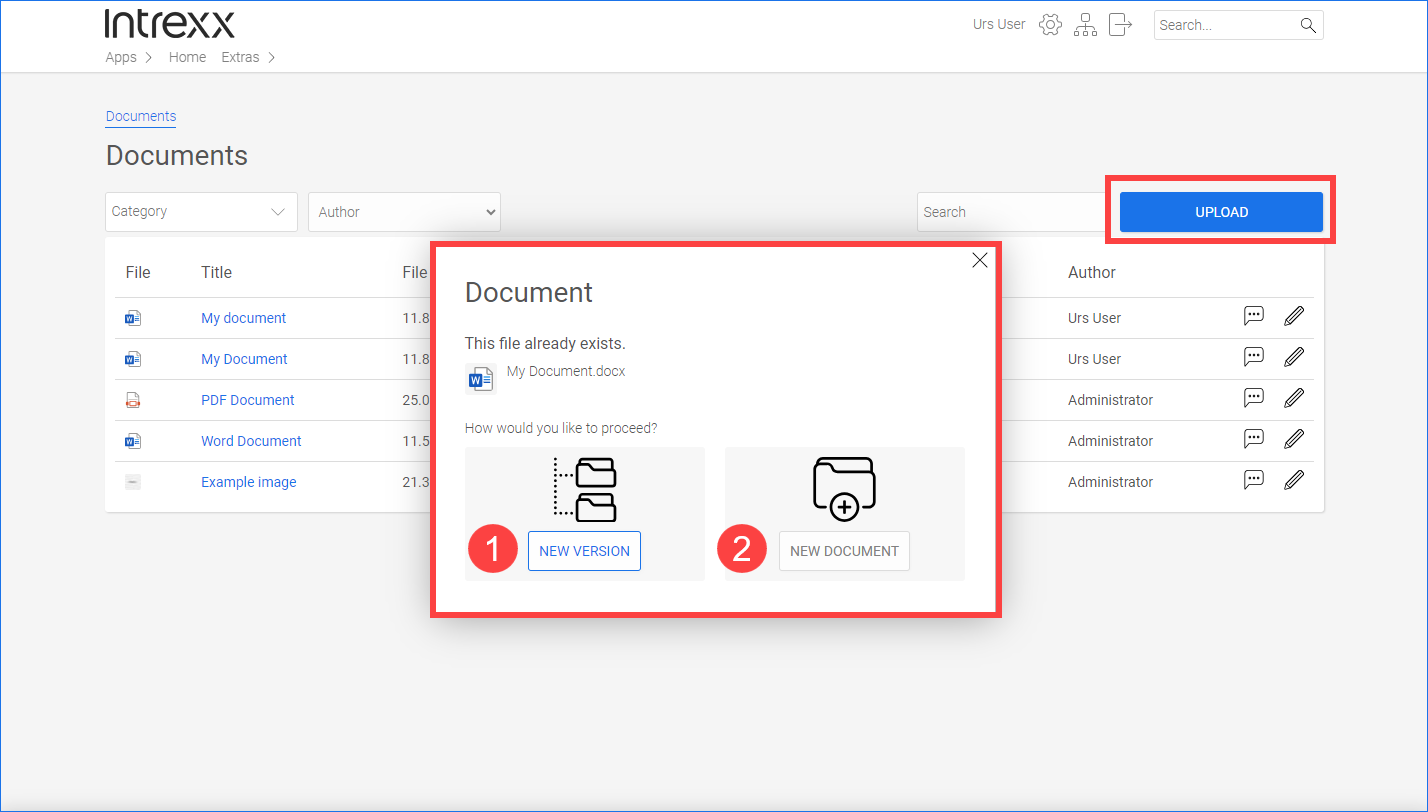
Click on NEW VERSION (![]() ) to create a new version of the existing file with the same file name. In this case, the file will be saved in the same document data record as the existing file with this file name.
) to create a new version of the existing file with the same file name. In this case, the file will be saved in the same document data record as the existing file with this file name.
Click on NEW DOCUMENT (![]() ) to create a new document data record. There are then two documents or files with the same file name in the "Documents" application, and they are stored in two document records.
) to create a new document data record. There are then two documents or files with the same file name in the "Documents" application, and they are stored in two document records.
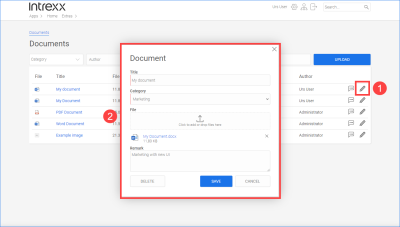
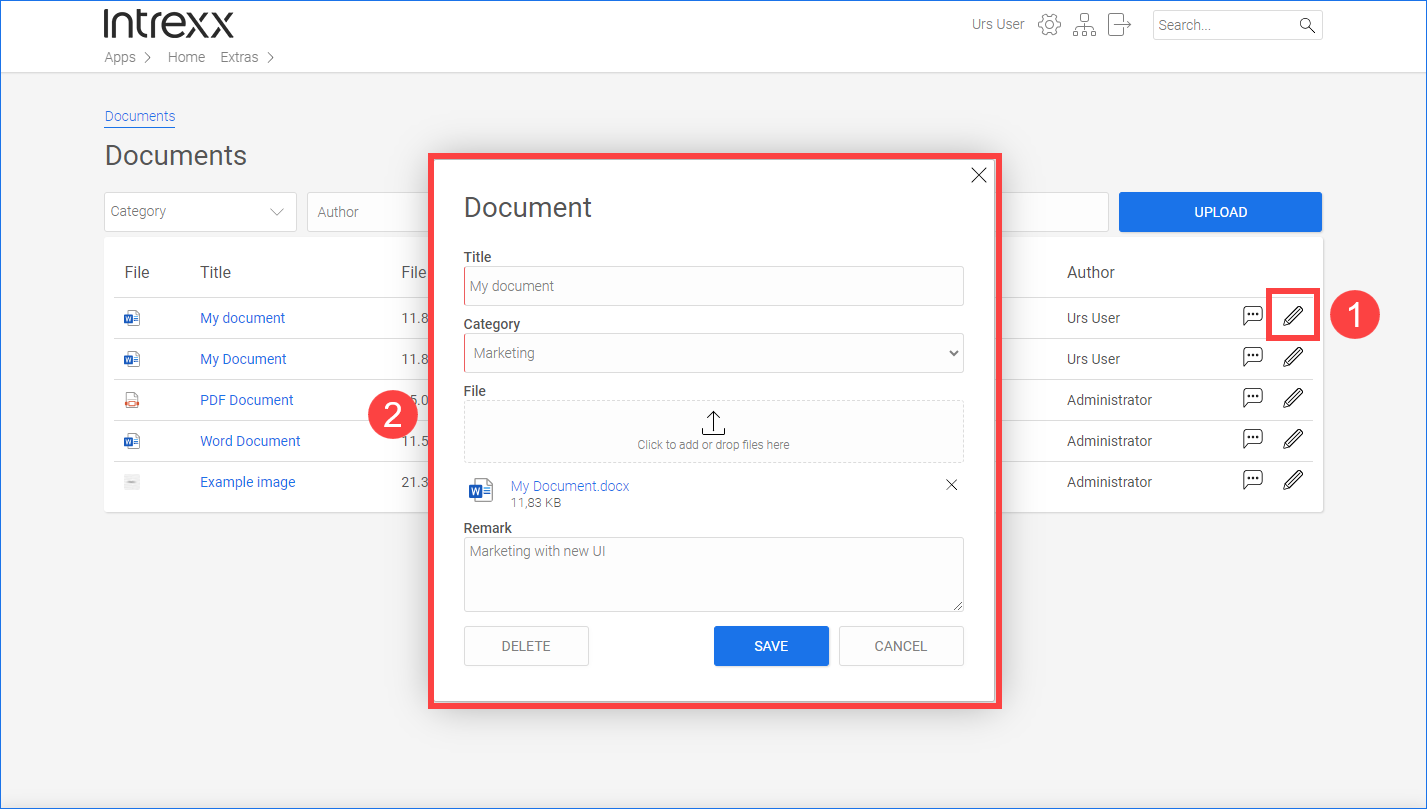
Replace documents
Step-by-step guide
To replace a document in a document data record, please proceed as follows:
-
Click on the pencil icon
 (edit)().
A dialog box for editing the document data record is displayed (
).
-
Drag and drop the file that should replace the currently uploaded file onto the designated area of the dialog.
Or
-
Click on the designated area of the dialog and then select the file.
The old file will be automatically replaced by the newly uploaded file.
(You can also start by deleting the file to be replaced by clicking on the X icon (Delete file) and then uploading the new file).
-
Click on .
You will be returned to the documents overview page.
Upload document versions
You can upload multiple versions of a document. A version of a document is a separate physical file. The "Documents" application template interprets a document as a version of another document when it is uploaded to the same document data record.
Step-by-step guide
To upload a document version, please proceed as follows:
-
Click on the title of the document data record (
).A dialog window will appear.
-
Click on (
).A dialog box for uploading a file and entering a comment is displayed.
-
Drag and drop the file onto the designated area of the dialog.
Or
-
Click on the designated area of the dialog and then select the file.
-
(Optional) Add a comment to the document version. It can be helpful to have notes on the differences in the individual document versions. You can see the comment, among others, in the documents overview. Descriptive comments help you to find out about the contents of a document without having to open it.
-
Click on .
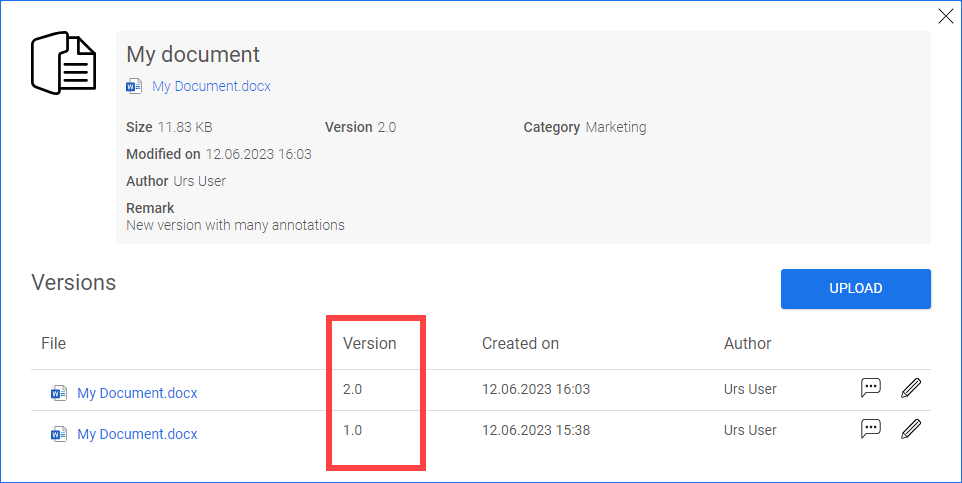
You will be returned to the dialog box where, among other things, the individual document versions are displayed.
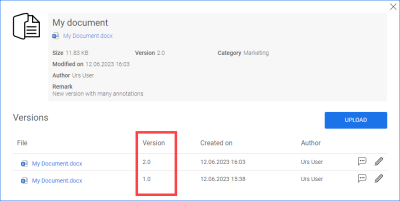
Versioning is performed automatically by the "Documents" application.
-
Close the dialog box by clicking on the X icon.
You will be returned to the documents overview page.
The new document version is displayed in the documents overview. (You may need to refresh).
You can view the recorded comments by clicking on the
 icon (Comment). In the documents overview, the comment for the latest document version is displayed in each case.
Comments for previous document versions can be viewed by clicking on the title and clicking on the
icon of each document version in the displayed dialog box.
Delete documents
In the "User" role, you can delete documents or document data records that you have uploaded yourself.
In the "Manager" role you can delete all documents and/or document data records.
Step-by-step guide
To delete a document, please proceed as follows:
-
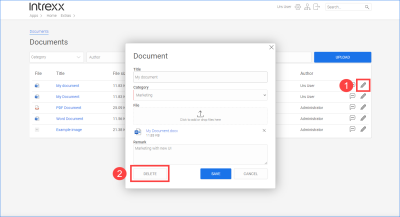
Click on the pencil icon
(edit) ().A dialog window will appear.
-
Click on (
).The document data record will be deleted.
Please note If the document data record contains document versions, all document versions will be deleted.
To learn how to delete individual document versions, see the section Delete document versions.

Delete document versions
Step-by-step guide
To delete a document version, please proceed as follows:
-
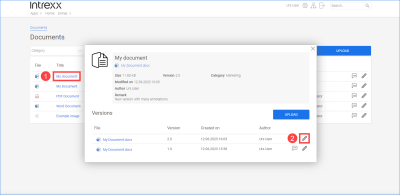
Click on the title of the document data record (
).A dialog window will appear.
-
Click on the (
).A dialog window will appear.
-
Click on .

Add category
In the "Manager" role, you have access to the "Administration" page. You can create new categories there. Categories make it easier to sort and find documents. When you upload a document, it must be assigned to a category. The categories are displayed on the "Documents" page.
![]()
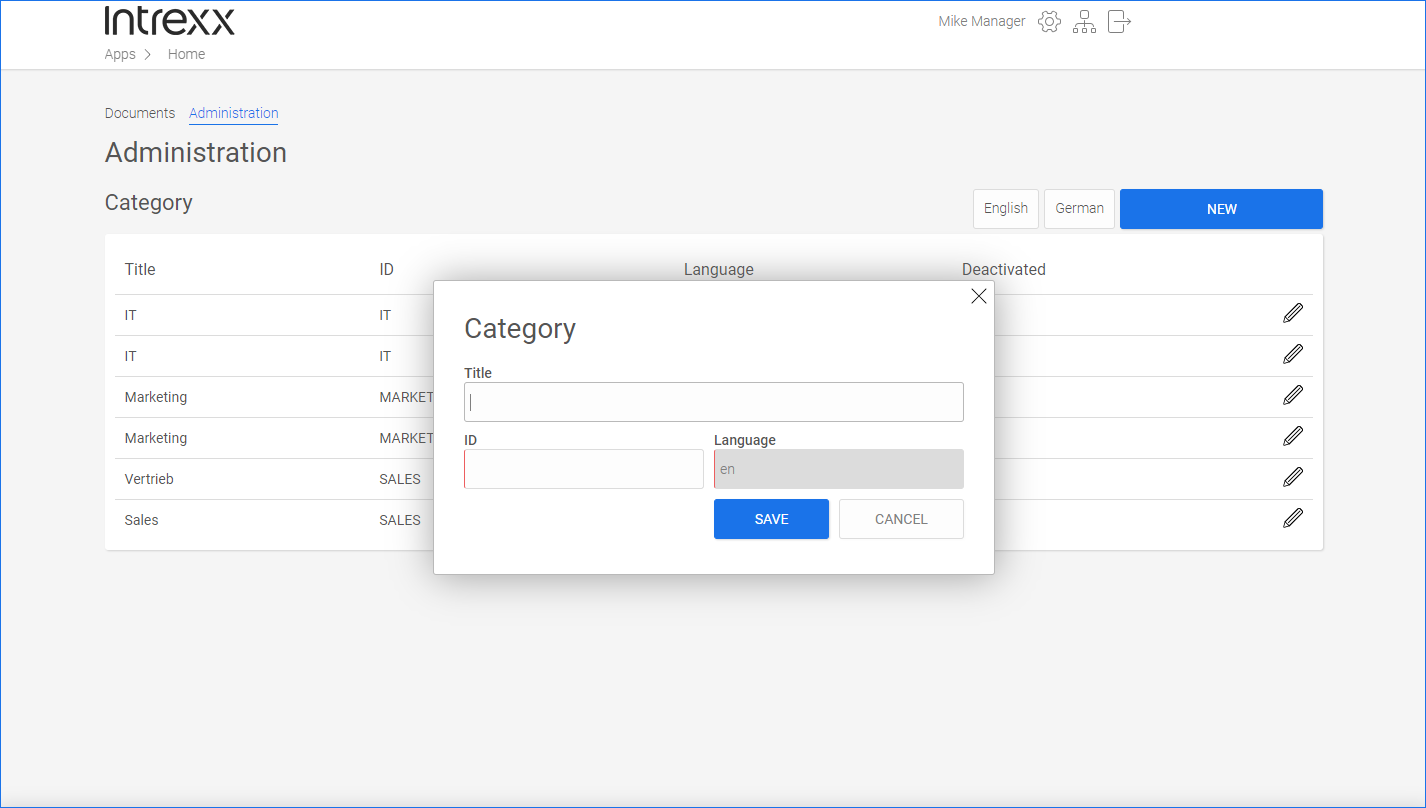
Click on the button to create a new category.
The ID cannot be changed once it has been saved.
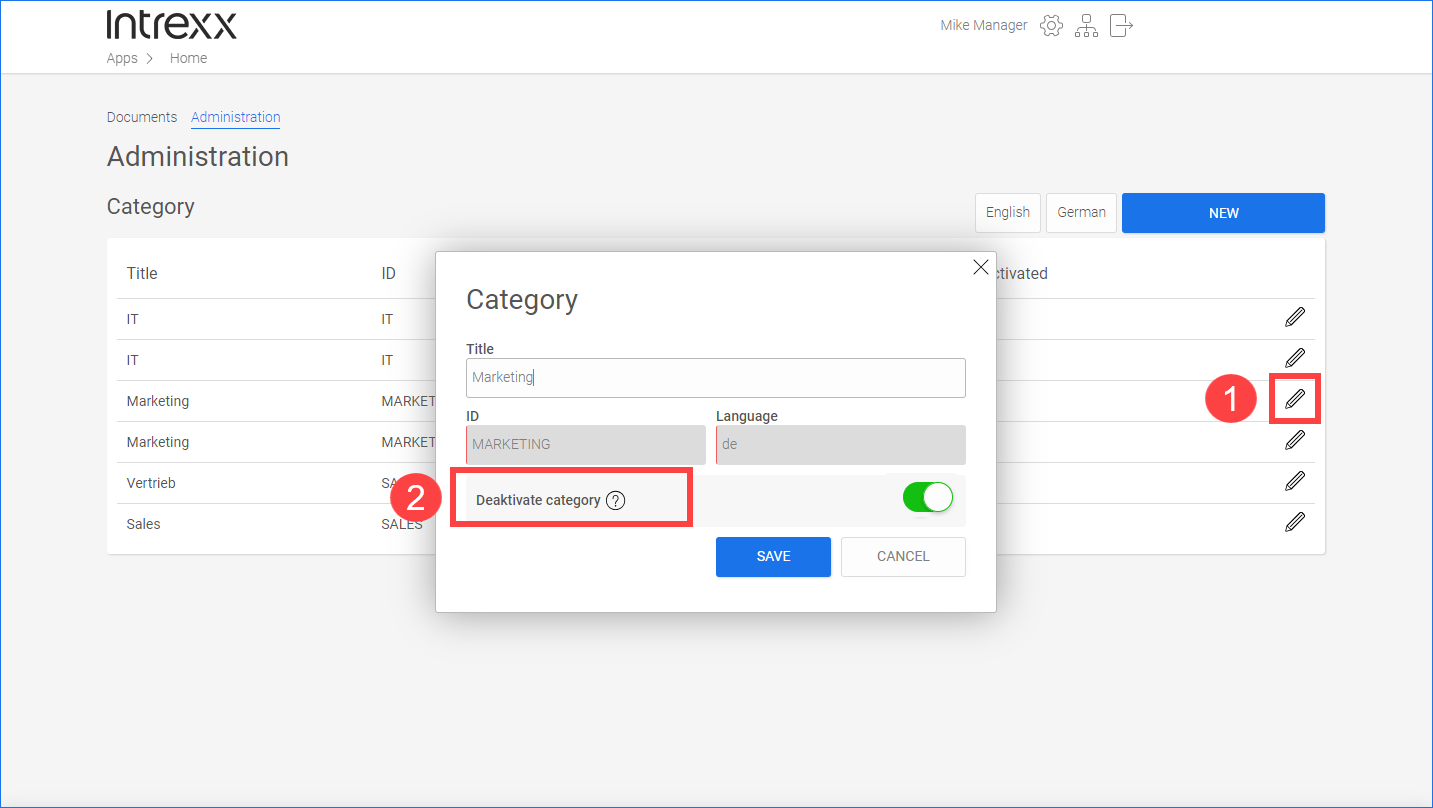
Deactivate category, delete category
Categories cannot be deleted manually. They must be deactivated first. The deletion will then be carried out automatically by Intrexx.
In the "Manager" role, you can deactivate categories on the "Administration" page.
To do that, click on the pencil icon ![]() (edit) (
(edit) (![]() ).
).
In the dialog box, activate the "Deactivate category" toggle (![]() ).
).
![]()
Click on .
Deactivated categories are automatically deleted by a background job at regular intervals.
More information